
Quilting 101, Lesson 7b- Quilting (the sewing machine edition)
Ok quilting friends, we are getting there- we’ve got through the worst step IMHO (basting) and now we are back to another fun part again- quilting! I’ve got two separate tutorials- one for hand quilting and this one for machine quilting. I love both, and although I’ve recently been leaning towards hand quilting, I really do LOVE machine quilting- and it’s much faster!

A quick note- a third option is to get a long armer to do the quilting for you and some people exclusively use long armers. This is totally personal preference but for me, I have always chosen to quilt it myself :-)
At the end of this tutorial, i’ve included some photos of quilts that I have quilted to give you some ideas/ inspiration :-)
Tools:
Sewing machine: Any sewing machine will work but there are a few things to keep in mind:
Your throat size- this is the space between your sewing machine foot and the edge of your machine. The larger the throat size, the easier it is to quilt- as at least half your quilt has to fit in that space rolled up. On my sewing machine, it’s a really large space so I can quilt any size with no issues. When I had a smaller sewing machine, it was a bit of a challenge (but still doable) to quilt a larger quilt (I quilted a queen size quilt on my $200 Brother so where there’s a will there’s a way but it wasn’t the easiest thing ever)
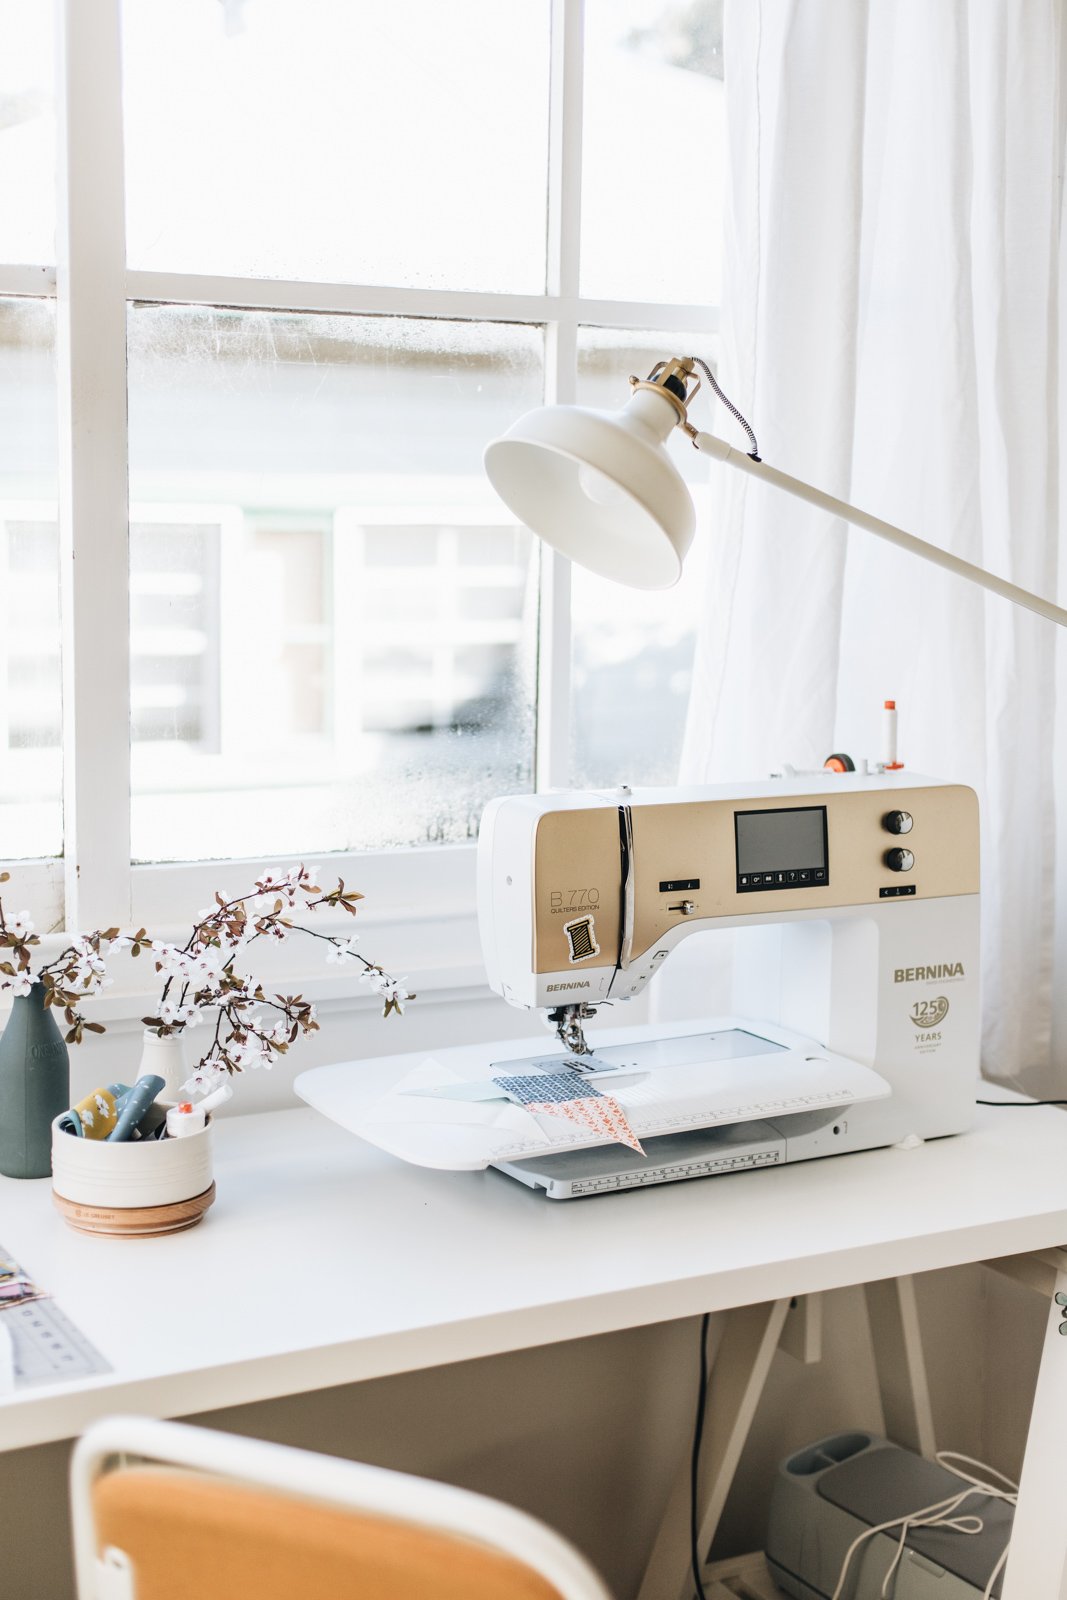
Walking foot and/or dual feed: this is another foot option that is highly recommended- it means the fabric moves more easily under the foot. You can buy one of these for most machines or you may already have one!
Guide bar: When you are machine quilting, my number one tip before getting started which will save you SO much time is to get a guide bar for your machine. This looks something like this (in the photo below, see the little metal bar that pops out of the side of the sewing machine foot) and attaches to your machine foot and means you can have straight lines and/or lines evenly distanced apart but only need to mark one! (or in some cases none)- such a time saver! You can buy one for most machines, but also check the little bag of trinkets that came with your machine as you may already have one!
Marking tools: I like either a hera marker (or you can use a butter knife) or a marking pen. Make sure it’s completely erasable. I have heard terrible stories about lines not disappearing or reappearing again. I highly recommend using the Sewline water erasable marker.
Ruler: The longer the better- this is needed to mark your line/s
Thread: Your thread of choice . I almost exclusively use white unless my quilt has a dark background in which case I will try to match the background.
This tutorial will cover straight stitch, big zig zag stitch and grid (i.e. straight or zig zag lines in two different directions.
Step 1: Marking
Start by using either a hera marker or marking pen and a ruler to mark your first line. This should be in the middle of your quilt from top to bottom (For parallel lines) or corner to corner (for diagonal lines). If you have a quilt that is made of blocks, you may not need this line as you can follow a seam line.

In this example, I can use the seam line that goes down the middle of my quilt as the first line (hence I don’t need to mark) the the ruler is there for looks only :-)
If you have a guide bar, you only need to do one line! If you don’t have a guide bar, use your ruler and chosen marker to mark the rest of the lines (making sure they are the same distance apart). I like to make mine about 1”-2” apart.
Step 2: Rolling
Now roll up almost half of your quilt, leaving about 6-8 inches to the side of your first marked line. In this example, I’m planning to do straight line quilting from top to bottom

In this example, I’m going to do quilting on the diagonal (from corner to corner)

It’s almost time to start quilting!
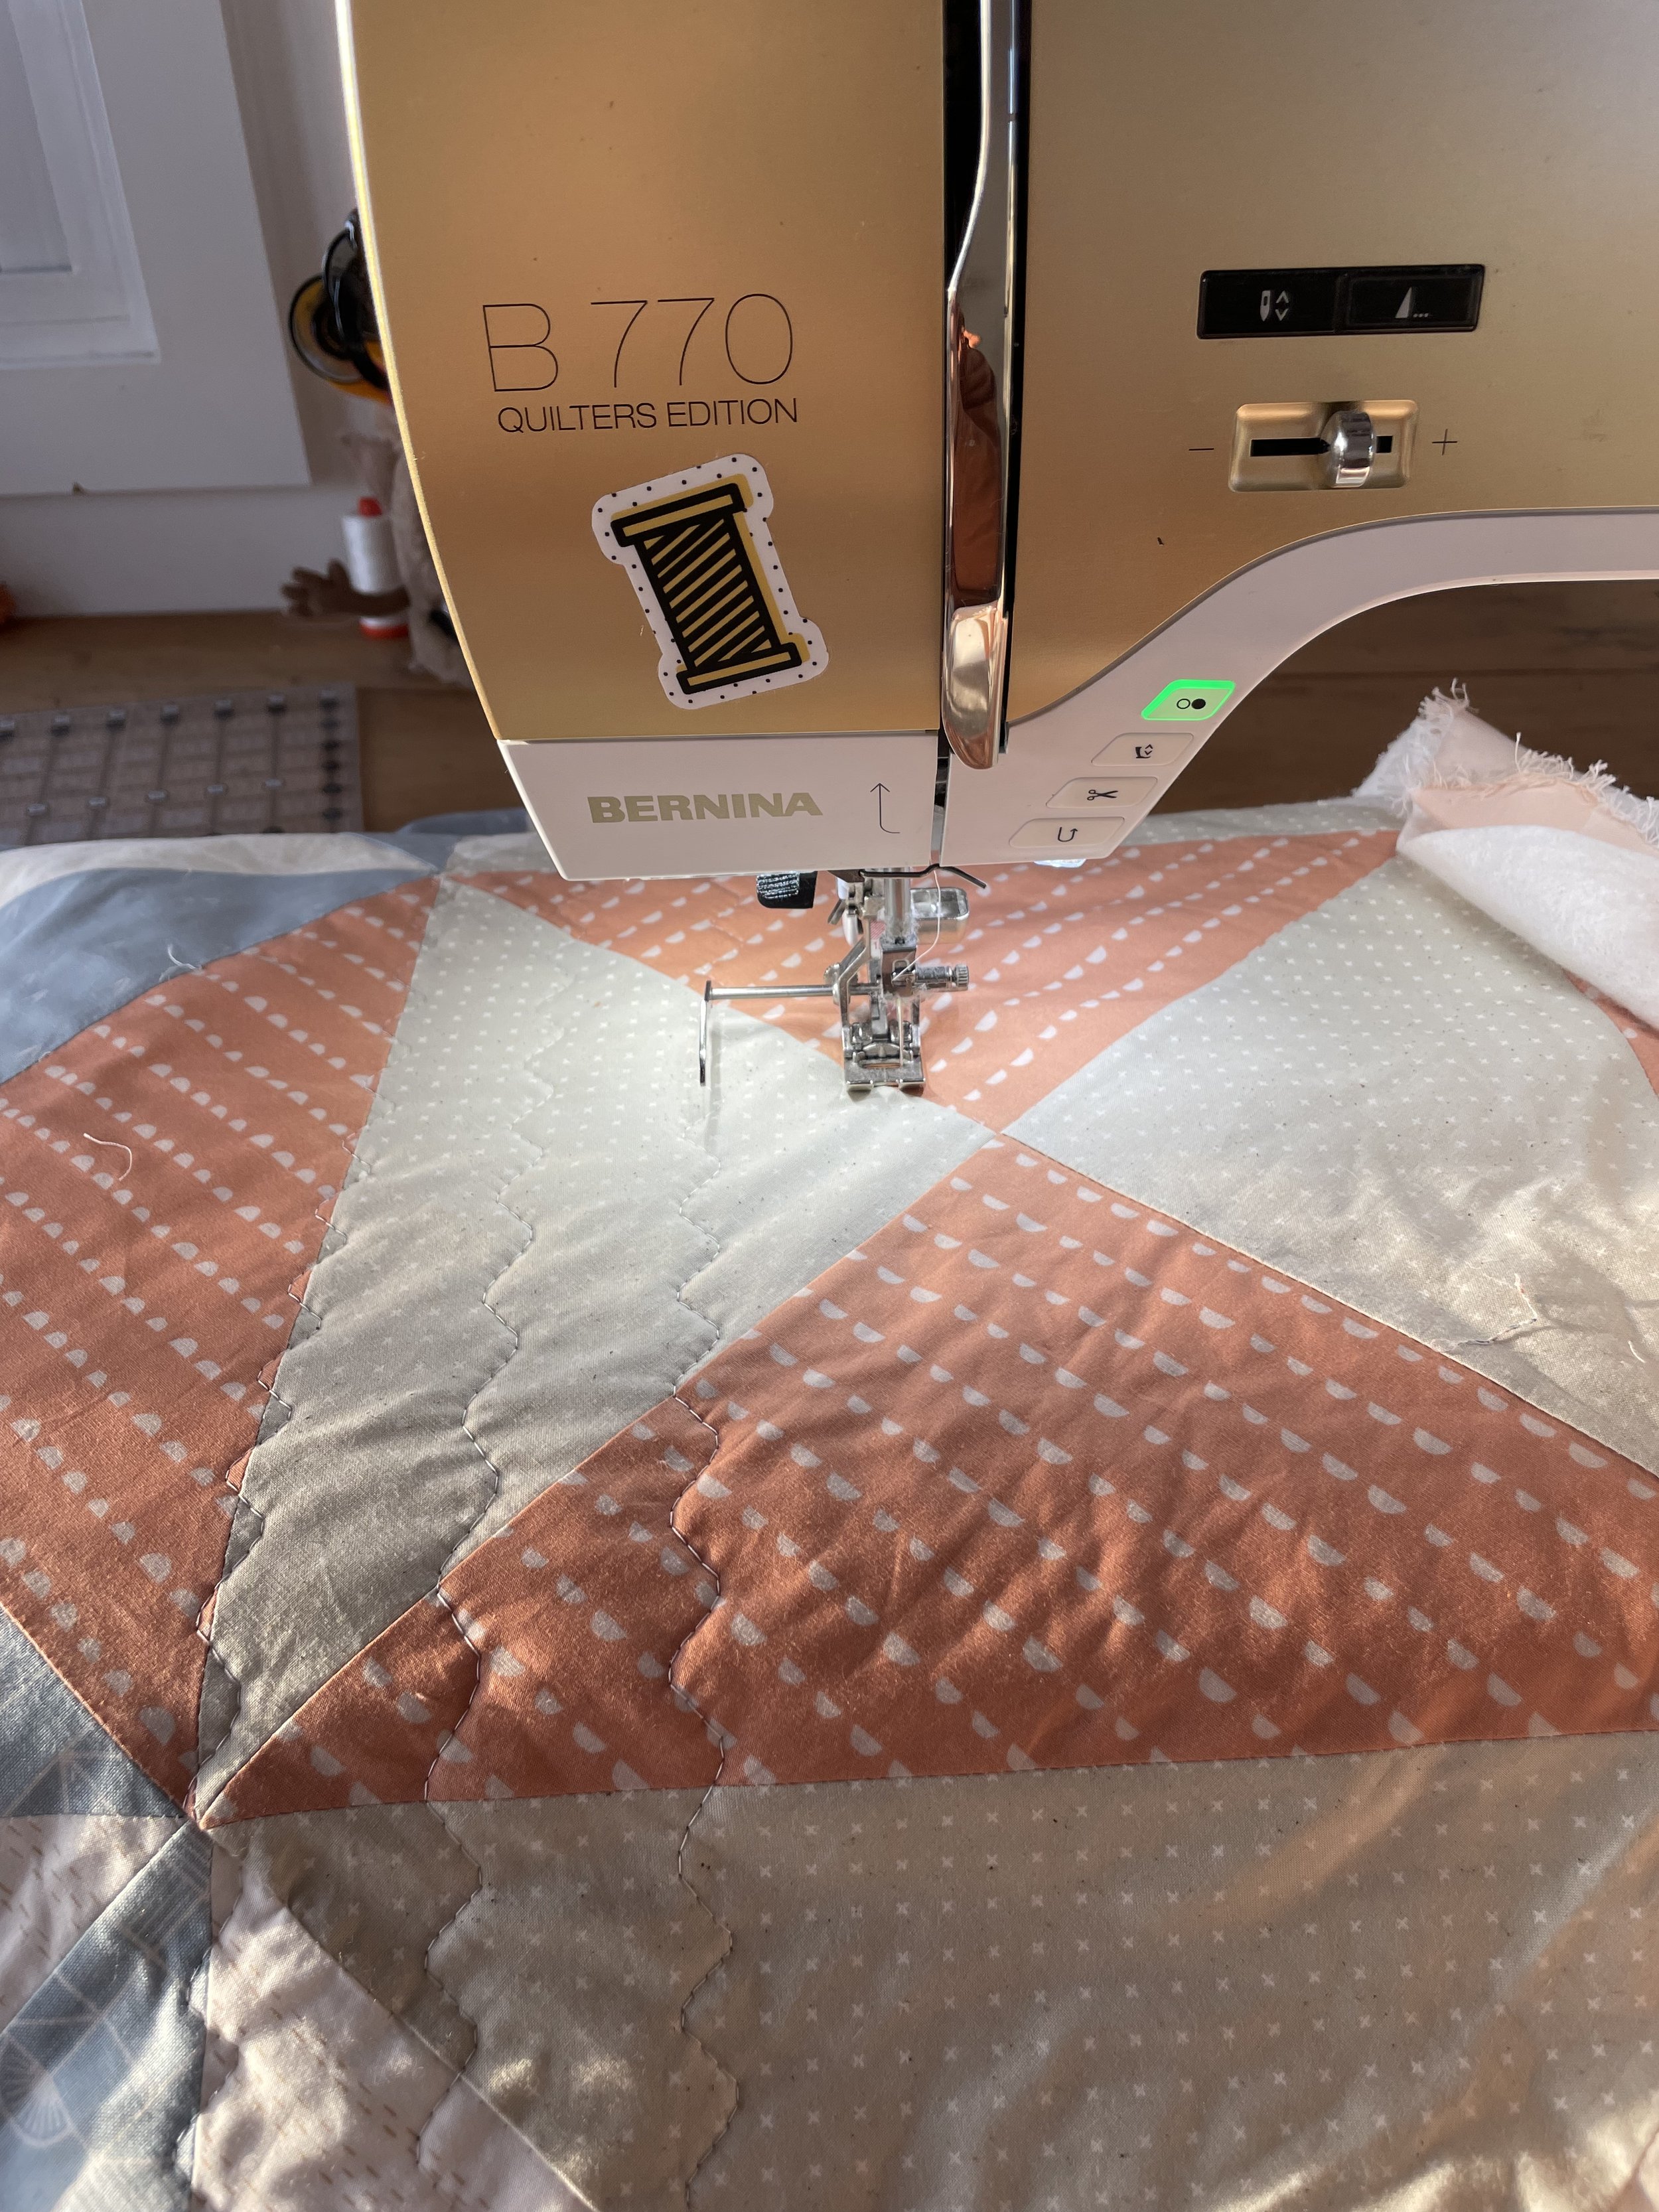
Step 3: Quilting
Decide whether to use straight line stitching or big zig zag/ wavy stitching (there are many more options than this, but this tutorial just covers those options).
For straight line quilting, I recommend a slightly longer stitch length than you would use with piecing. I use about 3.5 on my sewing machine.
For big wavy / zig sag stitching, it depends on your sewing machine how wide your stitch width is. On my sewing machine, I can go up to 9mm but 7mm also works well or even 5mm! I’ve included the settings I use on my machine below but you can apply the same on yours. See how stitch number two just has one stitch per zig and one stitch per zag, compared to stitch 4 has multiple? Keep an eye out for this on your machine :-) You might want to test a little patch out to see how you like it before starting

Now we can get started- feed your quilt into the sewing machine as follows.
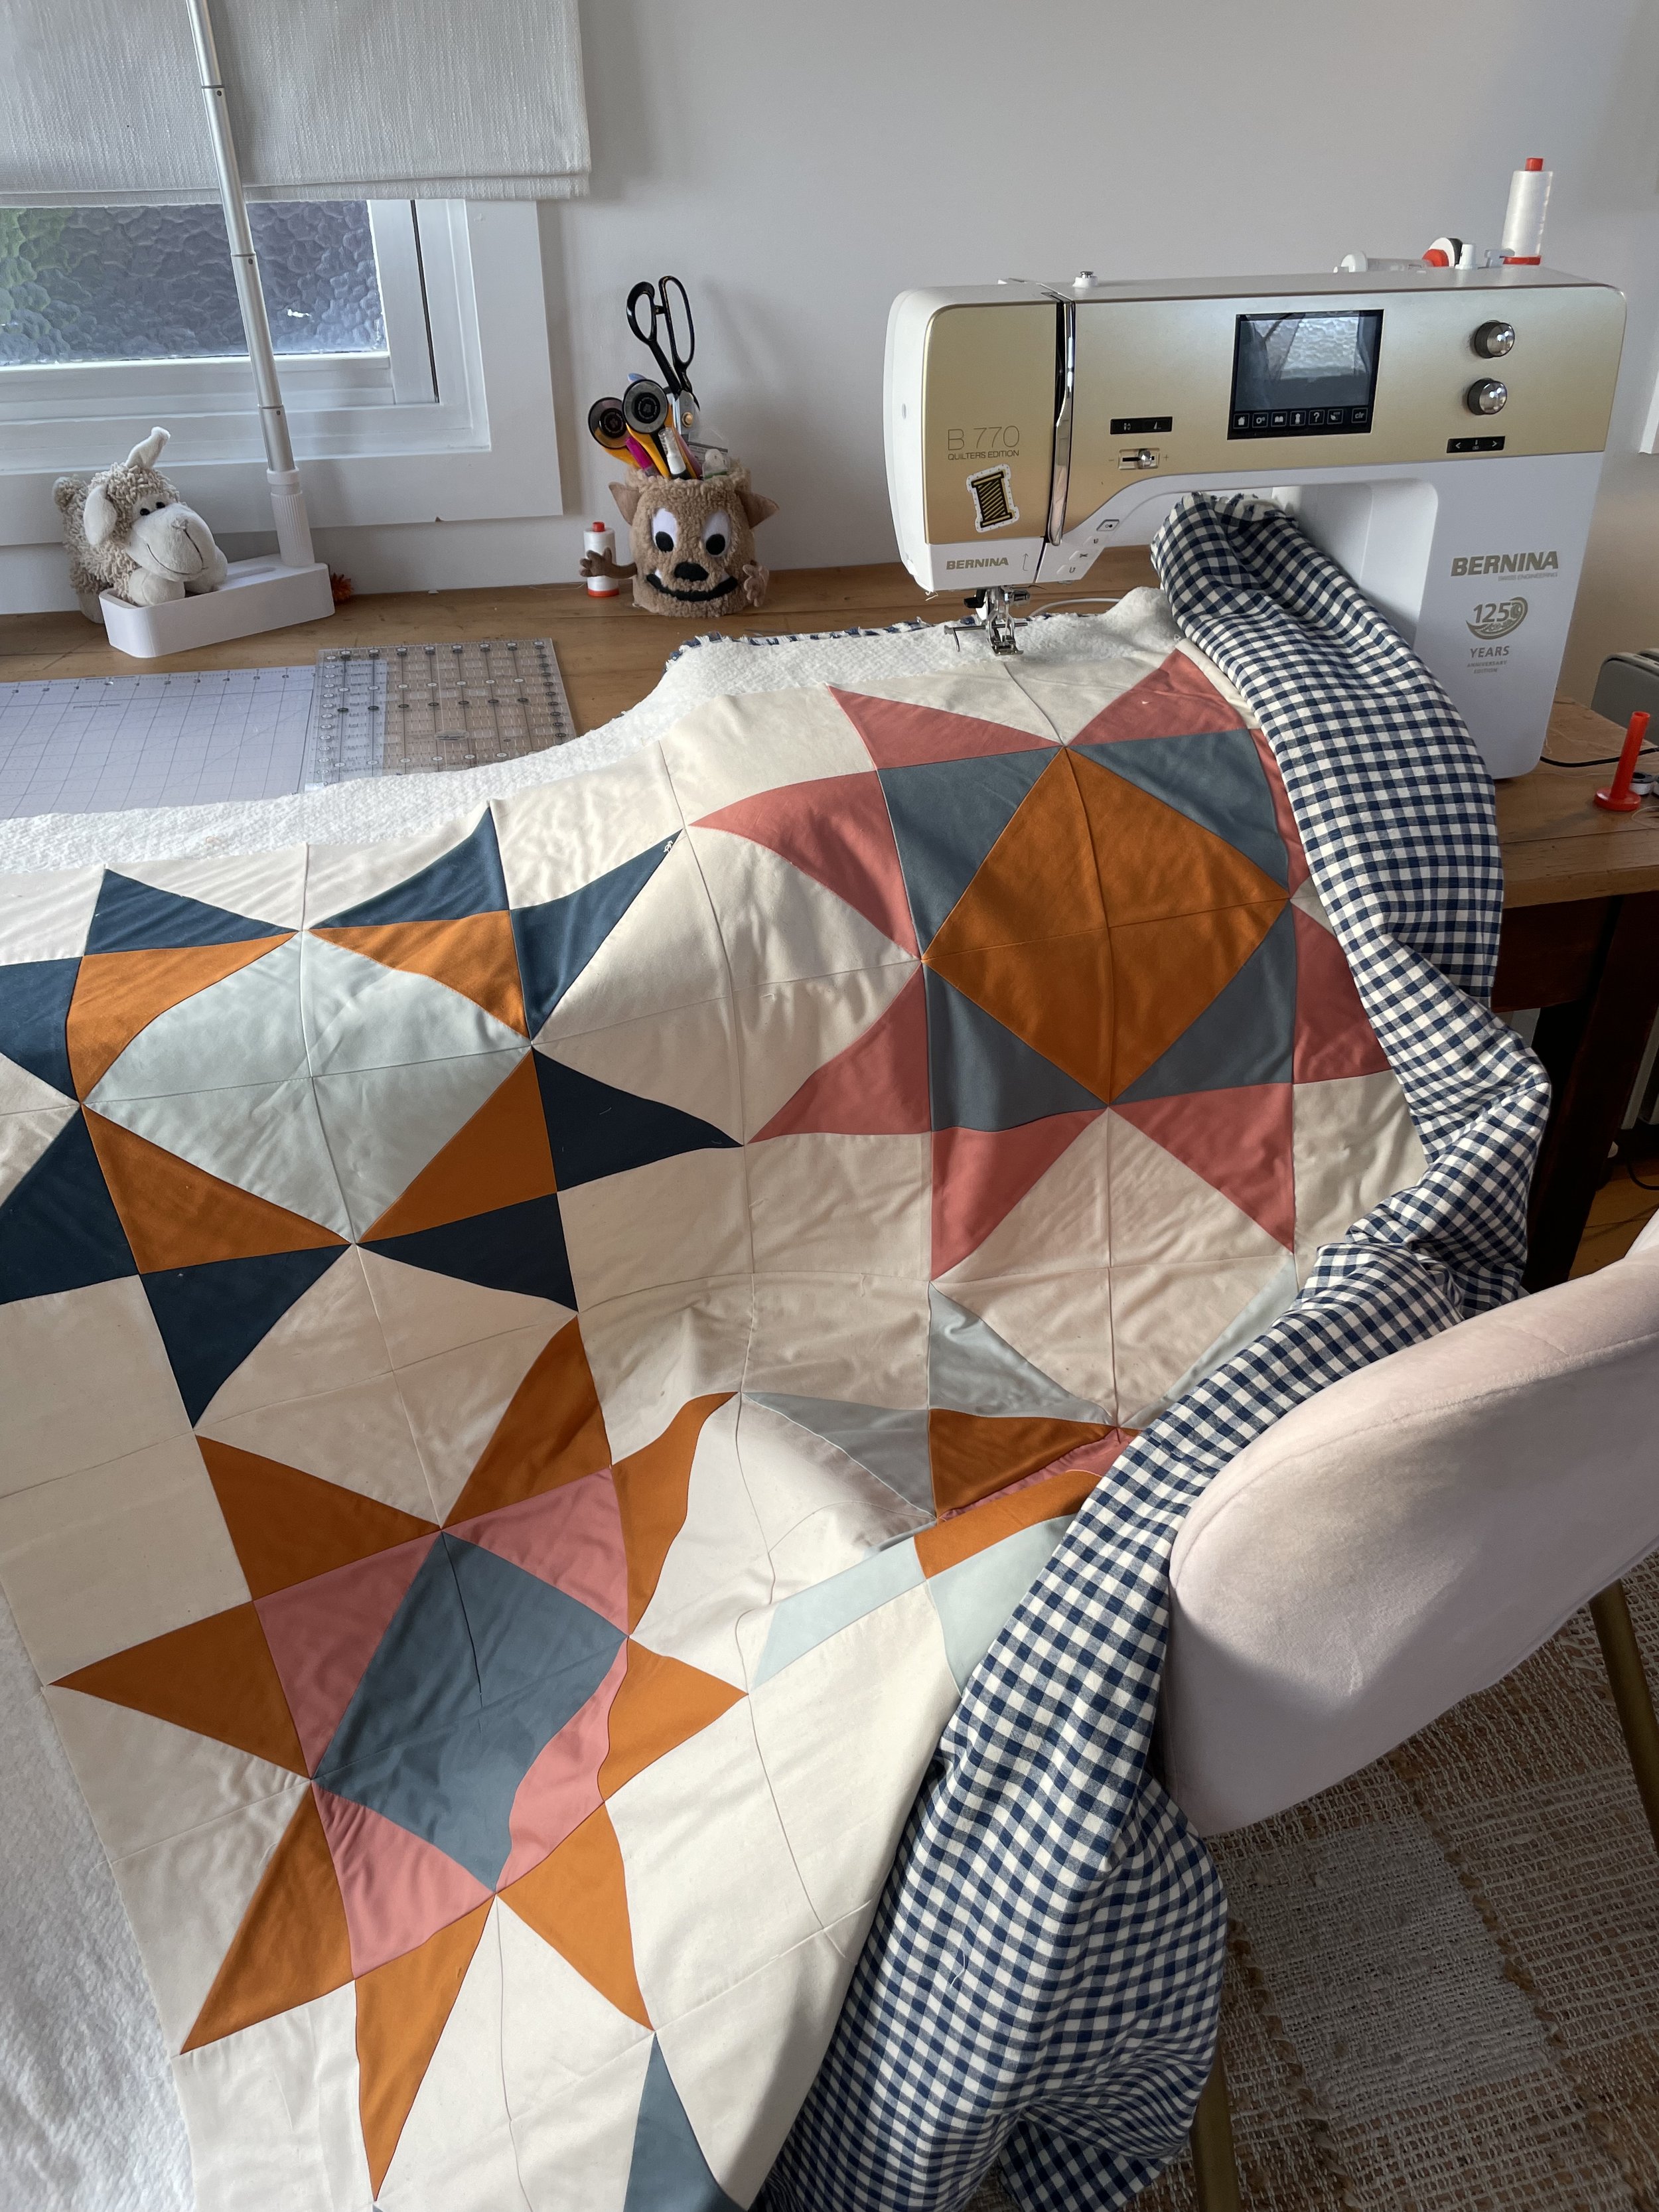
Starting at the top, we are going to start stitching! Go slow and steady along your first marked line, to start with but you can speed up as you get comfortable.
Once you’ve done your first line, you can unroll your quilt a little bit and add more lines (all going in the same direction from top to bottom). I’m going to move to diagrams now to hopefully illustrate the process clearly :-)
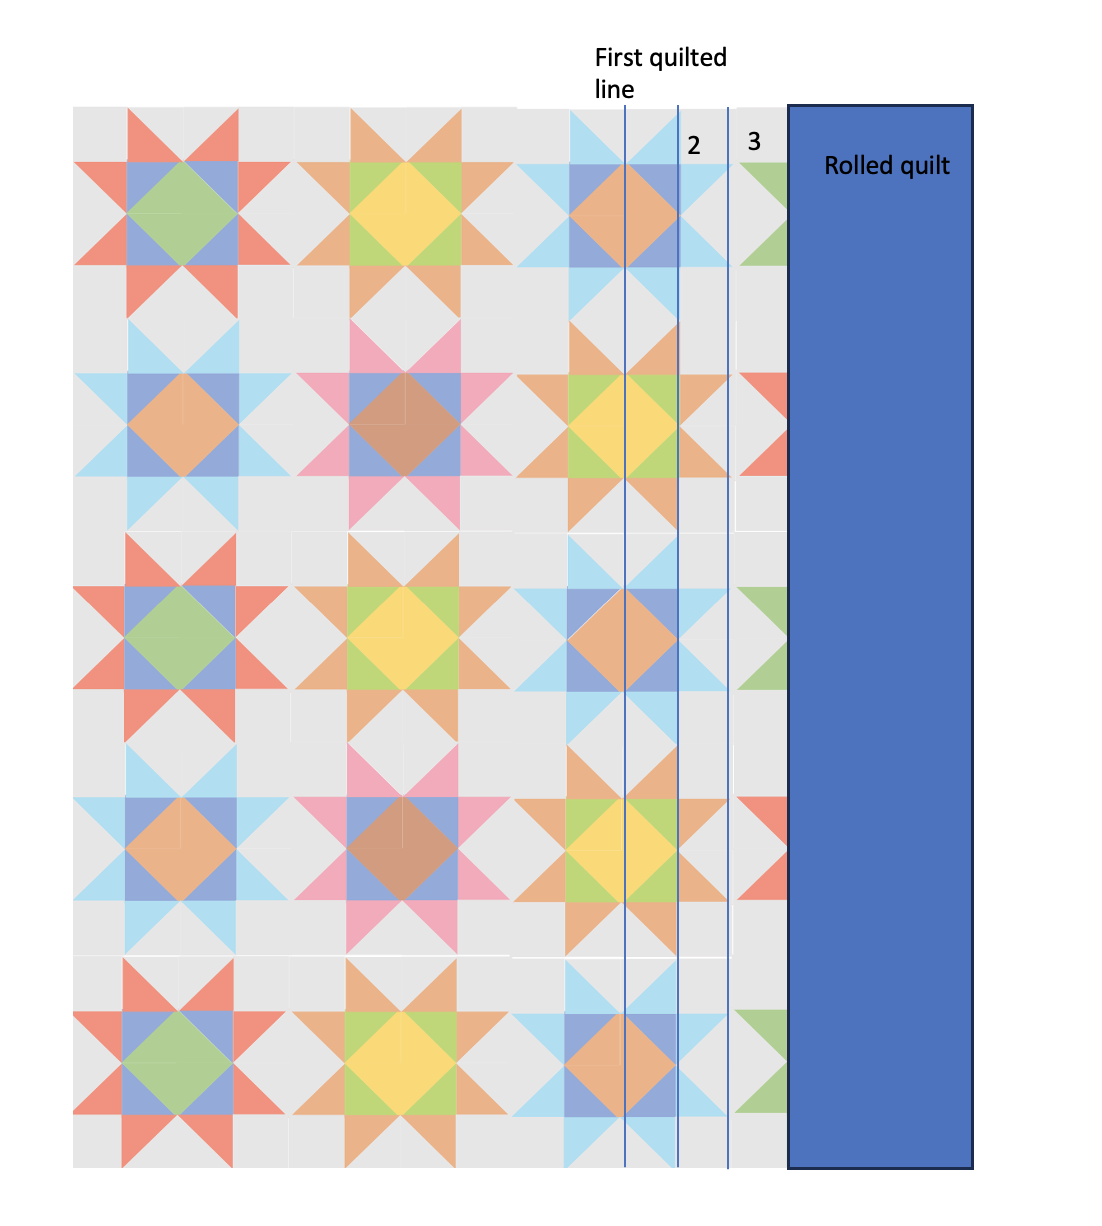
Then continue, moving out. You can use your guide bar each time to keep your lines equally space out, or follow your marked lines. As you go, your roll your quilt out a little bit more to leave space to add your quilted lines.
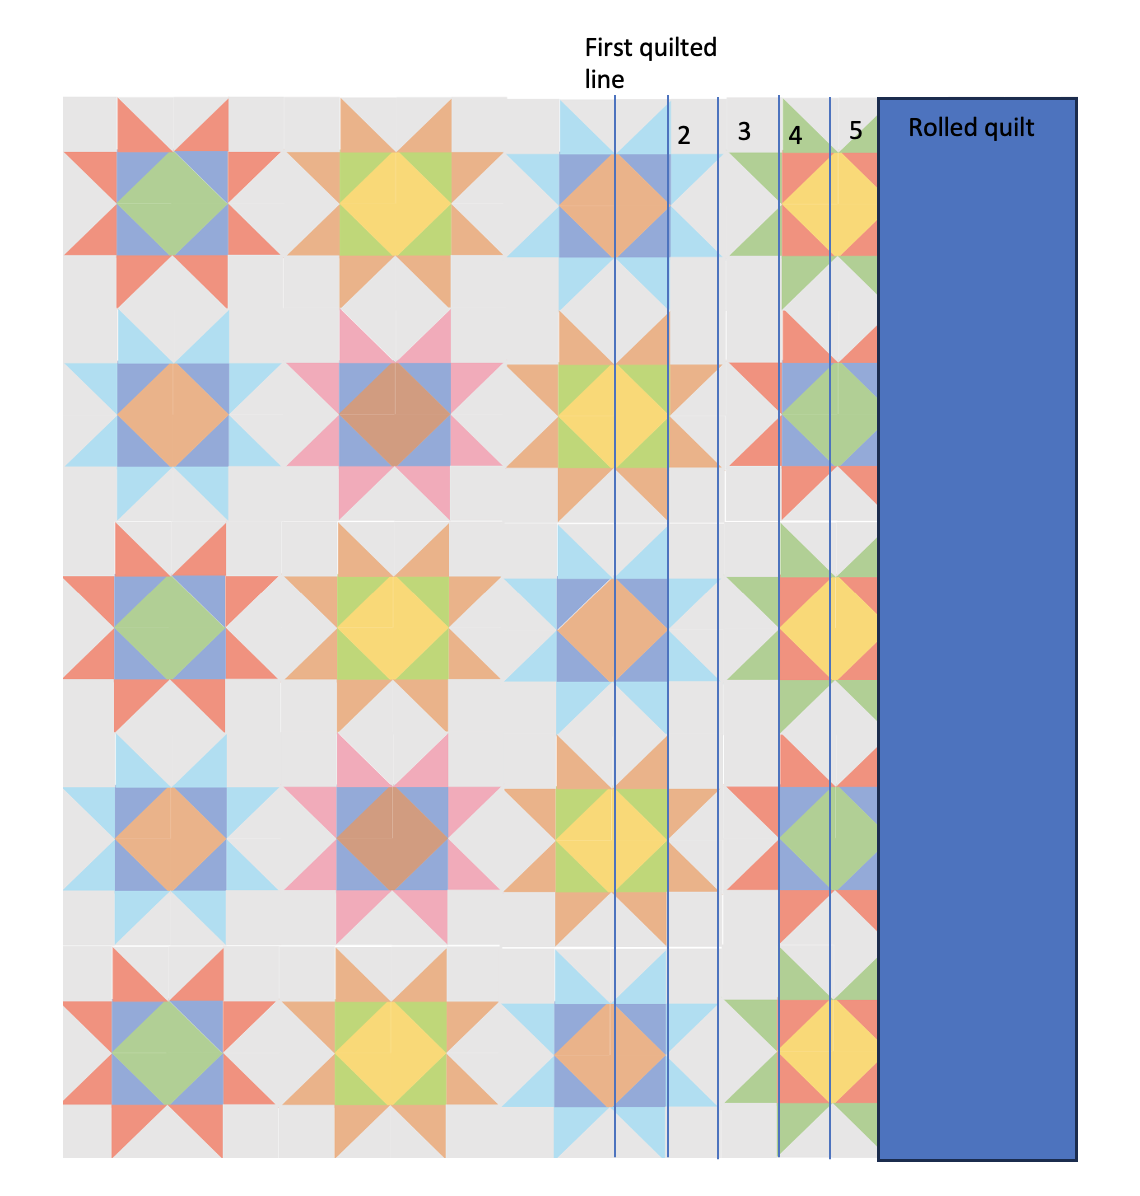
Keep sewing until you get to the end (and you’ve done half).

Once you’ve finished sewing those lines, its time to flip your quilt over so the lines are on the left side and roll up your right side (hopefully this diagram makes a little more sense)
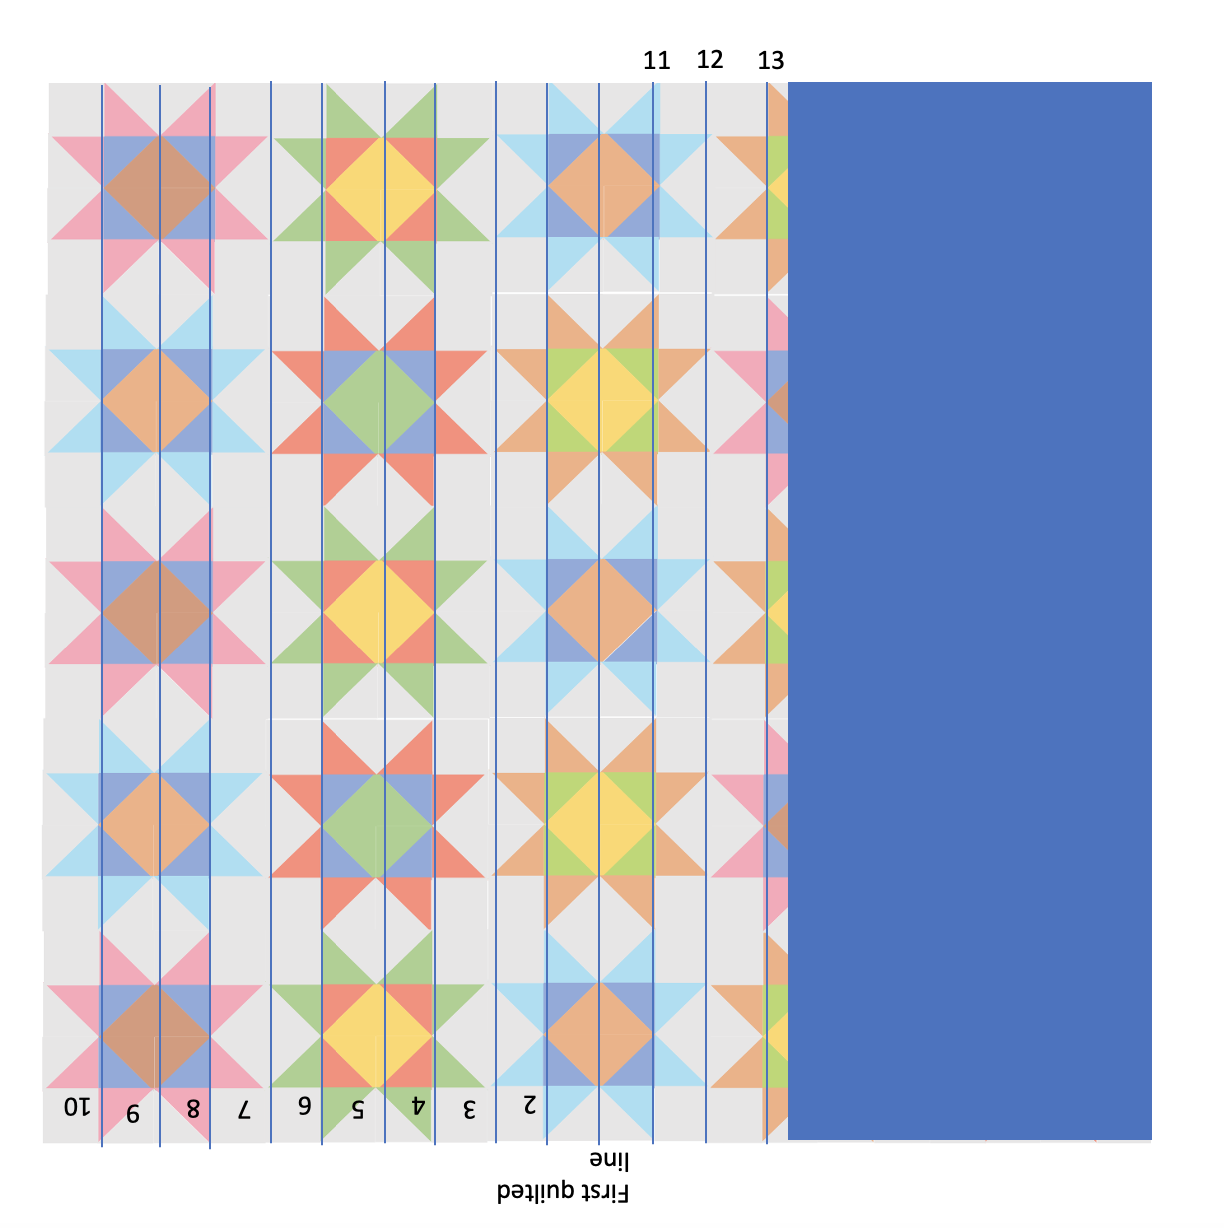
And then you keep on sewing until you get to the other side!
It’s the same process if you want to quilt on the diagonal, except you’ll be sewing on the diagonal.
If you want to do grid quilting, once you' have sewn all your lines in one direction (all running parallel to each other), you can repeat the same steps in the other direction (more lines running perpendicular), once again starting in the middle and working your way out.
And that’s it! See not so hard at all, was it? :-)
Once your quilt is quilted, you can use your rotary cutter and ruler to cut off the excess batting and backing so your edges are nice and even- do this in line with your quilt top but don’t worry if your quilt top isn’t perfectly square/ rectangle.
And then you’re ready for binding!
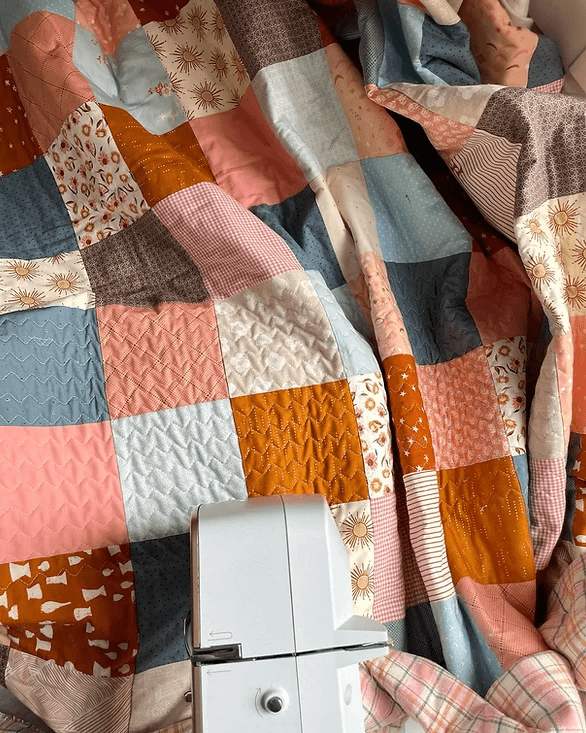
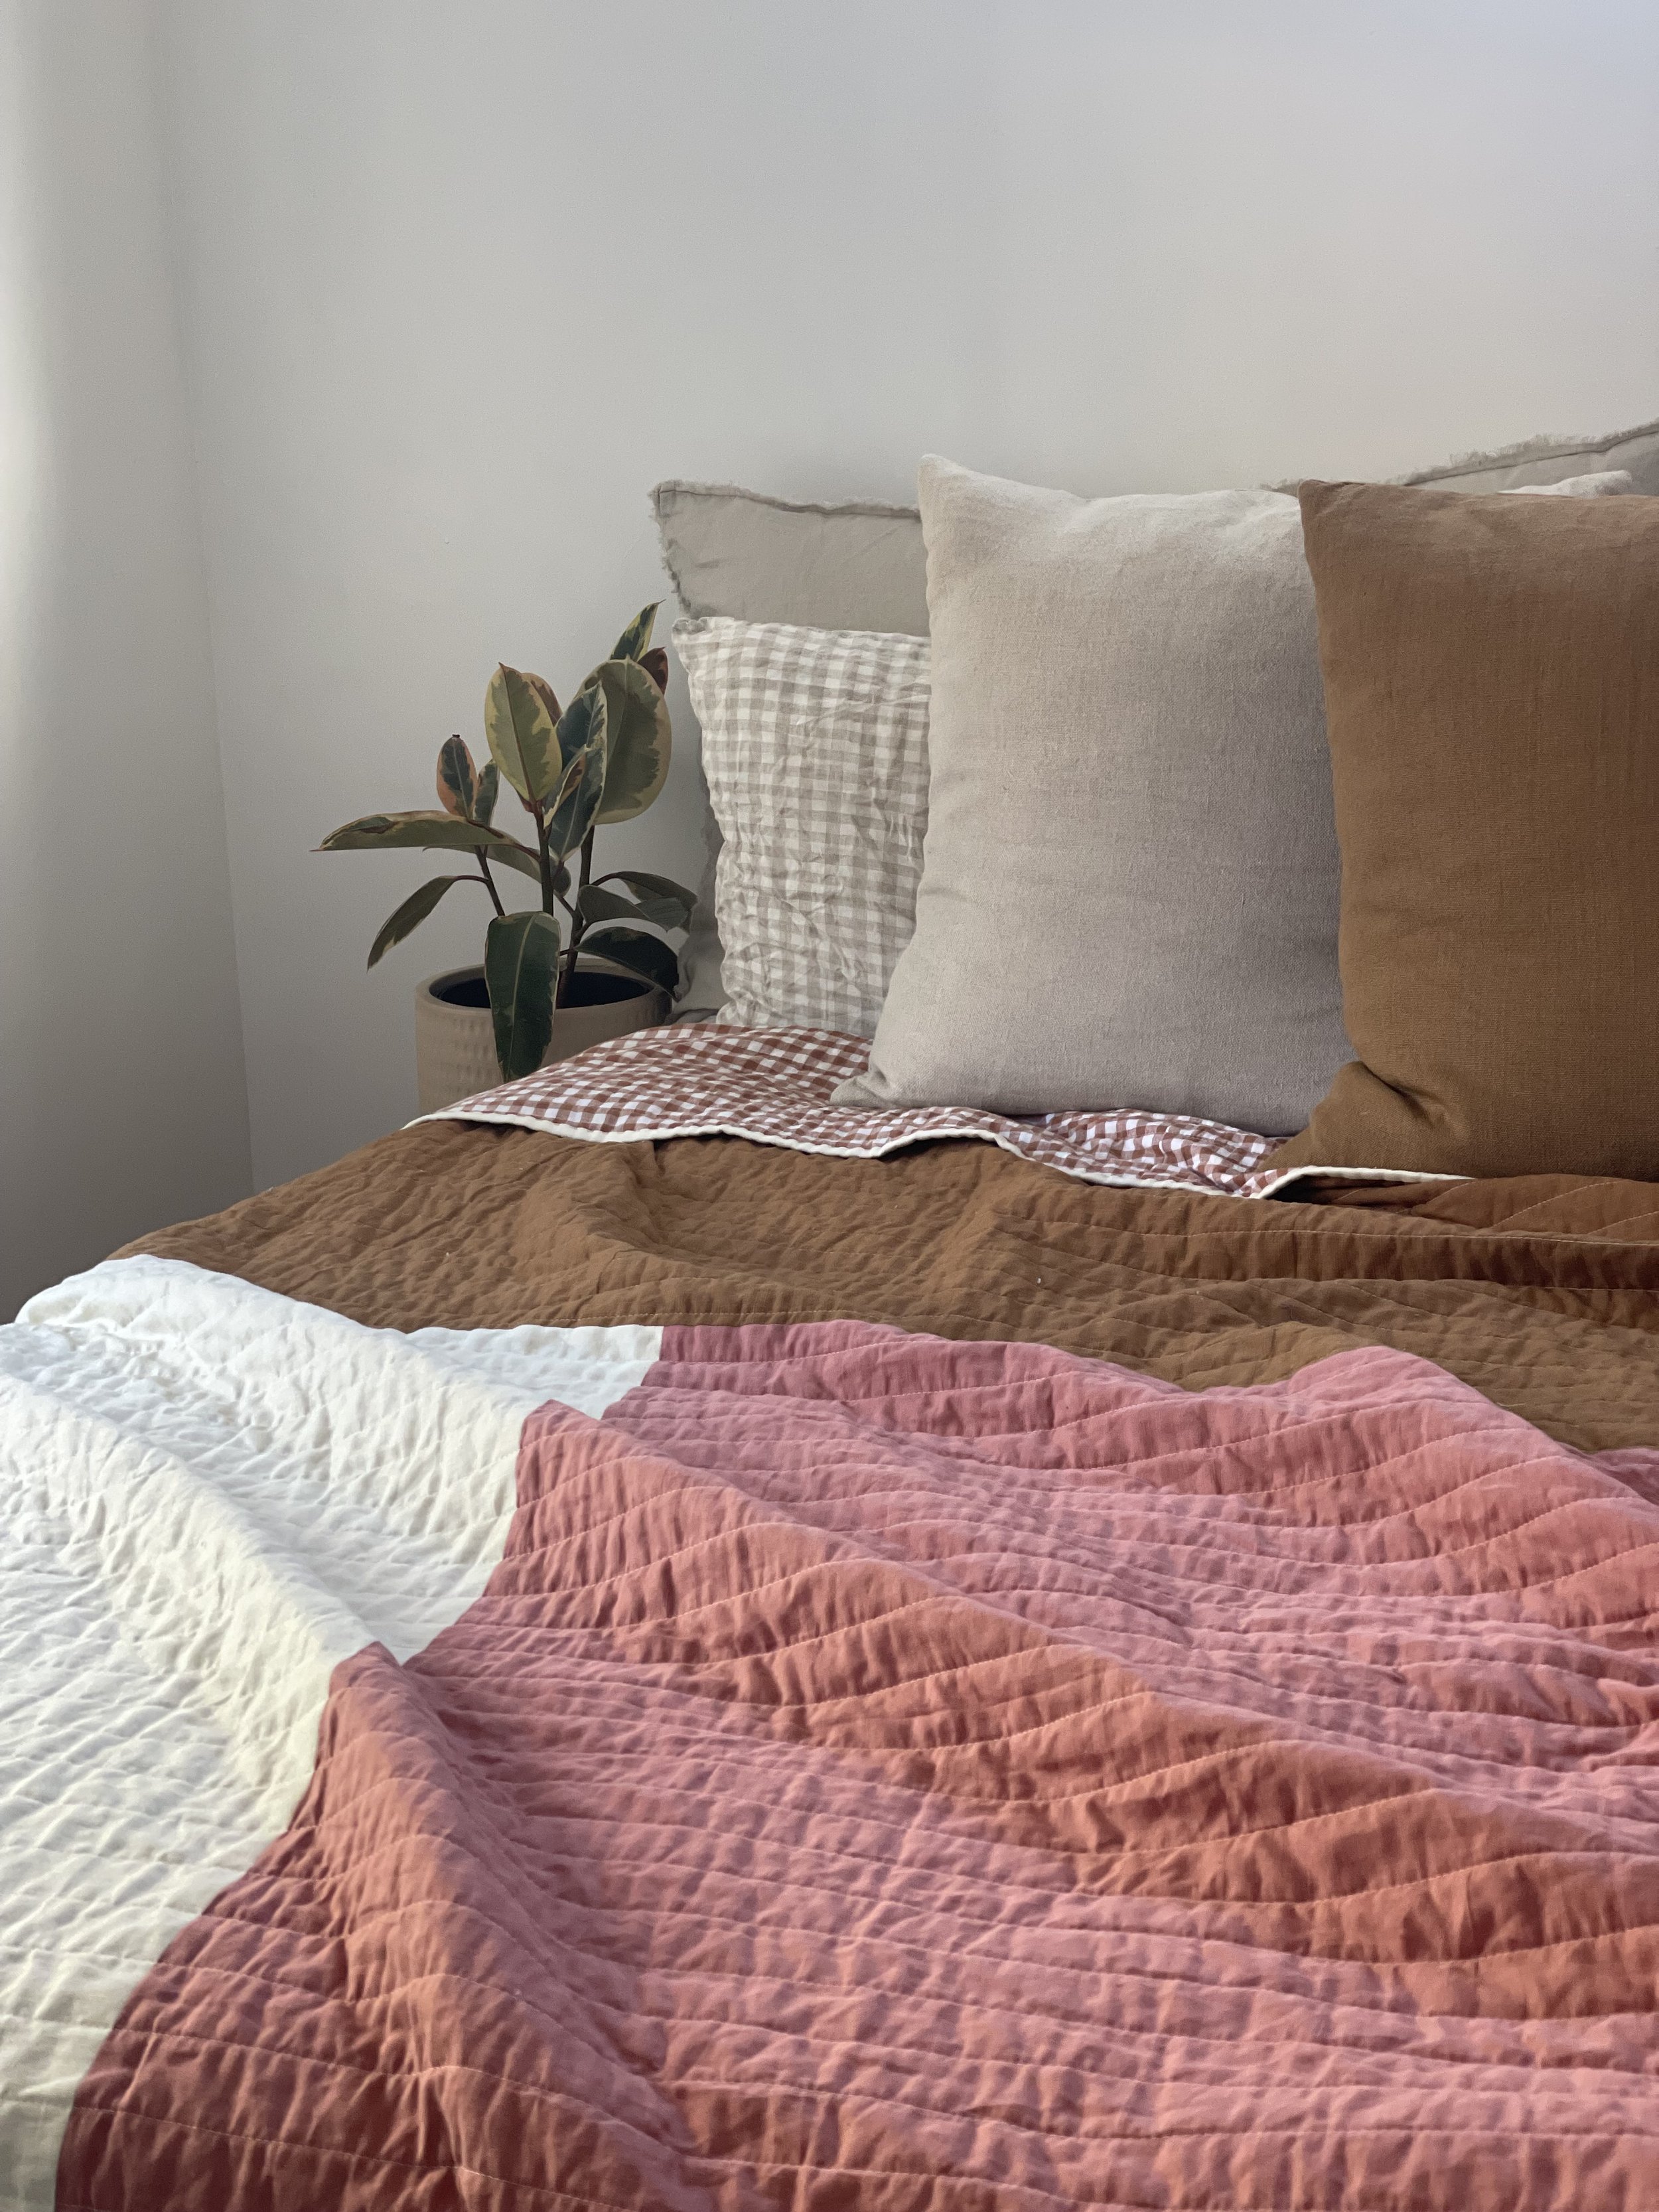
I’ve included some options/ inspo for machine quilting below. Let me know if you have any questions :-)
This is my Ramona quilt using big wavy stitching (using the settings I detailed above)

And more big zig zag stitches (can you tell this is my favourite?)
Here I just did straight lines (in one direction)- I think they were about one inch apart
It’s hard to see in this photo but here I did straight lines in both directions. Rather than using any kind of guide bar or marking tool, I made the lines 1/4”away from each of the squares (this is also called tram line or train track quilting)

Here I did big wavy/ zig zag stitches in two ways, both on a diagonal (like a diagonal grid
