
Quilt 101, Lesson 8- Binding
When I first started quilting, binding was the step that concerned me the most- how do they (the Expert Quilters) do it so well? Don’t worry- it’s a lot easier than you might think!

In this tutorial, we'll walk you through the steps of first calculating how much binding you need (don’t worry, there’s a handy calculator so no maths required), making the binding and attaching it to your quilt- machine sewing it to the front and big stitch hand binding it to the back.

Big stitch binding (which is apparently also known as utility stitch) is one of my favourite techniques that involves using a larger-than-normal needle and thicker thread to sew the back side of your quilt binding down.
There are other methods, including machine stitching it to the back, but this is my absolute favourite method and it has a really lovely hand finished look.
I make straight binding rather than bias binding- it uses less fabric and is much simpler to make. (However if you do want to make bias binding, Scribbly Gum has a tutorial on making this). So let’s get started!
Materials:
Fabric for binding (calculate the amount based on your quilt size- see calculator below)
Quilting ruler
Rotary cutter and mat
Sewing machine
Sewing machine Thread
Hand quilting needle
Hand quilting thread (I recommend DMC Perle 8 or Sashiko Thread)
Snips/ small scissors
Step 1: Calculating how much binding (and fabric) you need. Before using the calculator below, decide what width you want your binding. For guidance:
2” - recommended for the experts- it’s quite narrow so can be difficult to wrap around your quilt.
2.25”- my personal preference- it results in binding being relatively even in width on oth the front and back of the quilt
2.5”- a good starting point for beginners as it’s easy to wrap the fabric around the quilt but the back binding ends up wider than the front.
NB: This is the total width of the strips, but this will be folded in half and then wrapped around your quitlt so the width you will see is actually around 1/2”ish.
Next, use the calculator to determine how many strips and how much fabric you need. You can also use this handy printable download which does all the calcualtions for you!
Total binding needed: inches
Number of strips required:
Fabric required: yards
Step 2: Cutting your fabric
Using a rotary cutter and mat, cut strips of fabric for your binding calculated in step 1. For instance, if you decided to do a 2.25” binding and the calculator said you need 7 strips, you would cut (7) strips that are 2.25” x Width of Fabric (WOF).
Step 3: Join the strips together to create one long strip
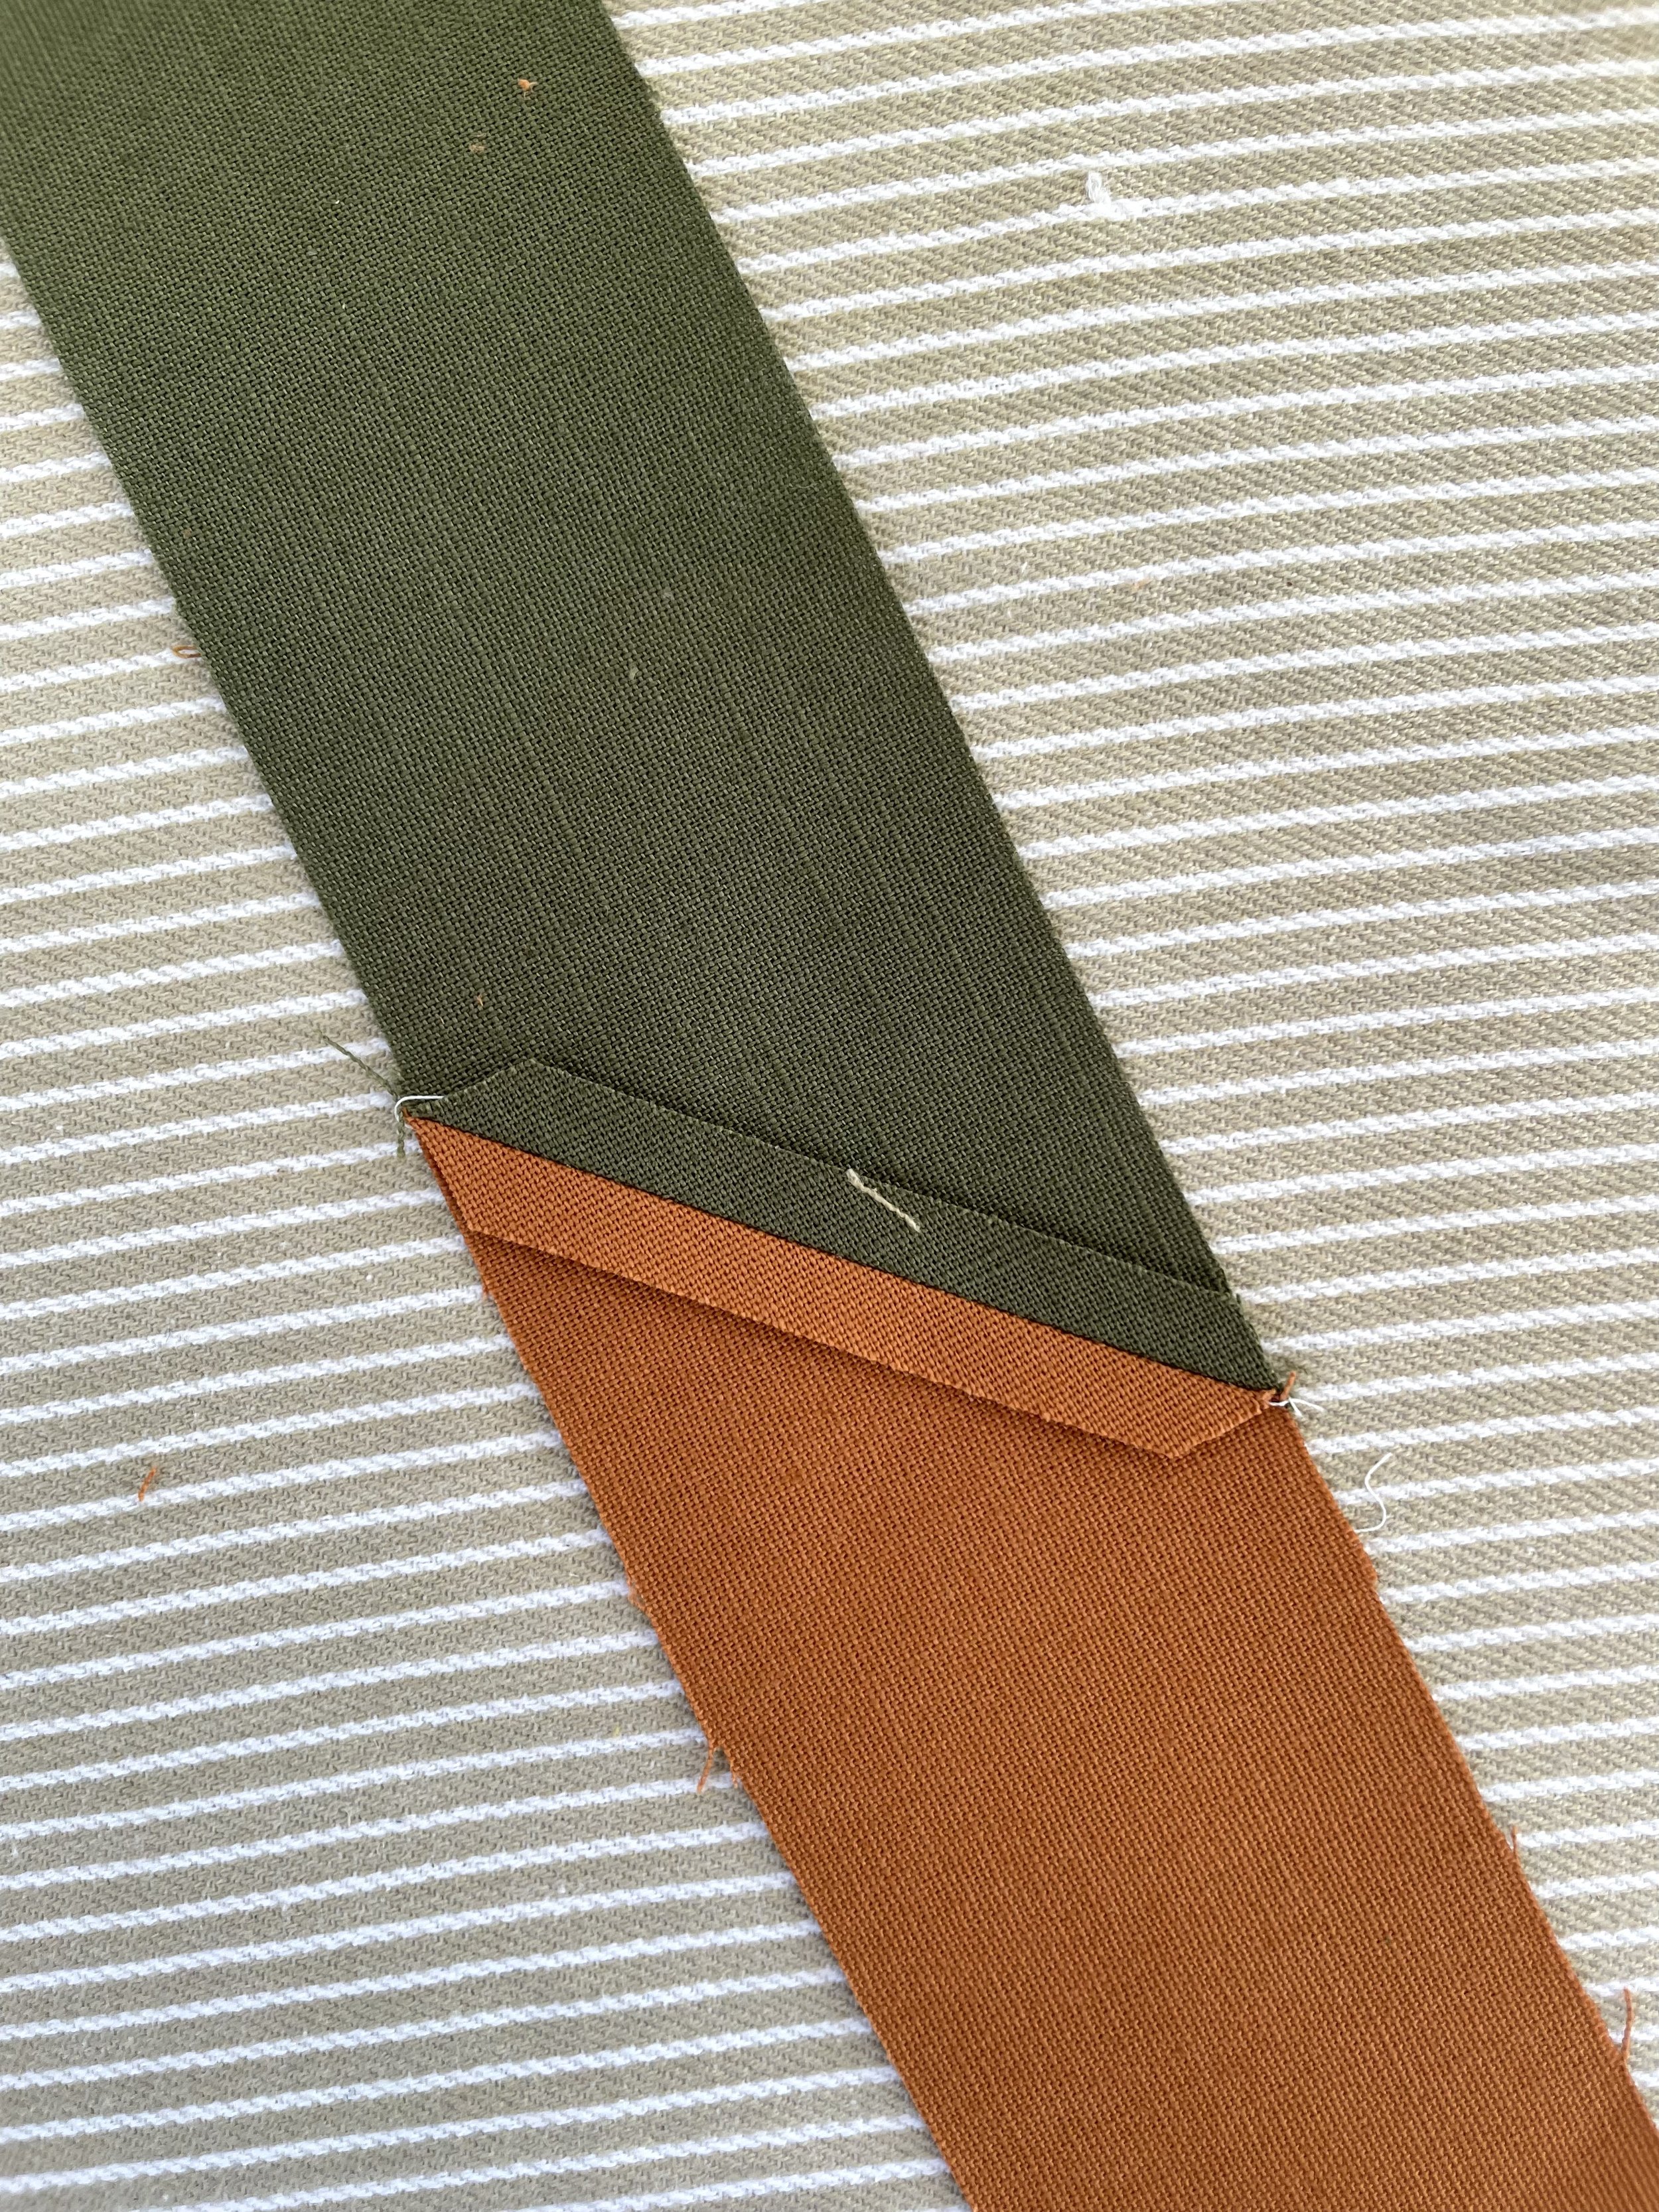
We will be using a diagonal seam to minimise bulk. Take two strips and cross them over right sides together with about 1/4” overlap. Draw a diagonal line as follows:

Then sew along the line.

Trim the seam allowance to 1/4 inch:

Press the seam open. Repeat for each of your strips

Step 4: Fold and press the binding
Fold the binding strip in half lengthwise, wrong sides together, and press it with an iron. This will create a crease down the center of the strip.

Step 5: Attach the binding to the quilt
Starting in the middle of one side of your quilt, place the raw edge of the binding strip against the raw edge of the quilt top. Leave a 6-8 inch tail of binding strip loose at the beginning.
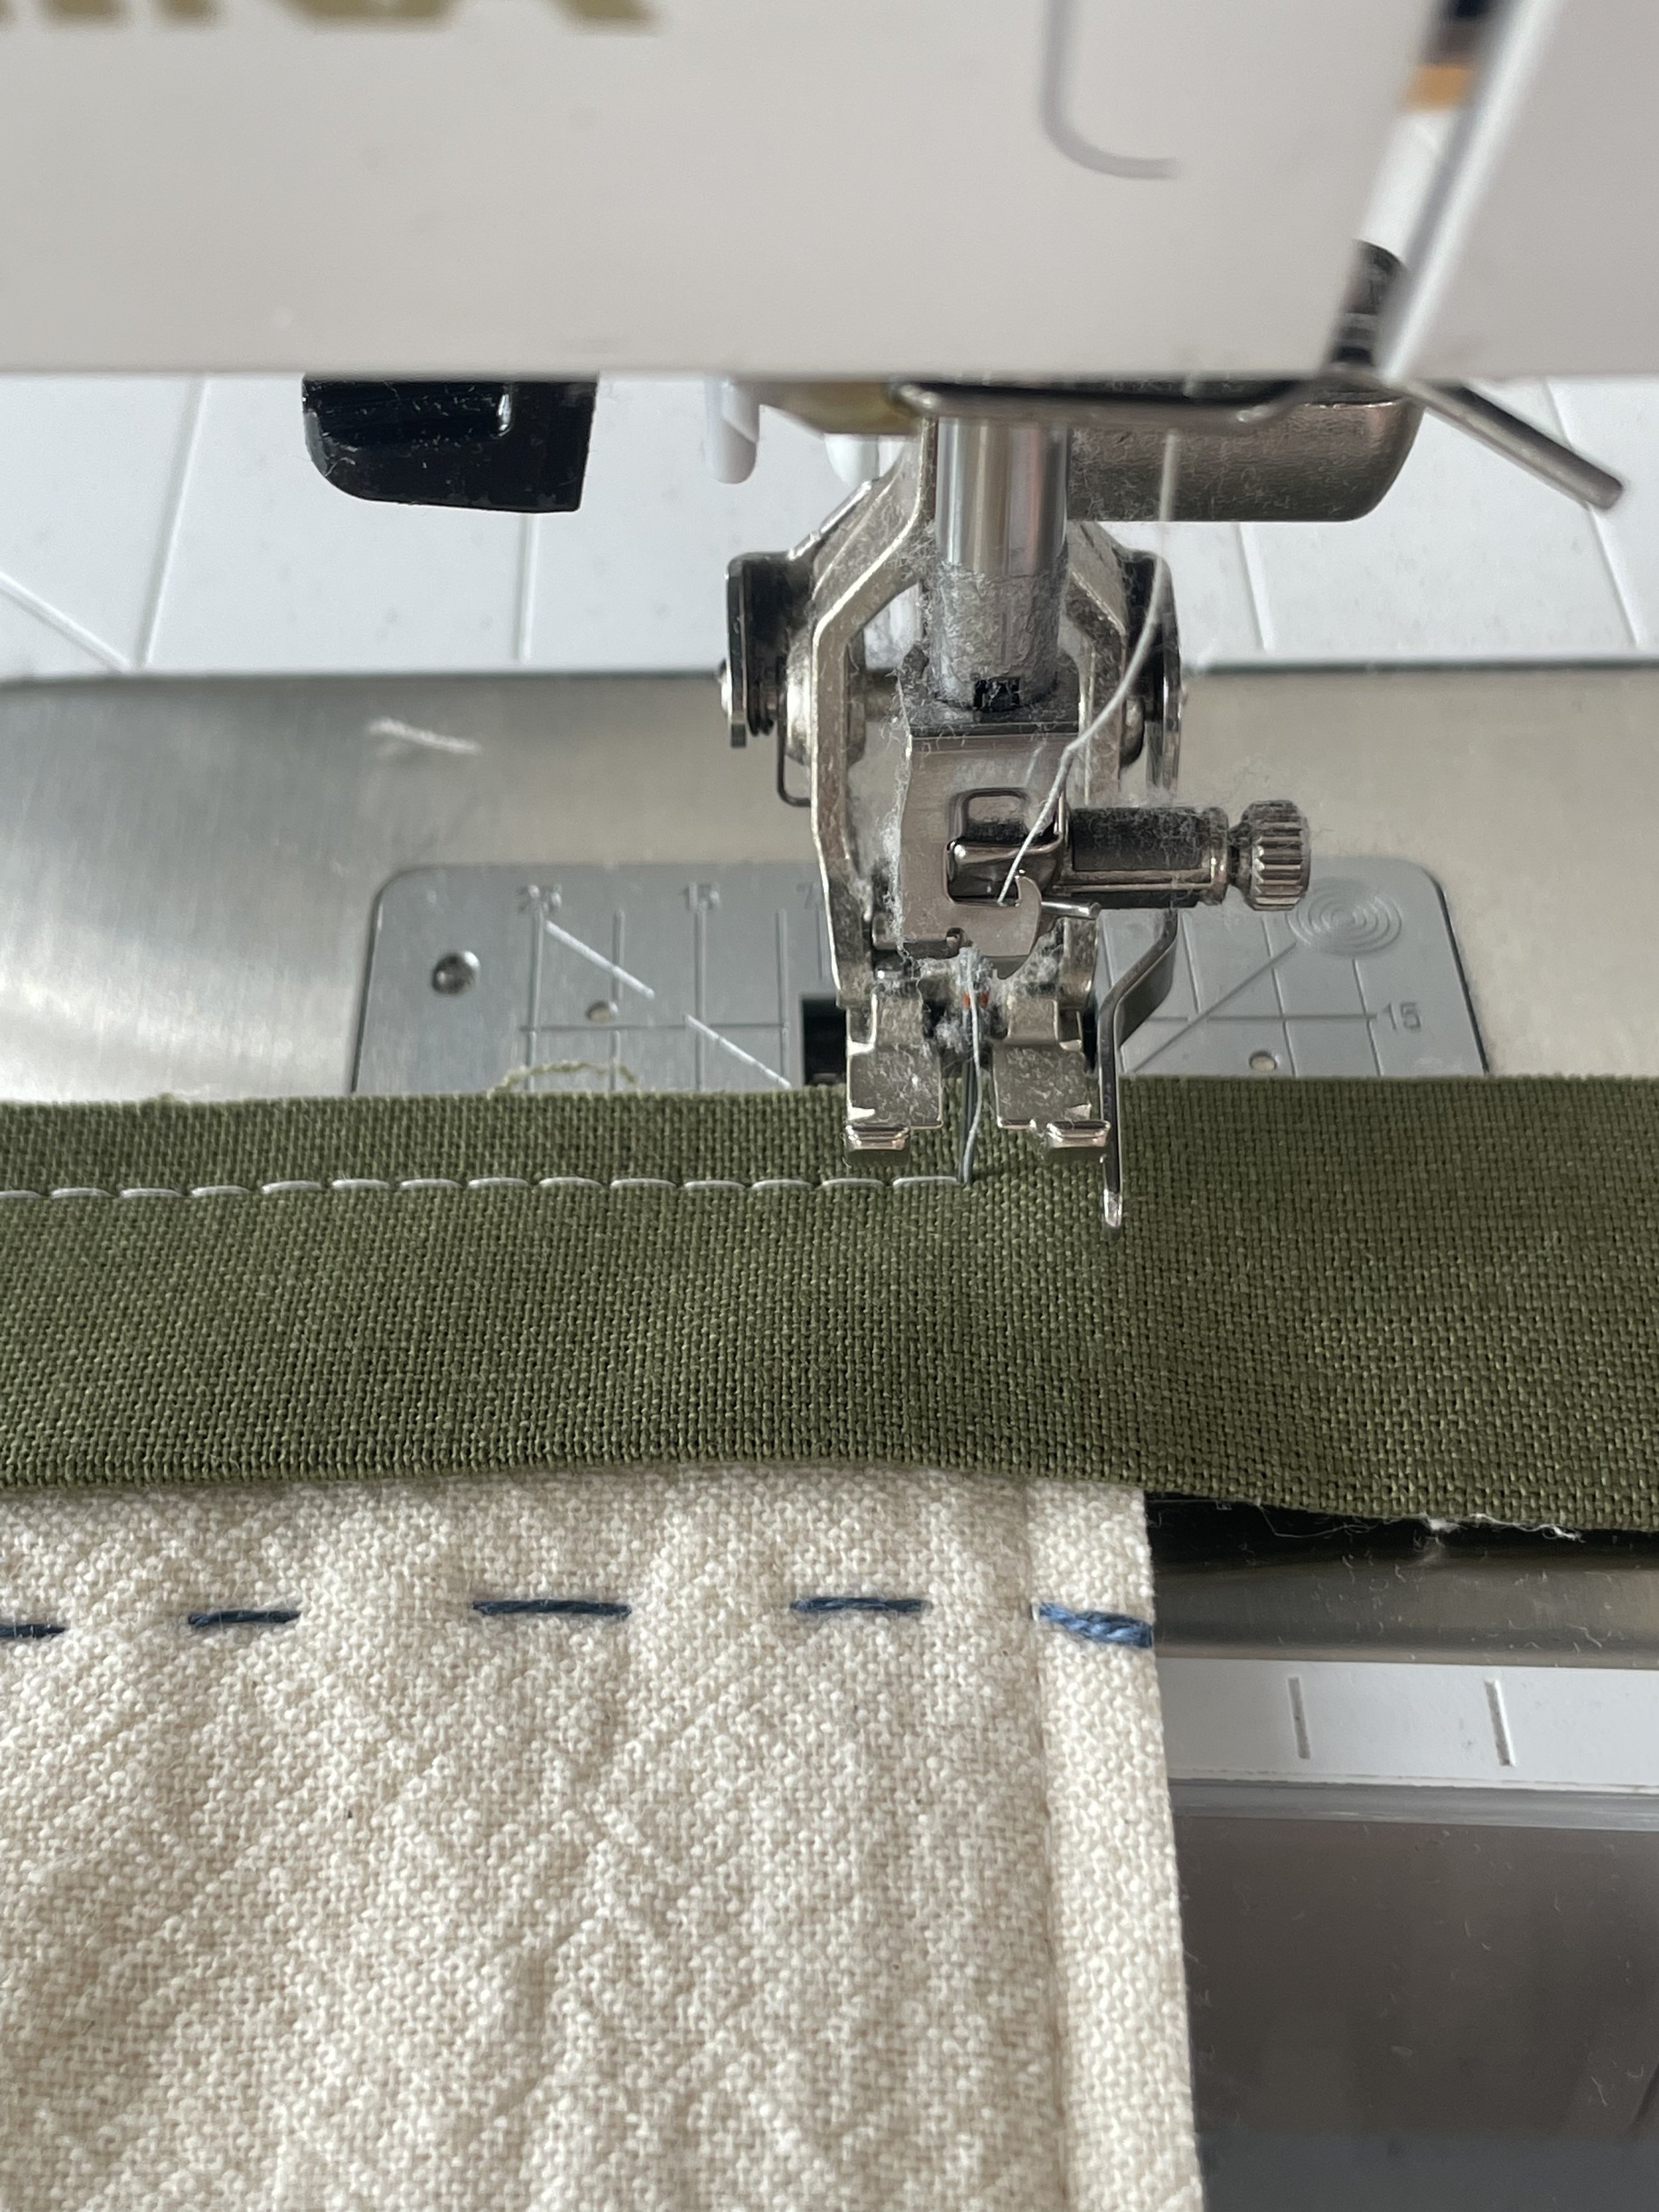
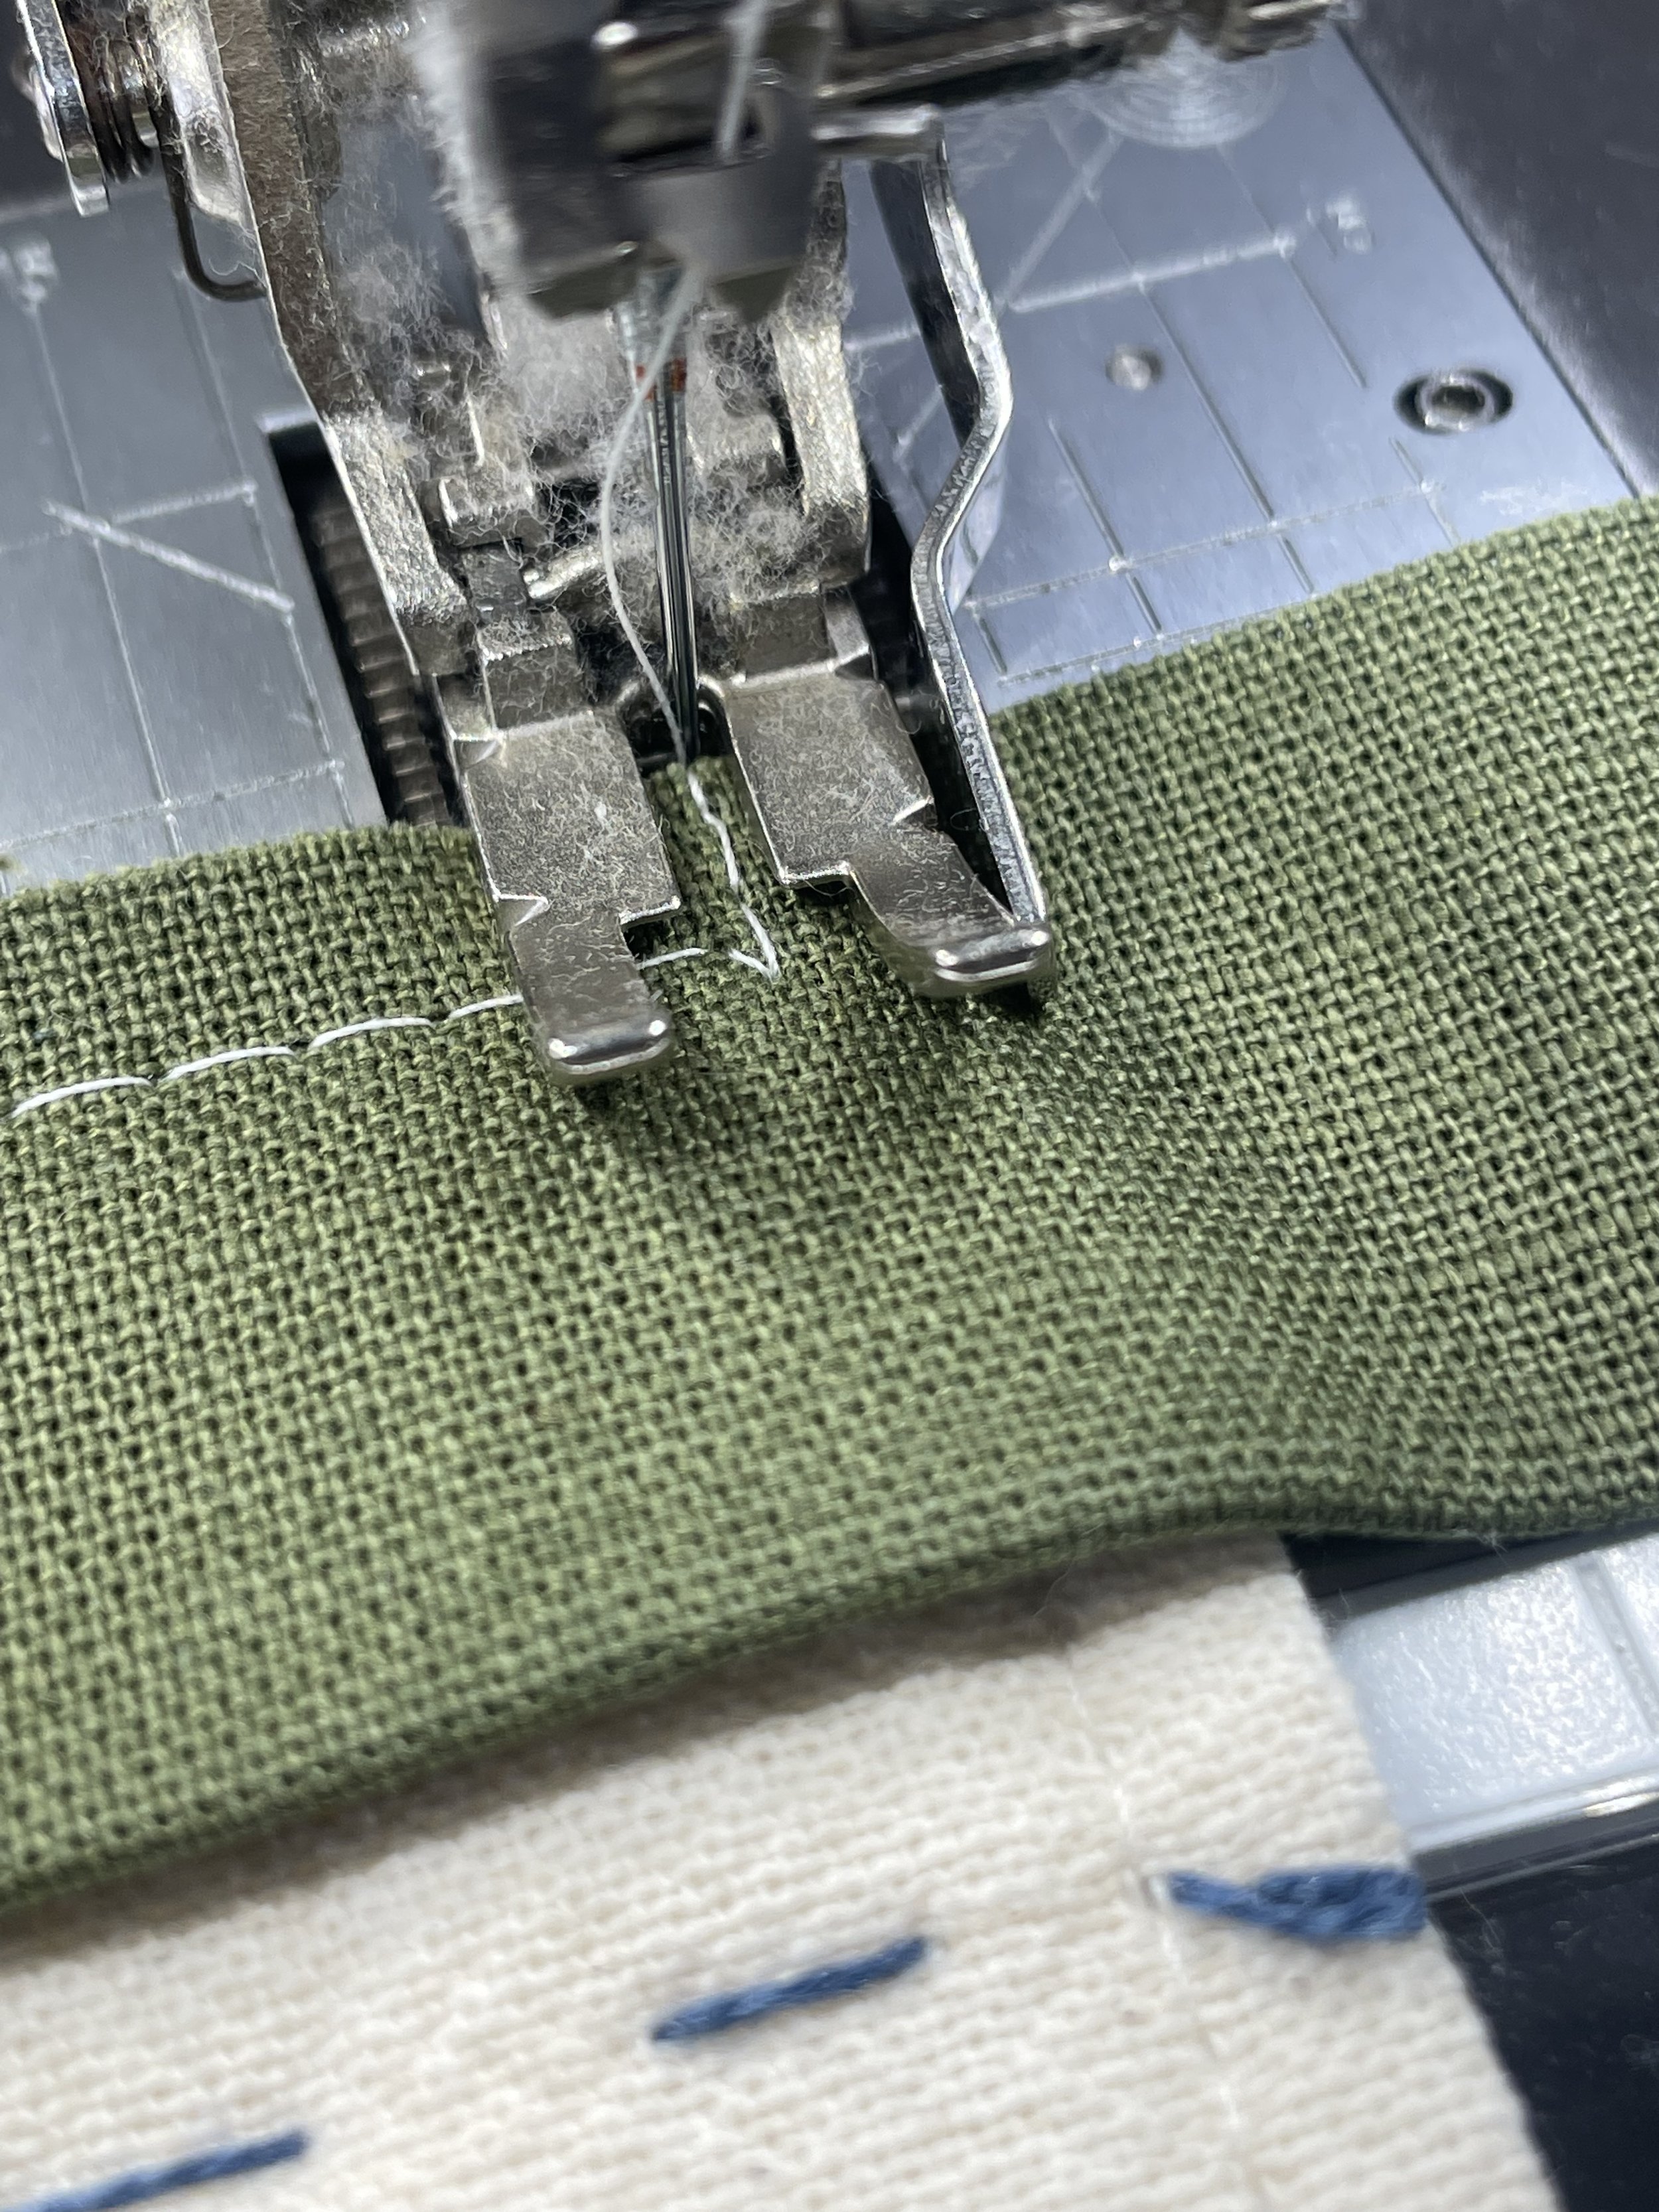
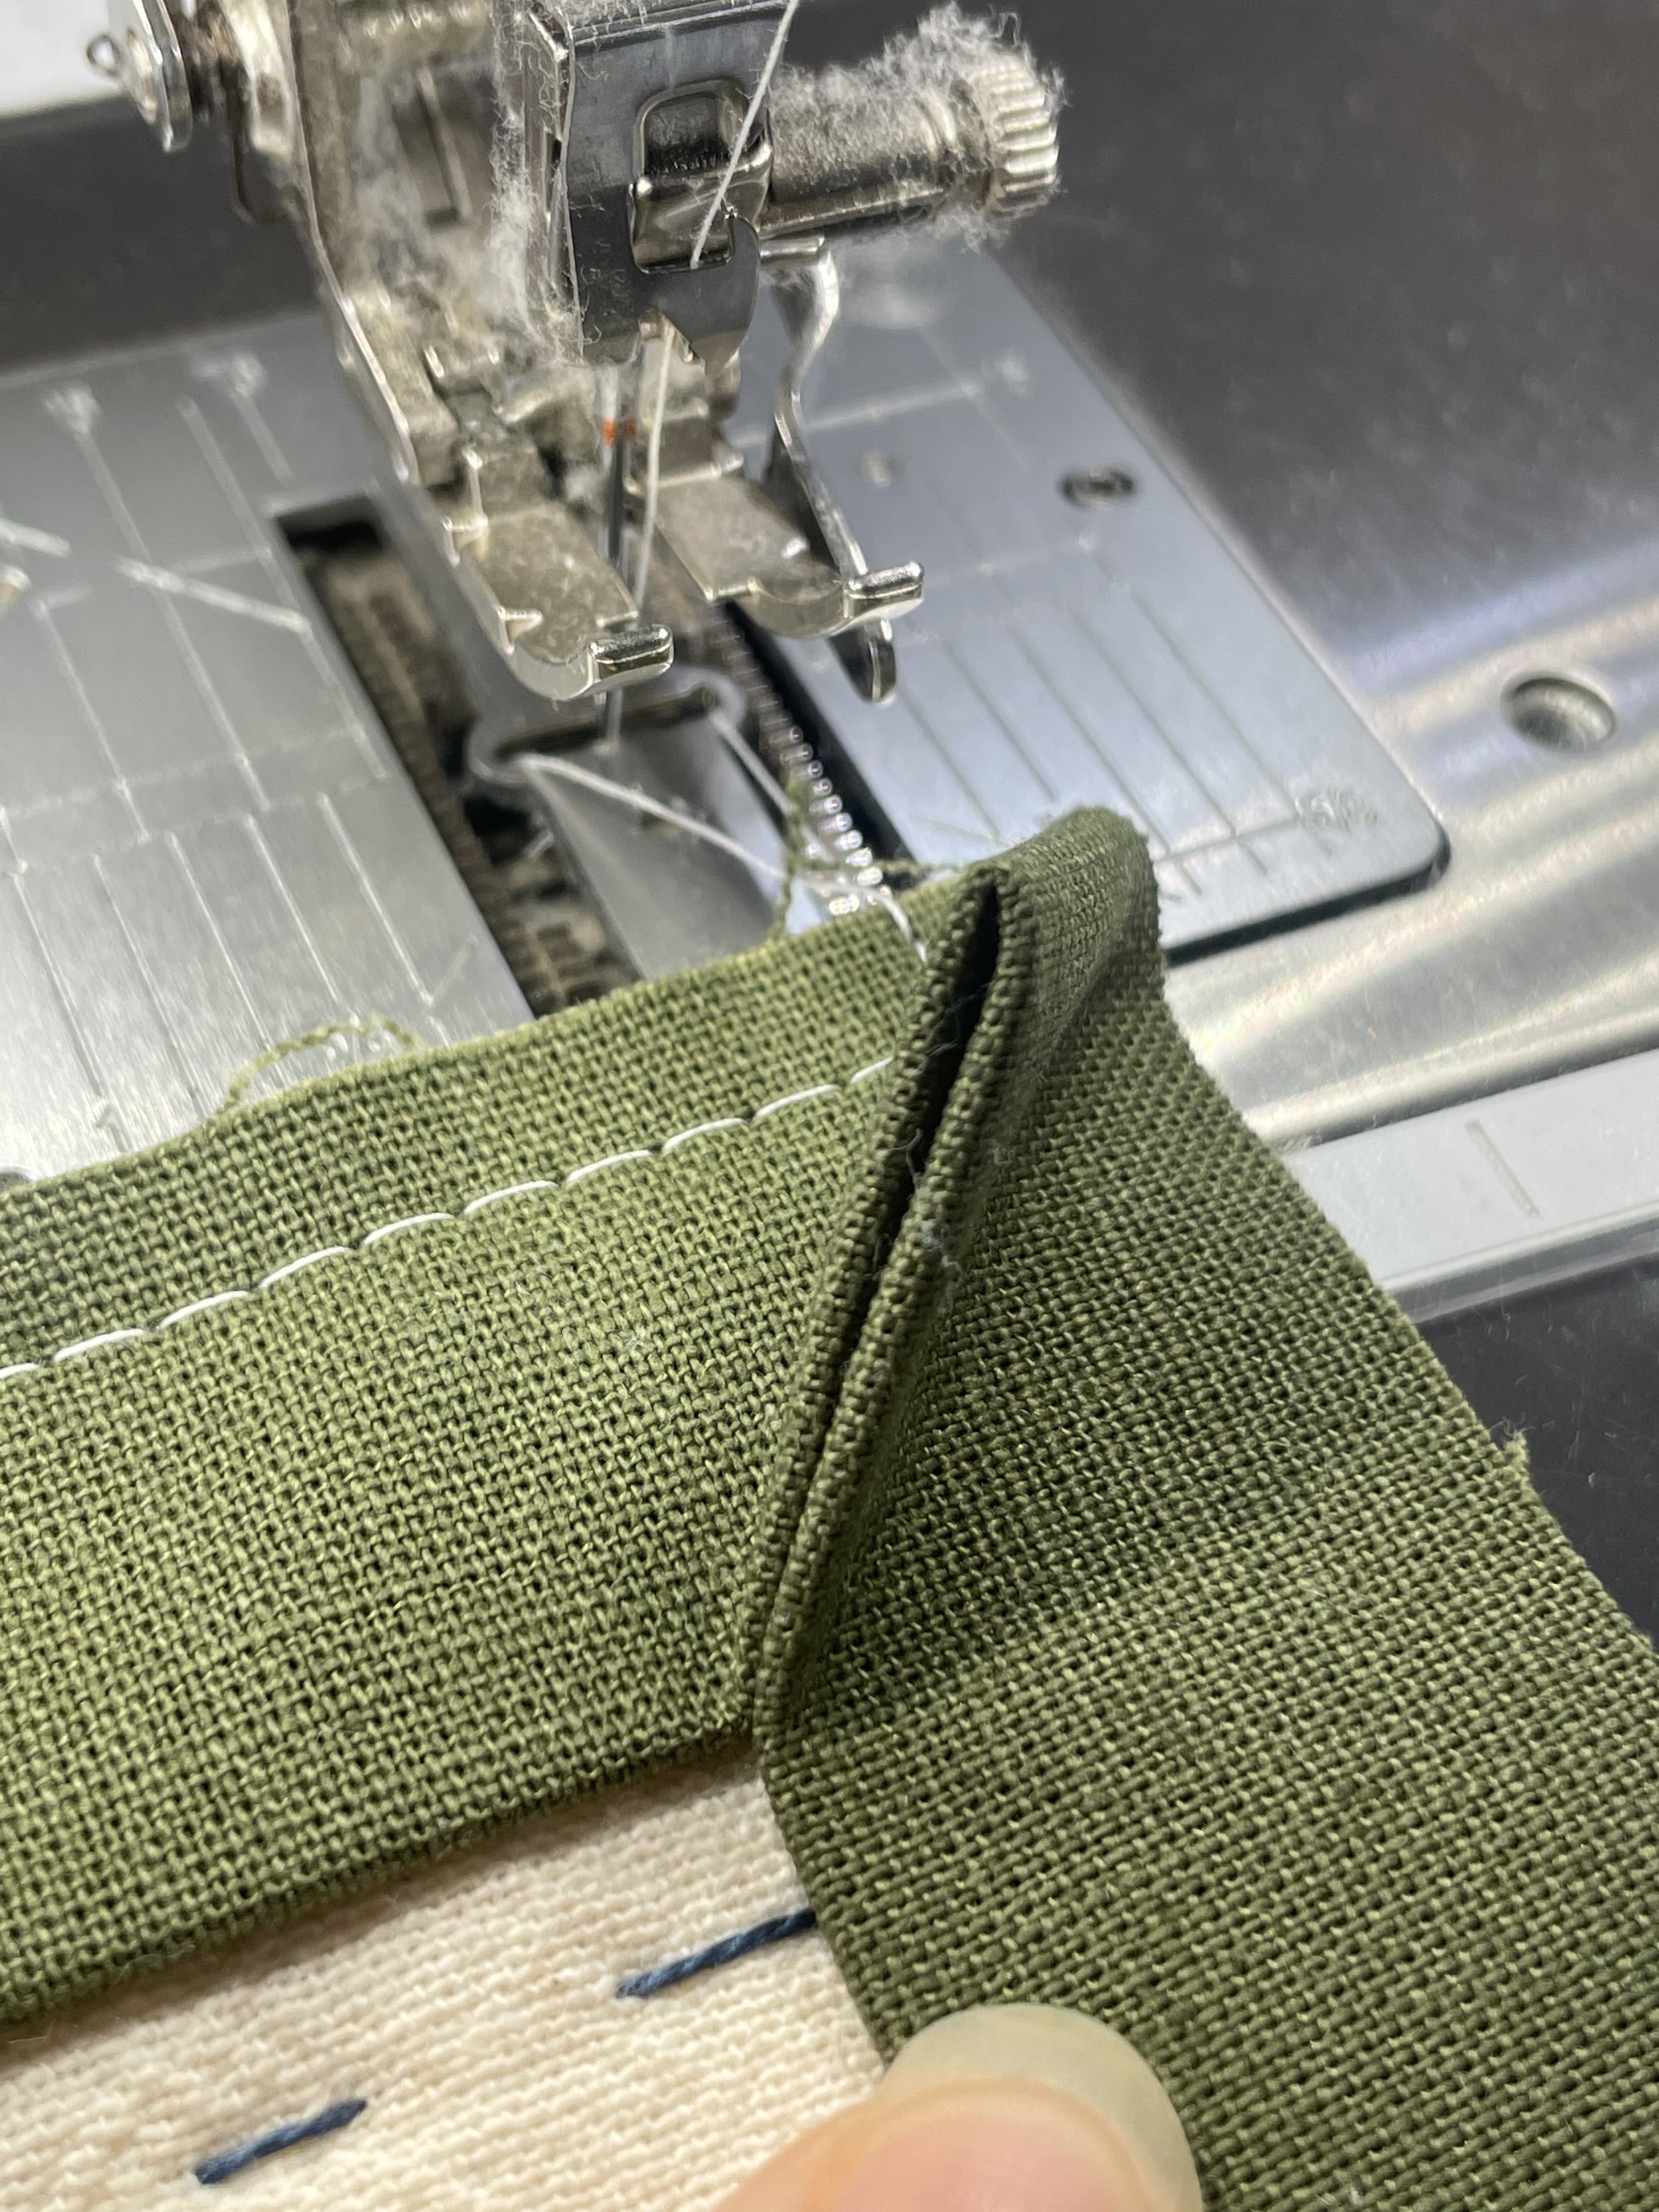
Sew the binding to the quilt using a 1/4 inch seam allowance, starting from the beginning of the strip (less the 6-8” “tail” mentioned above) and working your way to the corner of the quilt. Stop sewing 1/4 inch away from the edge of the quilt. Most sewing machine feet have a way of showing how much 1/4” is- as you can see below, 1/4” on my machine is the edge if the two lines, before the go up on an angle. Also, excuse my machine dust- would you believe me if I said it was only serviced and cleaned a few weeks ago- because it was!! :-)

Lift your sewing machine foot up, while leaving your needle down and rotate your quilt 45” as you can see below:
Now back stitch a few stitches until you get to the edge of the quilt.
Fold the binding up and away from the quilt, creating a 45-degree angle at the corner.
Then fold the binding back down, aligning it with the edge of the next side of the quilt. This will create a diagonal fold in the binding that forms a neat mitred corner.

Sew along the next side of the quilt, starting at the edge and sewing to the next corner.

Repeat the corner-mitering process for each corner of the quilt.
If you’d prefer to see that in video form, I made a little video for you :-)
Step 6: Finish the binding
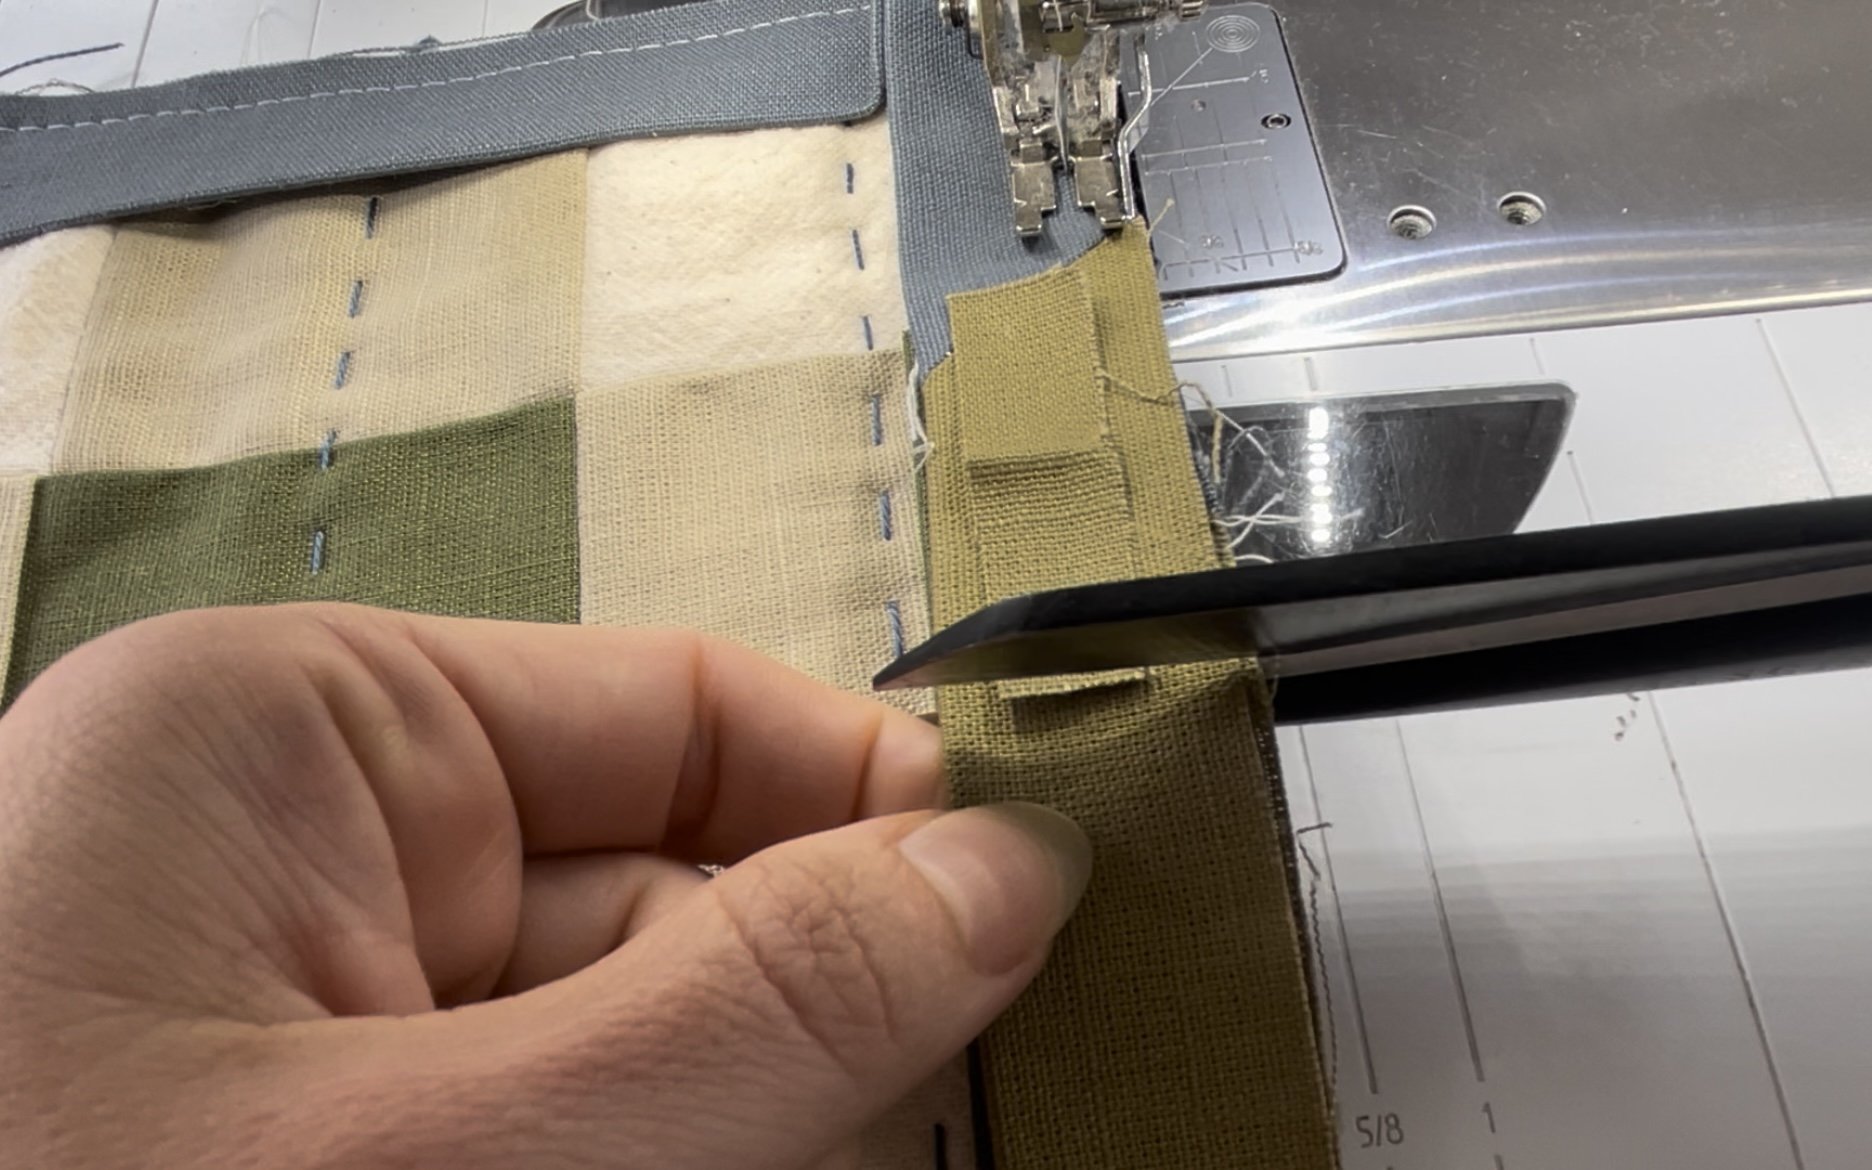
When you are about 10” away from the beginning of your binding , trim the excess so that the two ends overlap by the width of your binding (eg if your binding is 2.25”, they should overlap by 2.25”). Handy hint, if you cut the excess end of your binding off, you can use this to measure 2.25”.

I am using a little edge of my binding to measure the overlap
And then snipping off!
This next part is the hardest part (I used to always get this wrong) but i’ve included a little video to help you out:
Prefer written instructions? Take your quilt so its in front of you with the binding - take the piece of binding on your left and flatten out the fold (it doesn’t have to be perfect.
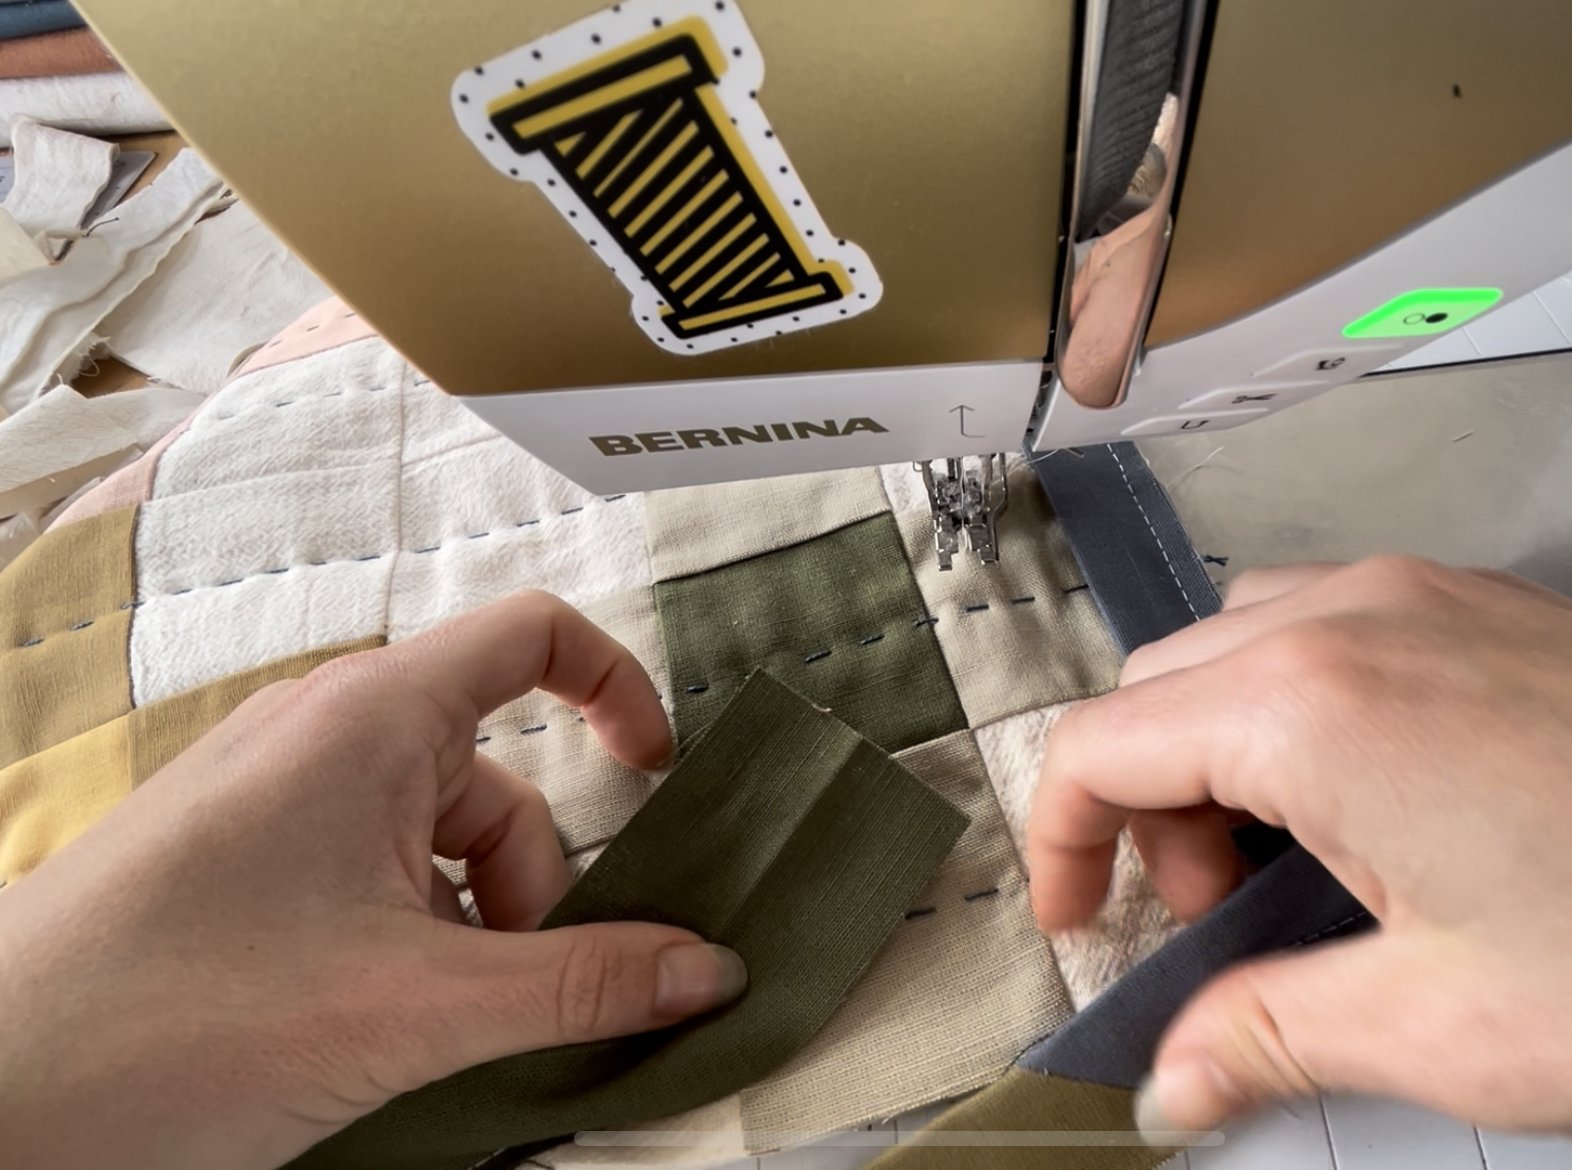
Take the right piece and also flatten it out Twist it around to sit on top of the left piece, right sides together, on a 45 degree angle.

Draw a line on a 45 degree angle from top left to bottom right then sew over the top of it from corner to corner.

Check by pulling your binding straight to make sure it’s the right length. Once it is, cut off the excess fabric leaving 1/4” seam allowance.

Finger press flat, then turn it out the right way. Continue sewing the binding to the quilt as usual, until you reach the starting point.

Now your binding is attached to the front, we are ready to attach to the back!
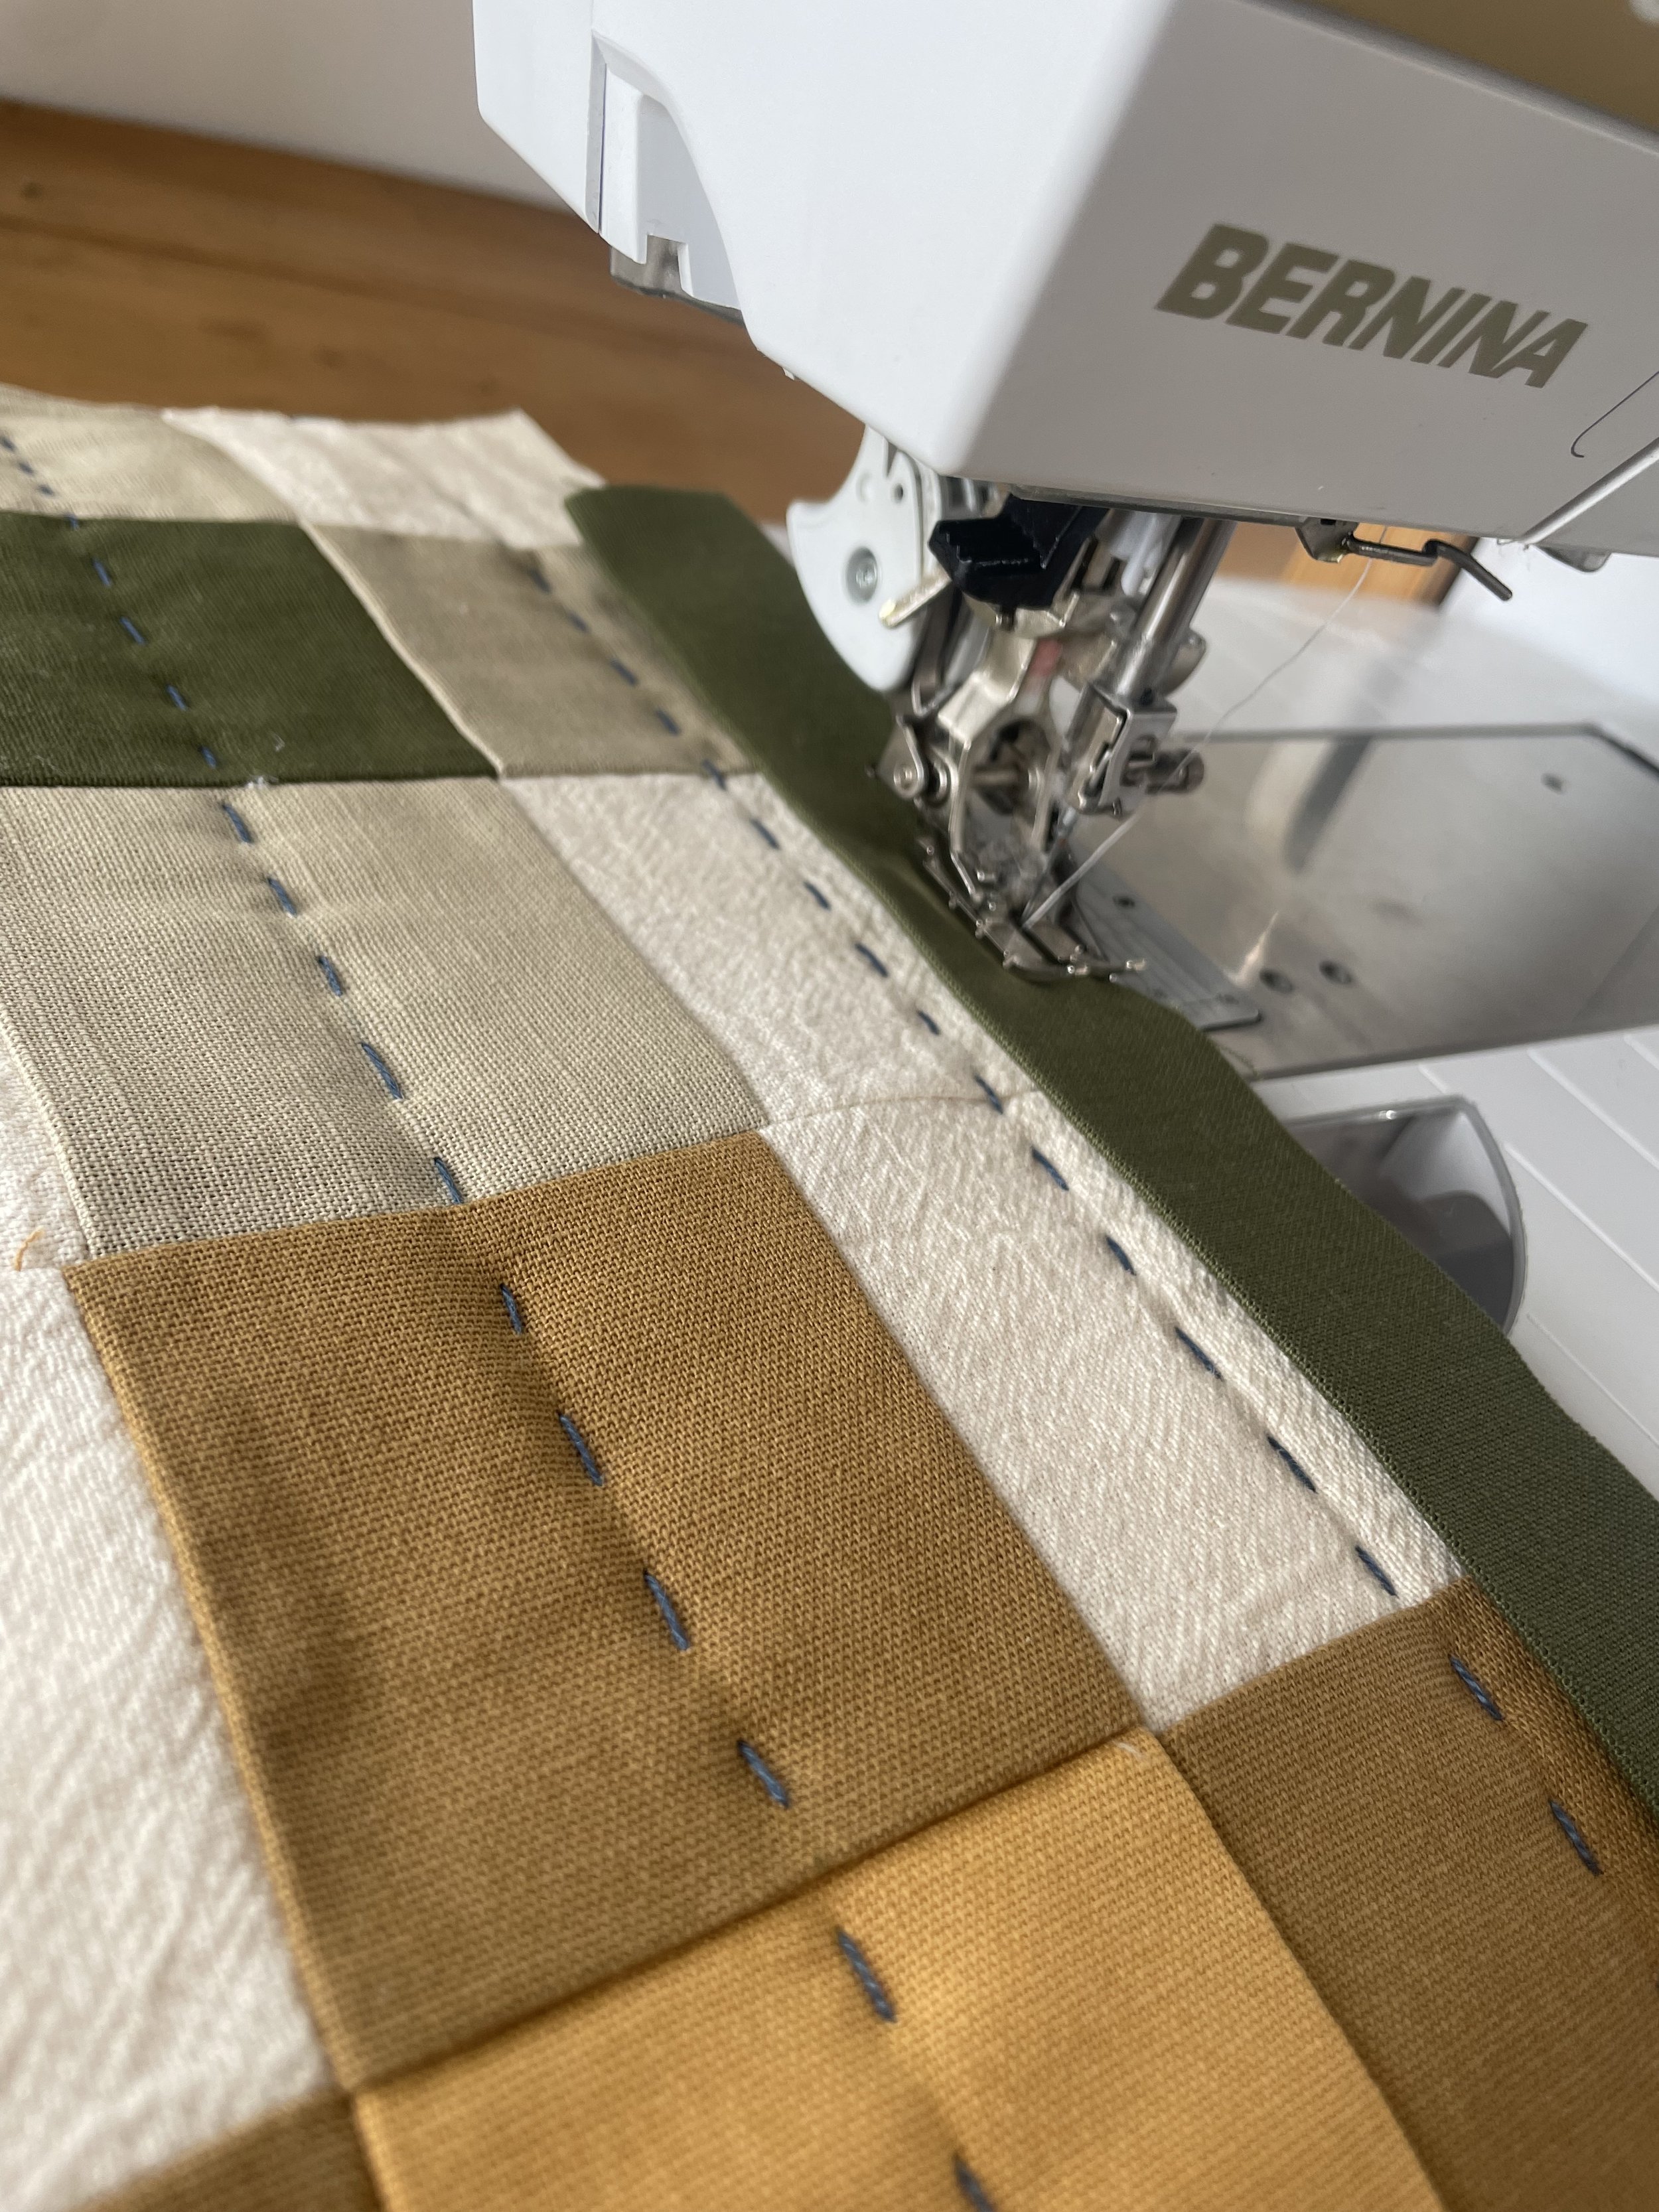
Step 7: Big Stitch Binding
Fold the binding over the edge of the quilt, covering the raw edge of the quilt and batting. Clip the binding in place using binding clips (you can just do a little bit at a time).
Thread your needle with a length of thread. I personally like to use about 6 feet for a throw size quilt because I hate rethreading the needle but perhaps start with about a yard / metre or so.
Tie a knot at the end of your thread, leaving a tail of about 1-2 inches. You can do this by using your needle tip to direct the knot.

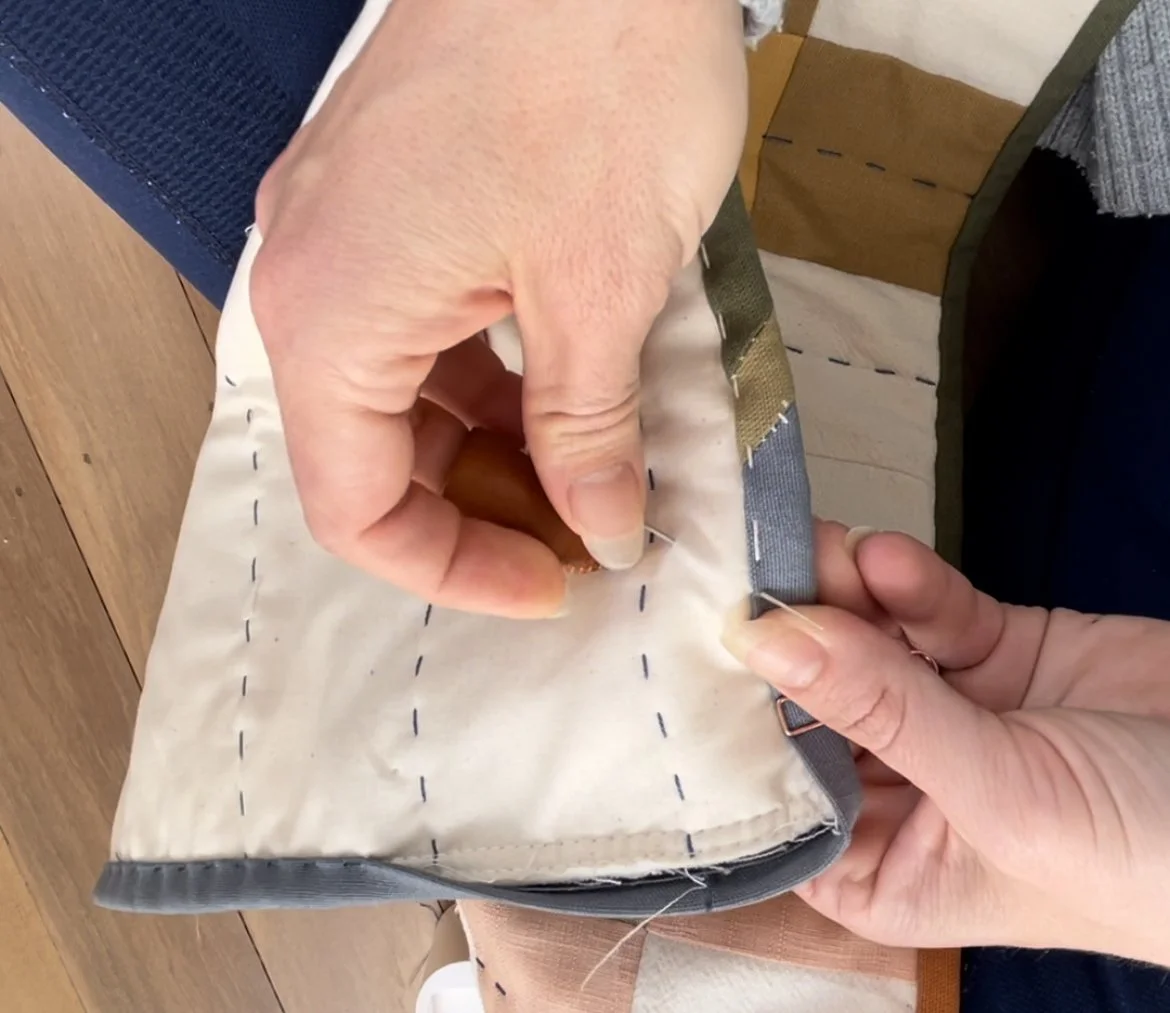
Starting at one end of your binding, insert your needle through the quilt back fabric about an inch from the binding but don't go through to the front of the quilt. This will be your starting point.

Direct your needle so it comes out through the edge of the binding - it should be going just under the backing fabric (so the top layer of fabric from this perspective).
Pull your thread through until the knot pops under the fabric- now it’s nice and hidden.
To make a big stitch, insert your needle into the bbinding about 1/4 inch away from where you started. You should only be going through the binding layer and the the backing fabric but if you do go into the batting and quilt top fabric, don’t worry too much :-)

Continue making big stitches along the length of your binding, spacing them evenly apart. You can space your stitches as far apart or as close together as you like.
When you get to a corner, fold the binding at a 45-degree angle and make a cross through the folded edge to hold it in place. Then, continue sewing along the next side of your quilt.

When you get back to where you started, tie off your thread by making a knot on the back side of your quilt. Cut the excess thread and you're done!
A few tips: take your time with your stitches and don’t worry if they aren’t perfect! If you would like them to be a bit more evenly spaced, try using a stripy binding and follow the stripes with your stitches. I hope you found the tutorial useful- let me know if you have any questions :-)