
How to make: A Checkered Squares Quilt (Baby size)
A quick note: The pattern below is free however I have a downloadable printable version available for purchase (with two sizes) if you’d prefer which you can find here.
After publishing my throw size Checkered Squares quilt tutorial, I had so many requests for a baby size version that I just had to write another tutorial!

I put a lot of thought into this one- originally I was thinking of using the same sized squares as the throw size and just having less. I also tossed up various different sizes. Eventually I settled on this one which uses smaller squares and finishes up at 38” x 38”.
The reason I did it this way is:
It results in the least amount of fabric waste/ least amount of fabric used - you only need 2/3 yard of each of the two colours and it means you only need one width of fabric for the backing fabric.
I tried to think of a way to do it with the larger squares in a smaller size quilt but there was just too much waste or the maths didn’t math (eg only getting 6 cuts from a strip but needing 8, etc etc
NB: The instructions assume usable Width of Fabric (WOF) of 42”
Fabric Requirements:
Fabric A (I used green): 2/3 yard (21” exactly) or 60cm
Fabric B (I used cream): 2/3 yard (21” exactly) or 60cm
Binding: 0.3 yards (5 strips)
Backing: 1.25 yards (or 1.1 metres)
Cutting Instructions:
From both of your Fabric A and Fabric B, cut (4) strips (from both Fabrics, so 8 strips in total) that are 5.25” x Width of Fabric (WOF). Don’t understand WOF? Check out this link.
Now take (2) strips of Fabric A and (2) strips of Fabric B and sew them together alternating, right sides together using ¼” seams as follows:

Press your seams towards the dark colour. This is important for nesting seams later on as well as making it easy to fold and cut :-)
Repeat 1 more time using your remaining strips so you have a total of (2) strips sets.

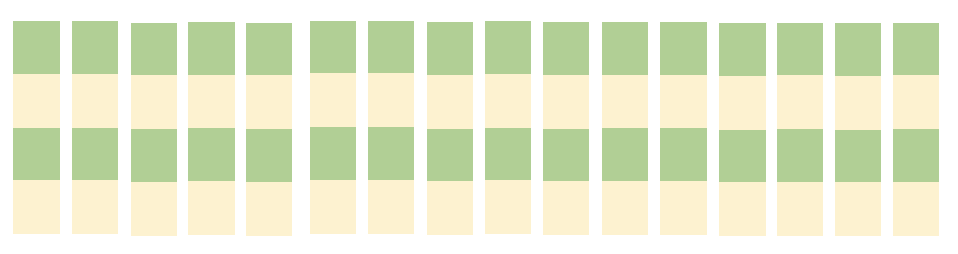
Now we are going to cut our square sets Trim off the rough edges, then cut 8 strips that are 5.25” long- this is what we are doing:

Be careful when you are trimming your rough edges as we will be taking up almost the entire length of usable fabric (eg excluding the selvage)
Repeat with your other strip set to create a total of (16) squares sets:
Take (2) of your square sets and sew them right sides together with ¼” seams with alternating colours as follows- press your seams towards the dark colour:

Repeat until you have 8 strips of 8 squares in total. Then we are going to sew each row together, making sure you flip every second row so you have a checkerboard. Sew right sides together using ¼” seam. Because we pressed all of our seams towards the dark colour, they will nest together perfectly:
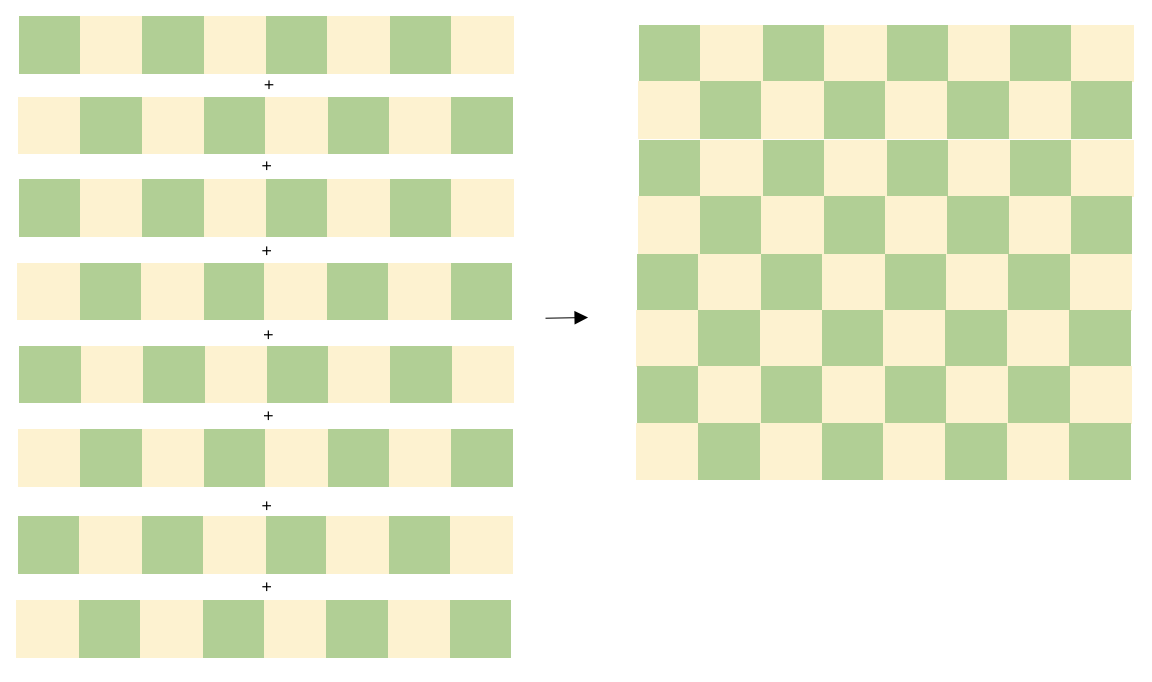
Give it a good press and your quilt top is done!
Baste, quilt and bind as desired
Now onto my quilt! I based my colour selections on the Koala backing fabric which I saw at Spotlight and realised I would immediately need to use it to make a quilt for my new niece Molly (she’s not even 2 months yet and she already has three quilts- this will be her fourth :-)
I’m still hand quilting it but I’m planning to make curved edges for my binding. I will machine sew on the front of my binding and hand sewed it on the back using a big stitch.
I hope you enjoy making this quilt! If you have any questions, let me know :-)