
Quilting 101 Lesson 1: Quilting Basics
Despite its centuries-old tradition, quilting has experienced a recent resurgence thanks to the 'slow craft movement,' which seems to be taking over (which is a great thing IMHO :-) Quilting essentially involves stitching layers of fabric together to create not only a functional, cosy and beautiful piece of art.

This is the 101 of the Quilting 101- the true basics:
Part I: The Components of a quilt
Part II: Why we use inches
Part III: Fabric measurements and cuts
Part IV: Quilting Acronyms
Part V: Common quilting shapes
I’ll link to other various resources I have across my website too so everything will hopefully come together nicely :-)
Part 1: The Components of a Quilt:
A quilt is made up of four main components:
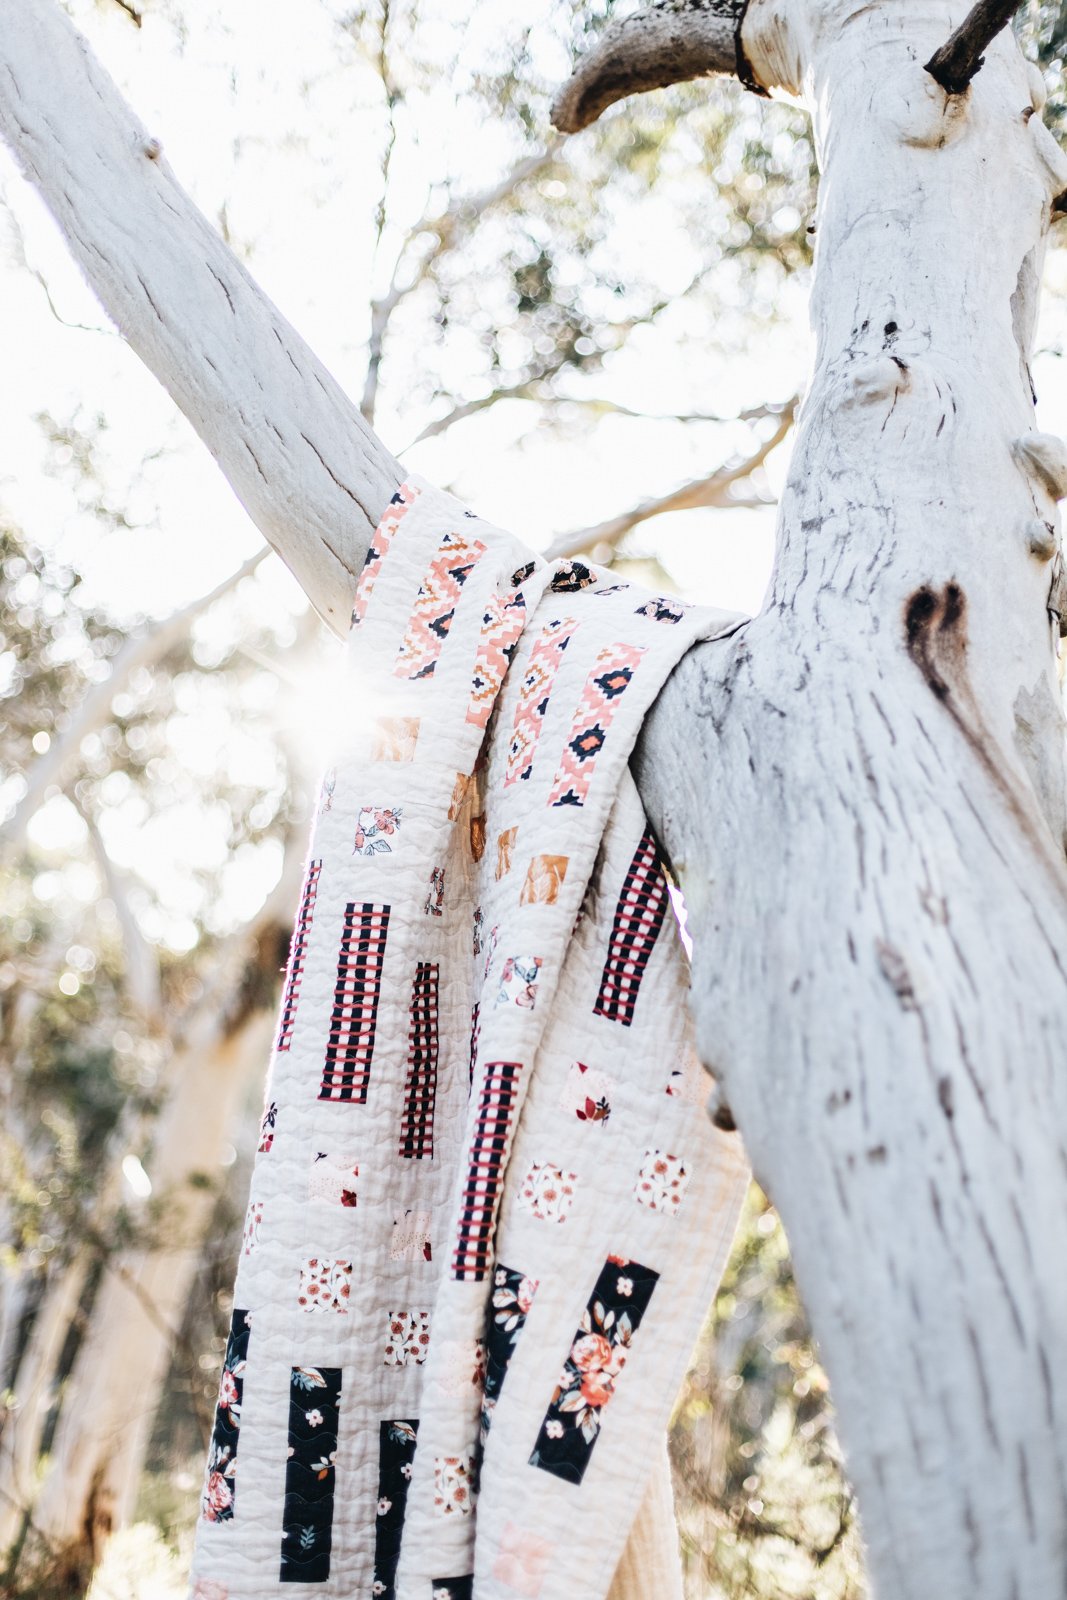
The Quilt Top- the decorative layer of fabric that is pieced together to create a design. It’s generally a combination of contrasting fabric (which could be fat quarters) and background fabric (see diagram below)
Batting - the middle layer of the quilt sandwich, providing insulation and warmth (and cosiness)
Backing- the layer of fabric that is placed on the back of the quilt, usually a solid colour or a print that complements the design of the quilt top
Binding- used to finish the edges of the quilt, creating a really finished and professional look.
The cream fabric in the image above is the background fabric
At a very high level :
Make the quilt top
Cut the batting, and backing to the appropriate size.
Create a quilt sandwich- the batting is placed between the quilt top and the backing, with all three layers pinned or basted together to hold them in place.
Quilting stitches (this step is called “quilting”) are then added to hold the three layers together and create a decorative design.
Finally, binding is added to finish the edges of the quilt and your quilt is finished!
(Don’t worry, there will be very detailed posts with diagrams which go through each of the above steps in a lot more detail)
Part II: Why quilting uses inches (For those that grew up using metric)
Have you ever wondered why inches are used in quilting instead of centimetres? (I know I sure did). According to my research, (google), it all starts with the origins of quilting itself.
Back in the day, quilting was all about making cozy blankets to keep you warm during those chilly winter nights. Quilters used scraps of fabric to create designs, and the size of their creations was determined by the size of the fabric scraps they had available. At that time, the quilters of the world had no standardized system of measurement to work with, so they relied on the good old "inch" - a unit of measurement that had been in use since the 7th century!
Now, fast forward a few centuries to when quilting became more of a hobby and less of a necessity. Even though standardized measurement systems were introduced during this time, the tradition of using inches in quilting had already been established. Plus, inches were still being used in other areas of sewing and fabric arts, so it just made sense to stick with what people were already comfortable with.
Another reason why inches are still used in quilting today is that many quilting patterns and tools are designed using the imperial system of measurement. For example, a lot of quilting rulers and cutting mats have measurements in inches, and if you're using a pattern that's written in inches, it's just easier to work with measurements that are already familiar to you.
So there you have it - the reason why inches are still used in quilting today! It's a combination of tradition, familiarity, and practicality. And who knows, maybe one day the quilting community will switch to the metric system, but for now, it seems as though inches are here to stay.
Part III: Fabric measurements and cuts
A note for those who use metric: the vast majority of patterns will provide all instructions, including fabric requirements in yards. You can do a 1 for 1 if you are happy to have a little extra fabric and can’t be bothered doing the maths (eg if the pattern calls for 1 yard, get 1 metre, if it calls for 0.25 yards, get 25cm). If you are on a tight budget and want to purchase exactly the right amount, I’ve put a little calculator below so you can convert the fabric requirements into metres and centimetres.
In quilting, fabric measurements are an essential part of the process. Understanding the different types of fabric measurements, such as fat quarters and quarter yards, is crucial for selecting fabric and planning your quilt. In this section, we will go through what a fat quarter is, how it varies from a quarter yard, and other common fabric measurements used in quilting.
What is a Fat Quarter?
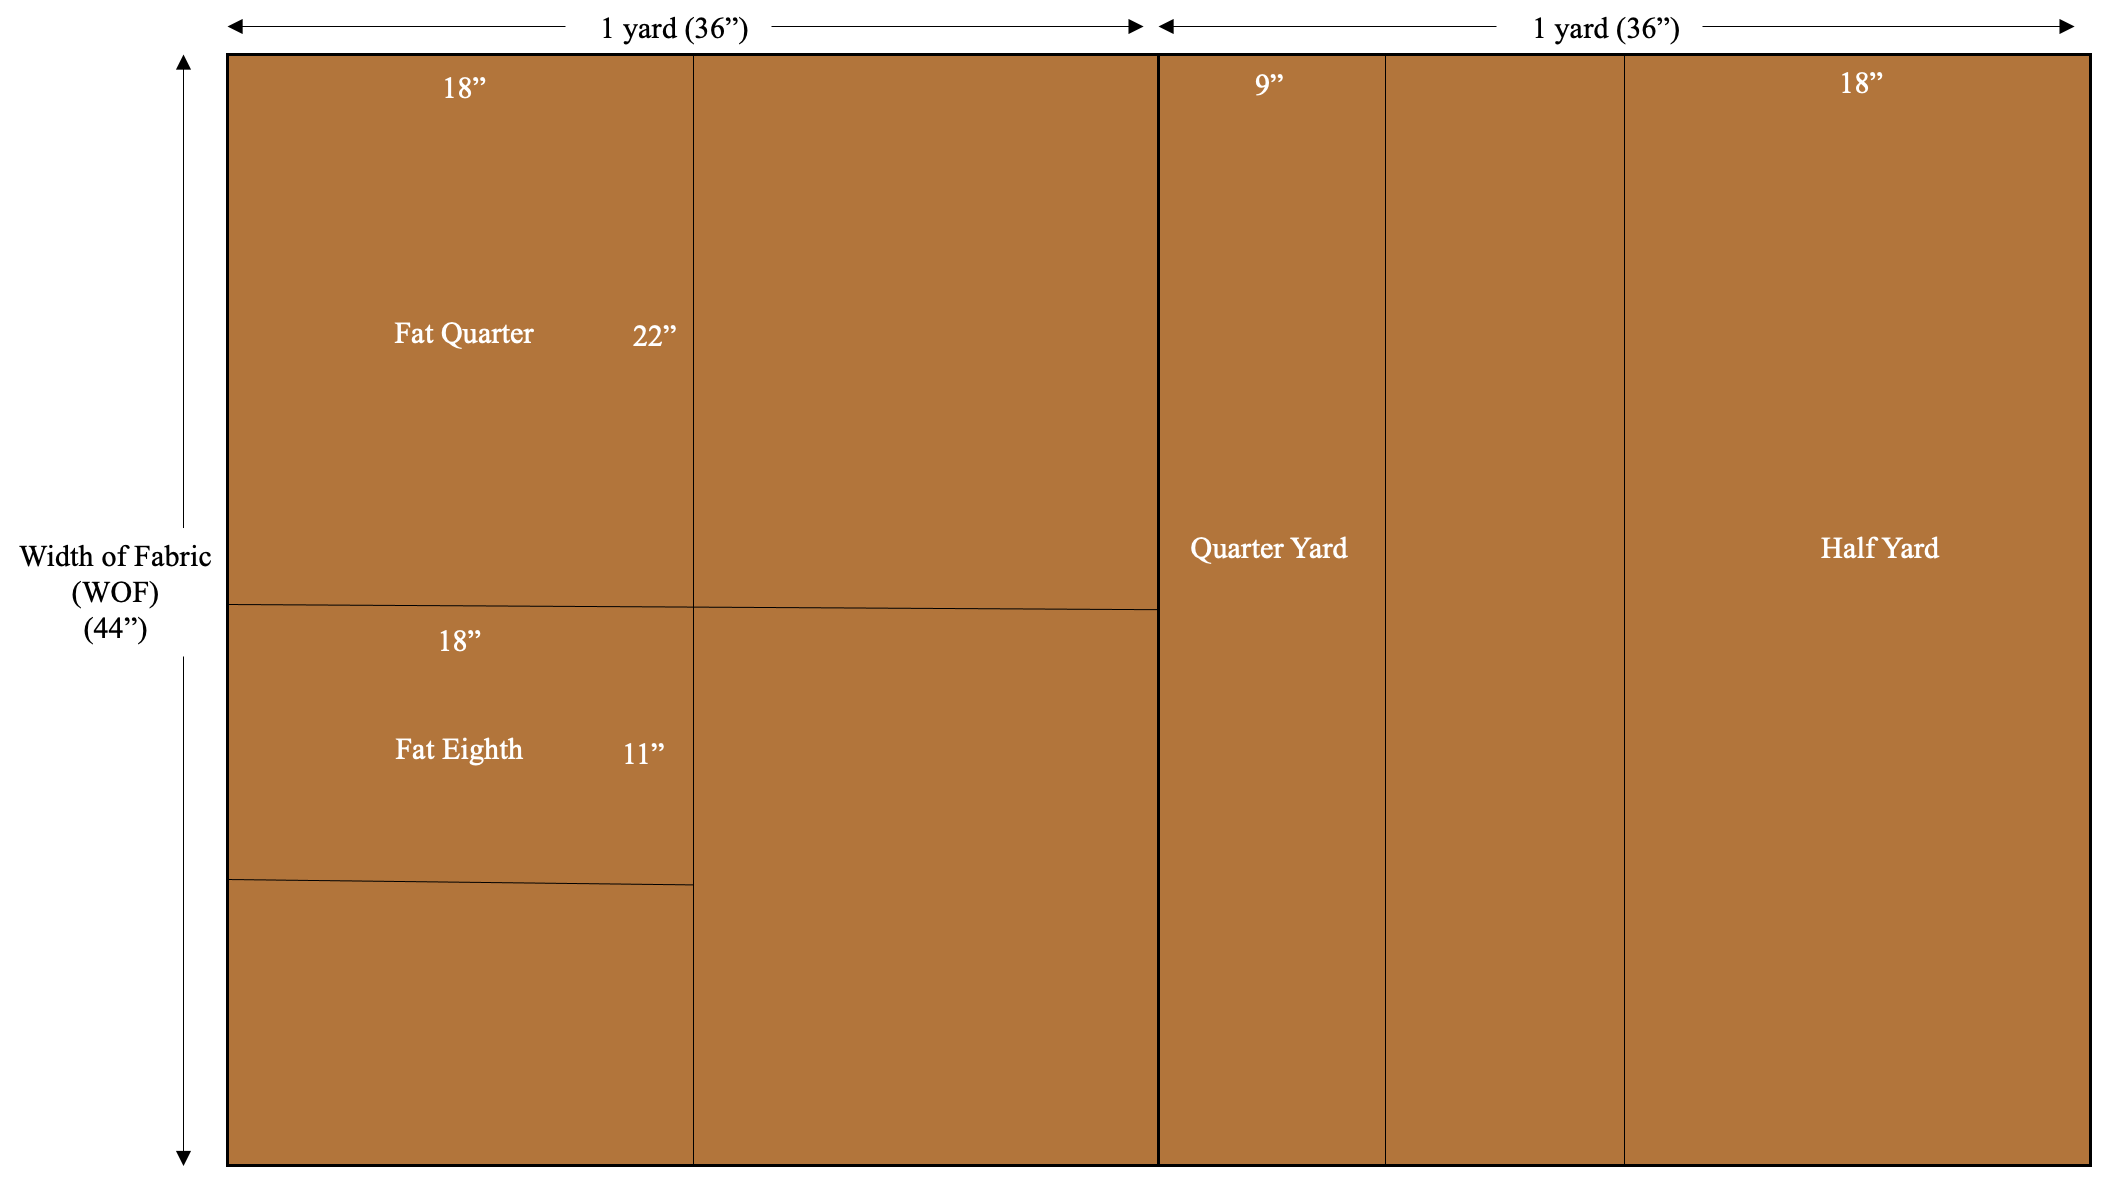
A fat quarter is a piece of fabric that measures approximately 18 inches by 22 inches. It is created by cutting a yard of fabric in half lengthwise, then cutting it in half widthwise. Fat quarters are popular in quilting because they allow for more versatility in fabric selection, as they can be used for a variety of quilt blocks and designs.
How Does a Fat Quarter Vary from a Quarter Yard?
A quarter yard is a piece of fabric that measures 9 inches by the width of the fabric, typically around 44-45 inches. When compared to a fat quarter, a quarter yard is longer but narrower. Sometimes you can replace a fat quarter with a quarter yard (and vice versa) but depending on the size of the pieces being cut, sometimes this isn’t possible.
Other Common Fabric Measurements in Quilting:
Fat Eighth: This is half of a fat quarter
Half Yard: A half yard is a piece of fabric that measures 18 inches by the width of the fabric. It is useful for larger quilt blocks and designs.
Yard: A yard of fabric measures 36 inches by the width of the fabric. It is useful for background fabric, backing fabric and larger projects.
Charm Pack: A charm pack is a pre-cut bundle of fabric squares that measure 5 inches by 5 inches. They are commonly used for smaller quilt blocks and designs.
Jelly Roll: A jelly roll is a pre-cut bundle of fabric strips that measure 2.5 inches by the width of the fabric. They are useful for strip quilting and can be used for a variety of designs.
Layer Cake: A layer cake is a pre-cut bundle of fabric squares that measure 10 inches by 10 inches. They are useful for larger quilt blocks and designs.
Part IV: Quilting Acronyms
WOF: Width of Fabric (the fabric from selvage to selvage)
FQ: Fat Quarter
HST: Half Square Triangle
QST: Quarter Square Triangle
WIP: Work in Progress
FMQ: Free Motion Quilting
RST: Right Sides Together (in quilting, you’ll most commonly sew pieces right sides together)
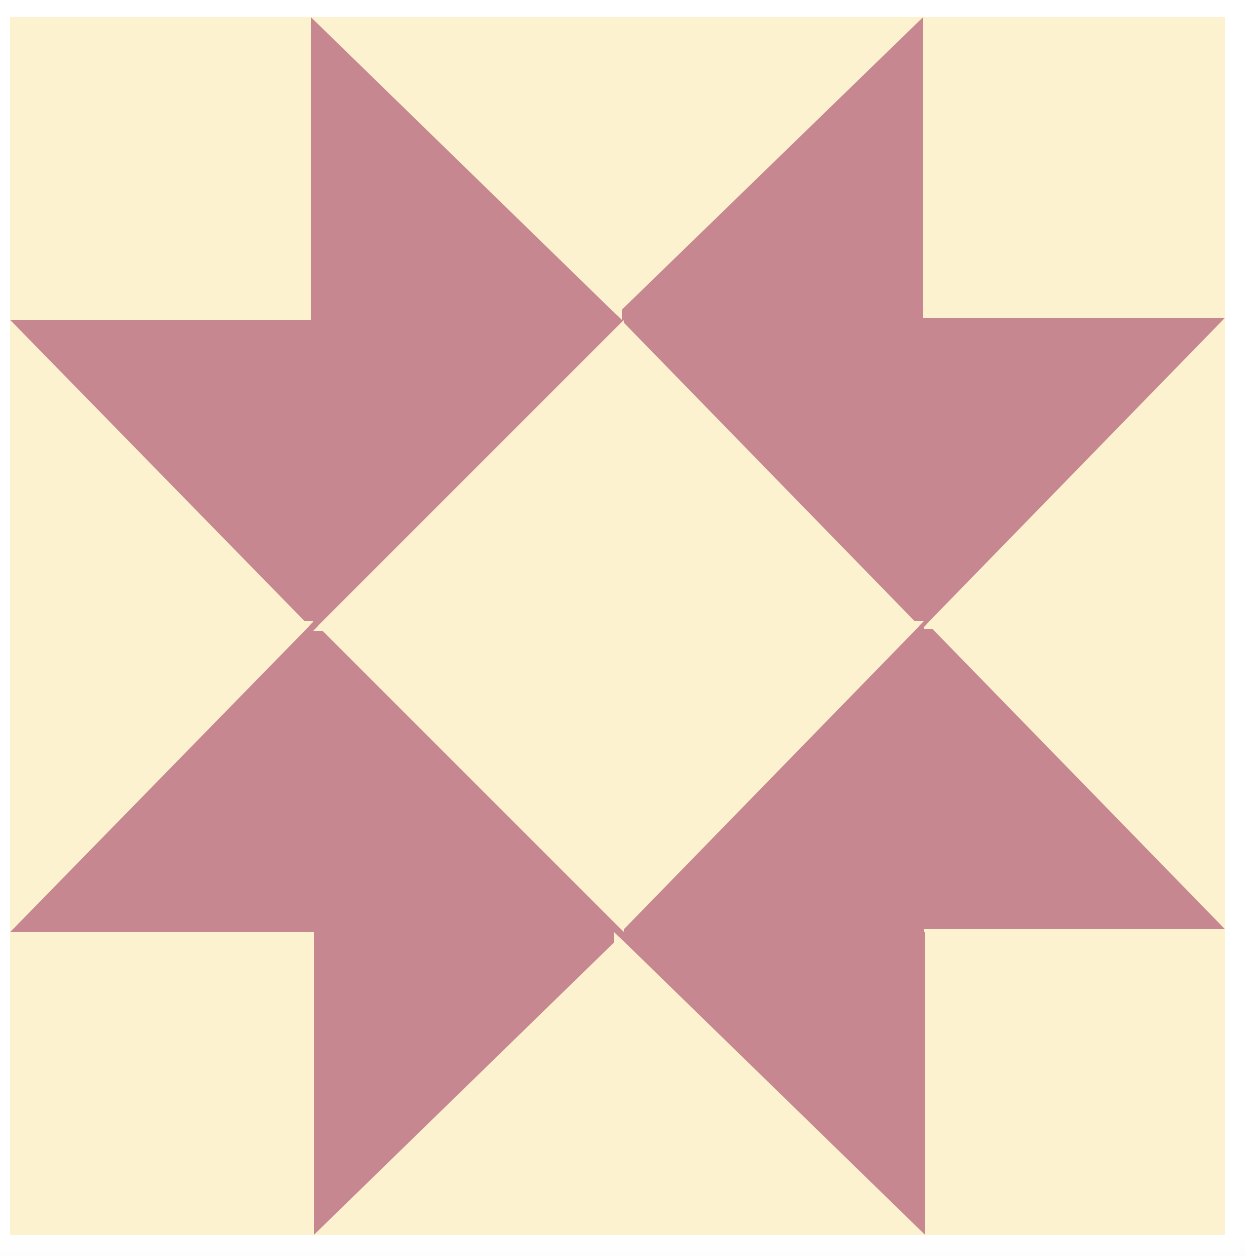
Part V: Common quilting shapes
Half Square Triangles (HSTs): There are a few different methods for making half square triangles and they are a super versatile shape for creating heaps of different patterns! You can find my tutorials and tips for making HSTs here.

Quarter Square Triangles (QSTs): QSTs look like a hourglass shape- a little less common than HSTs but a great block to use!

Flying Geese: When arranged in a quilt, flying geese appear as triangles in a chevron or arrow formation.

Rectangles and Squares: These basic shapes are the building blocks of many quilt designs.
And that’s it- your very high level introduction to the quilting basics. If you have any questions, please let me know- otherwise, I’ll be back soon with more details on each of these steps- stay tuned :-)