
How to make: a Little Squares Cushion
If you've only started following me recently, you may think that I only make quilts and other designs with squares, squares and more squares- I promise I do make other quilts but at the moment, I can't get enough of this relatively mindless sewing! So today, I have a tutorial to show you how to make a small squares CUSHION COVER- a really fun afternoon project :-)
If you are more a "watcher" to learn rather than viewer, I have made a reel which goes through all the steps which you can find here.
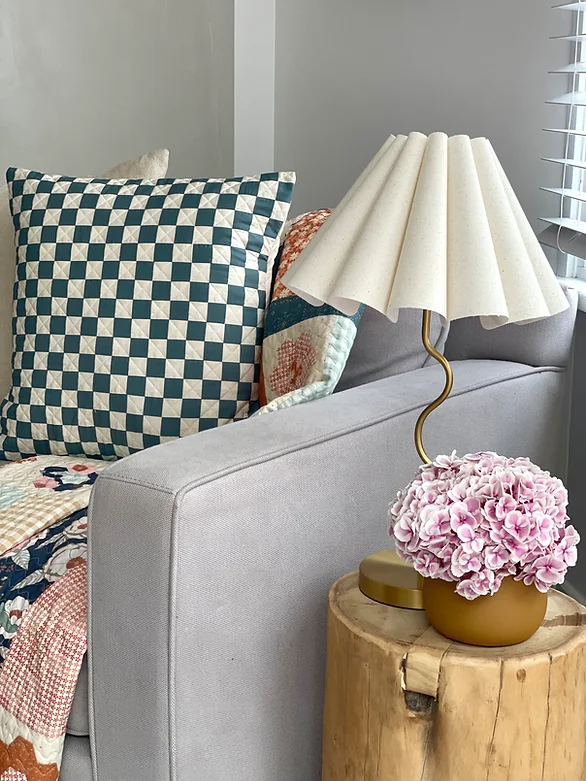
This makes a 55cm (22") cushion cover which is the perfect size cover for a Euro cushion- it fits nice and snuggly as you can see from the images above and below.

Fabric Requirements:
1/2 yard Fabric A (I used the gingerbread colour in one and blue in the other)
1 yard Fabric B (I used the cream)
1 3/4 yards Fabric C- you won't see this fabric as it's inside the cushion so just use any leftovers you have or the cheapest fabric you can find.
Batting
Cutting
Cut the following:
Fabric A:
(9) strips 1.75" x Width of Fabric (WOF)
Fabric B:
(9) strips 1.75" x WOF
(2) squares 22.5" x 16
(2) strips 2.25" x 22.5"
Fabric C:
(1) piece- 58" x 25" (this is for the inside of the cushion)
Batting
(1) piece- 58" x 25"
Sewing the Cushion Cover Front (the little squares)
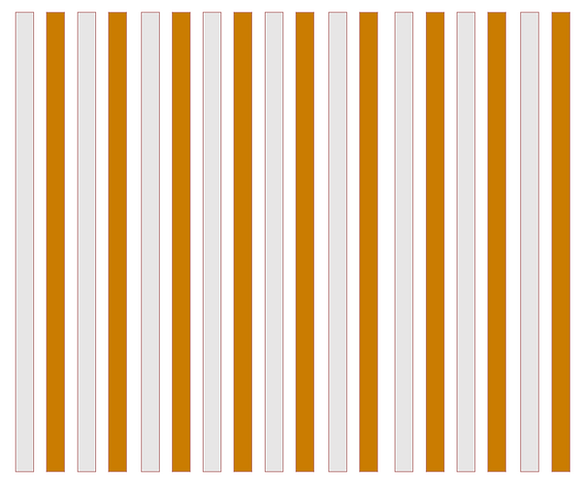
Take your (9) strips 1.75" x WOF of each of Fabric A and Fabric B and sew together, alternating colours, using 1/4" seam.
Don't worry if the top and bottom is a bit uneven- we will cut that off in the next step
Press your seams towards the darker colour- this will help us nest them to ensure they line up perfectly.
Once your piece is nice and pressed, it's time to cut:
Trim off one edge to even it out and then cut (18) strips that are 1.75" wide each

You will have 18 strips that look like this:

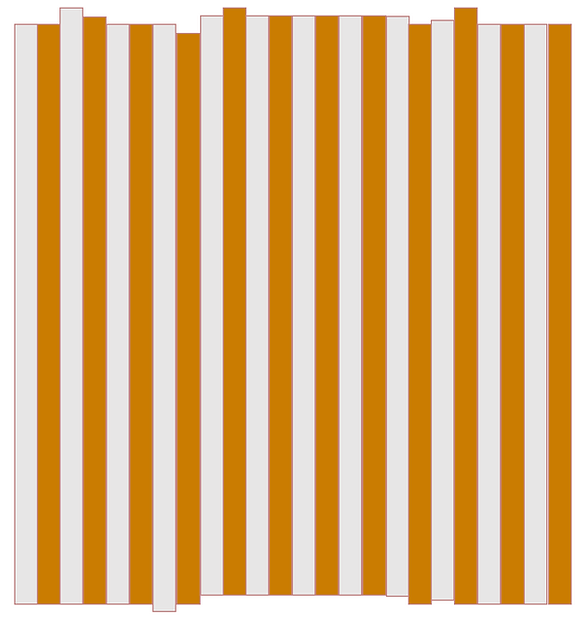
Now we are going to sew each strip together, alternating each one as follows. Make sure to nest your seams.

And it will look like this!

Now it's time to add the back pieces so it closes like an envelope. Don't worry, no zips are in sight here!
Take your two pieces of Fabric C that are 16" x 22.5" and sew them to opposite sides of your small squares piece (right sides together), using a quarter inch seam:

Now it's time to baste. Make a quilt sandwich, using the above piece, with the batting in the middle and Fabric C on the bottom. I love to spray baste (505 is my favourite) but pin basting is another option.
I quilted using diagonal lines through the cream squares so as not not take away from the pattern too much. I used a hera marker to mark a line on the white backing part and then used a guide bar to make sure the rest were (mostly) equally spaced.
It's now time to add binding to the edge of the cushion envelope so it has a nice finish. Take your two strips of Fabric B that are 2.25" x 22.5" and press them in half, lengthways.
Then we are going to attach them to the right side of the edge using 1/4" seam with the unfolded section on the edge- I have reverted to photos here as this is stretching my diagramming abilities :-) (For clarity, the grey fabric will be the inside of the cushion).


Then we are going to wrap the binding fabric around to the other side and secure, using a stitch just a few millimeteres from the edge:

Repeat on the other side.

Now it's time to sew our cushion together. Fold down one side, right sides together and sew either side using a 1/4" seam:

Then repeat on the other side:

Turn it out the right way and you are done! The cushion back will look like this:

Stuff with a Euro size cushion and enjoy :-) I hope you found this tutorial useful- as always, please let me know if you have any questions!
