
How to make: A big rectangles and squares quilts (real original Joz)
Hi, I’m Joz and I can’t stop making different variations of square and rectangle shaped quilts :-) So here is my latest square and rectangle quilt which was inspired by our bath mat. It comes together super quickly plus it’s very low waste!

This makes a generous sized throw which is 62” x 67”. There is enough fabric and cuts to make it 62” x 75” by adding another row and I’ve included instructions for both (it’s the same cuts and steps up until the last step), but this throws the balance of a little bit as with the extra row, it’s not perfectly symmetrical- I’ll post a couple of diagrams below and you can decide which you prefer :-)
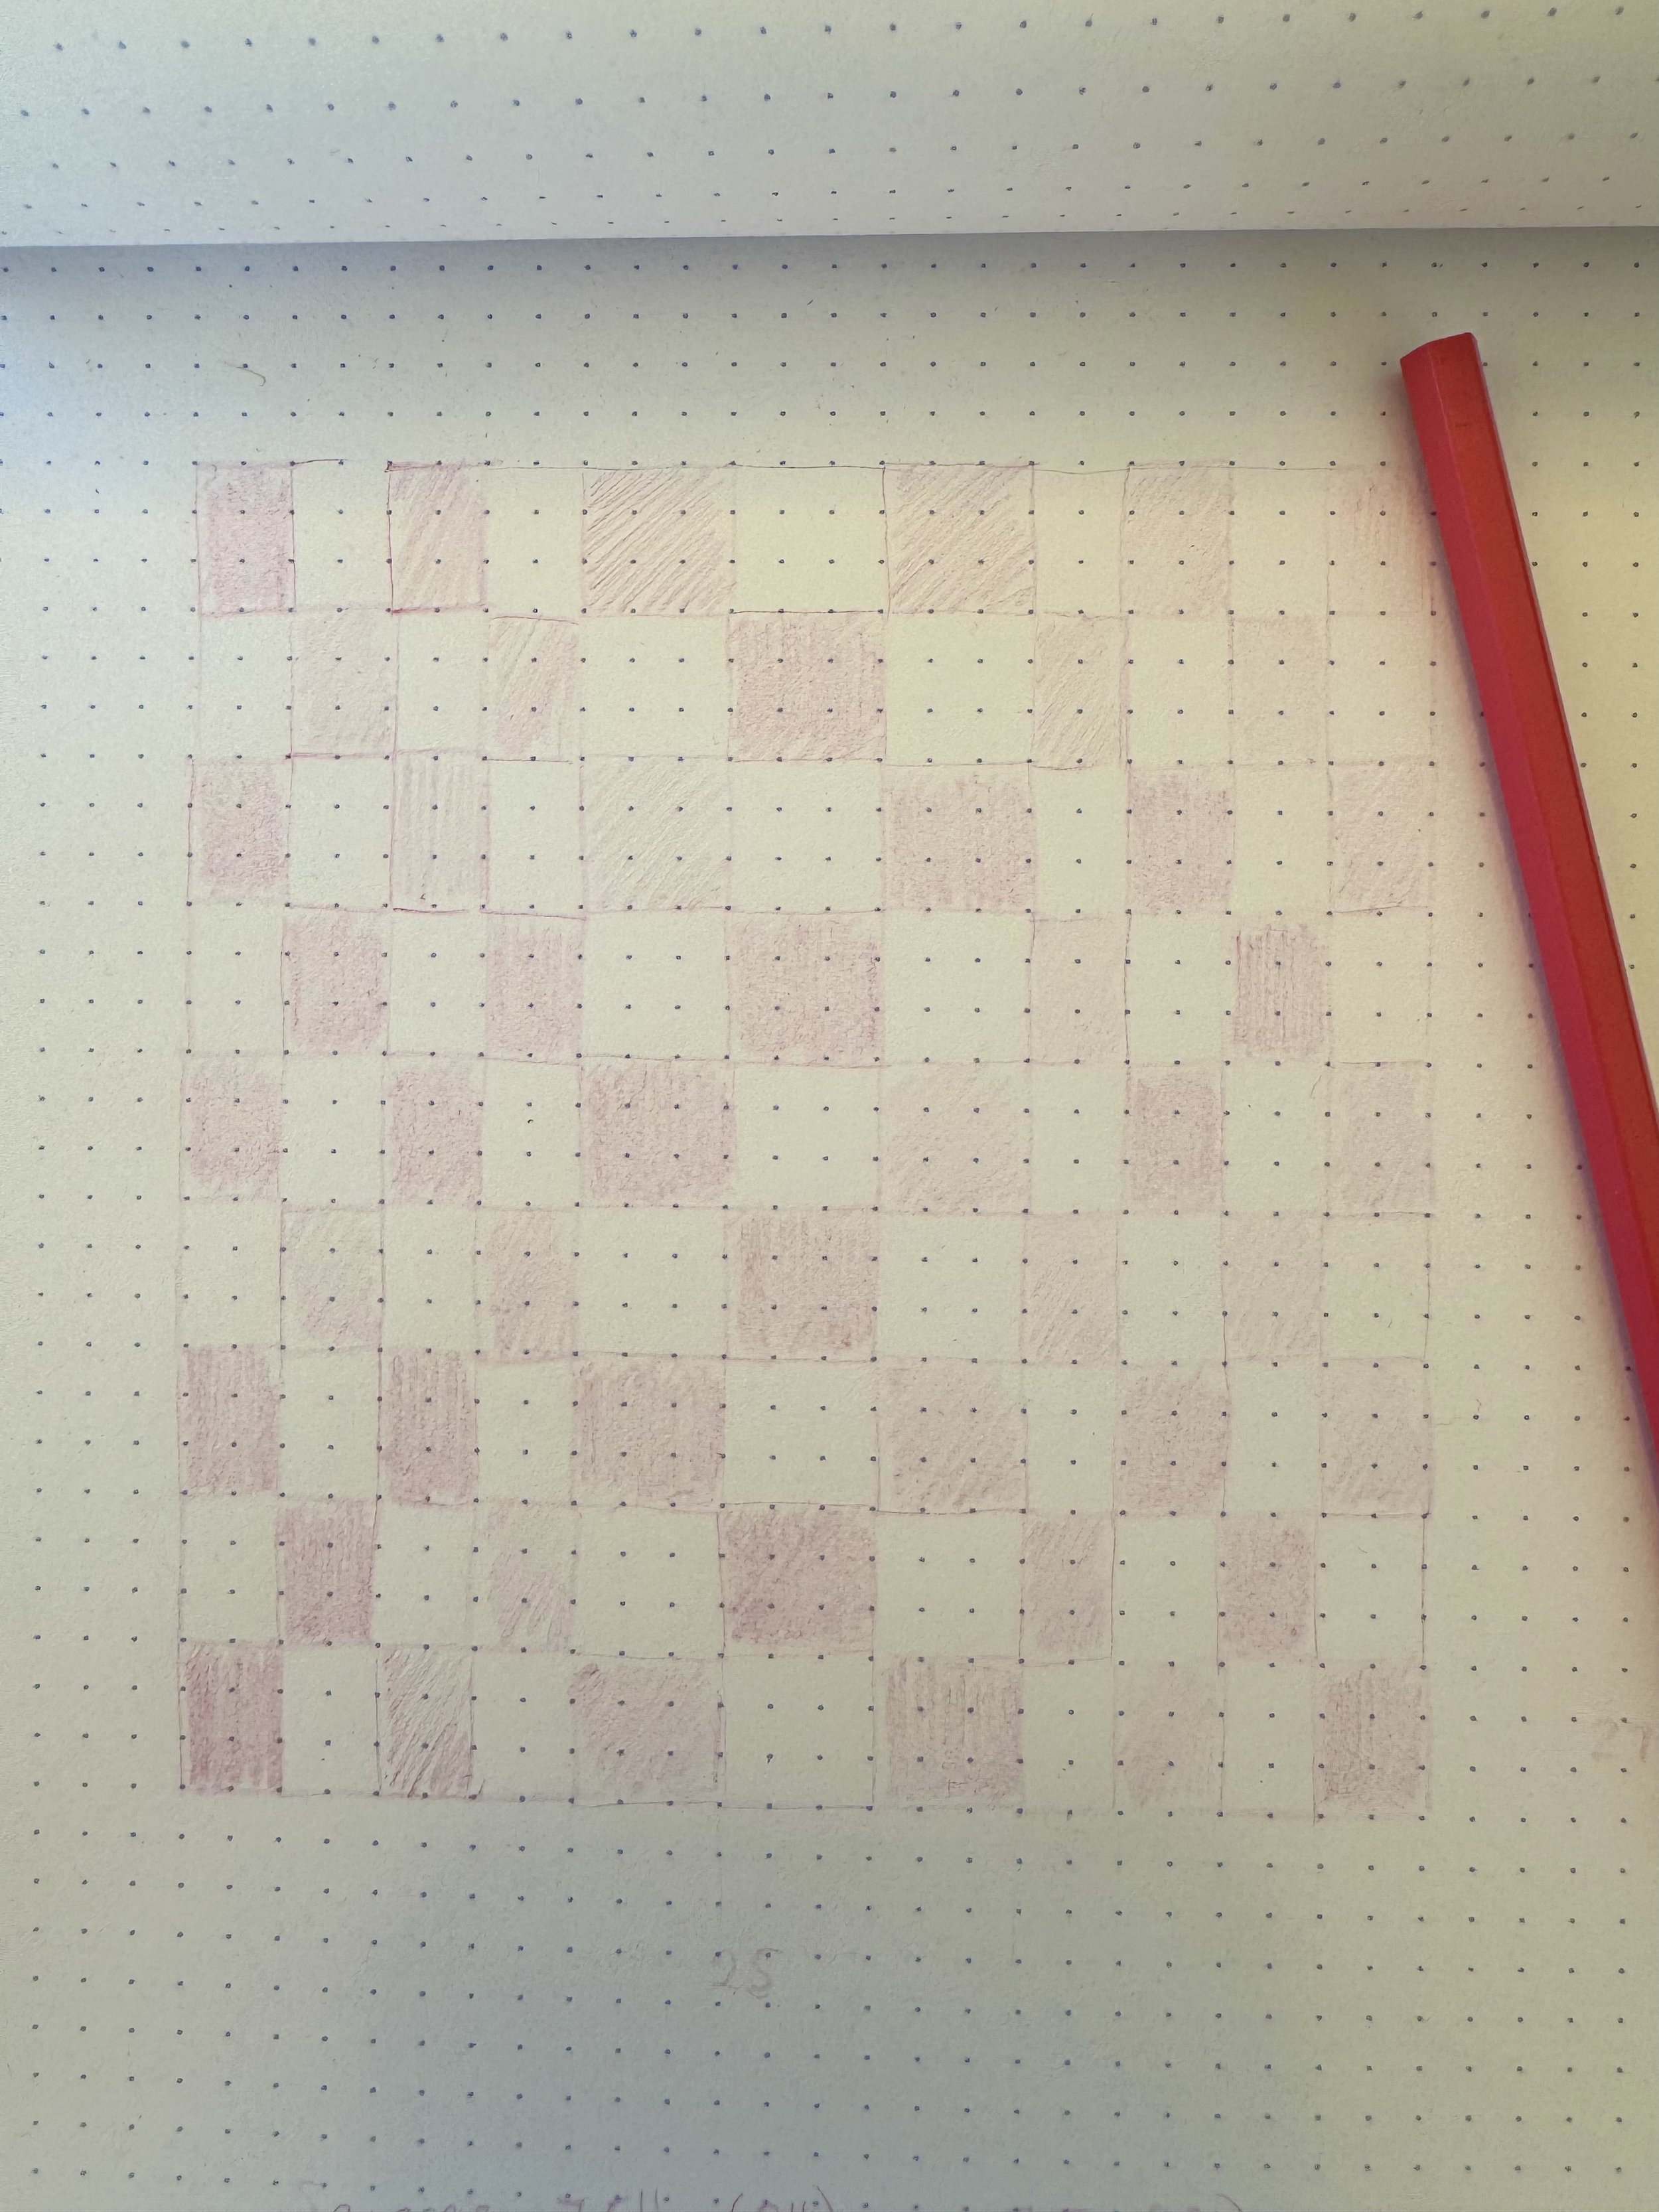
This is the 62” x 67” version- as you can see it’s got pink squares on the 4 corners and in the middle of the top and bottom, there are two large pink squares. The white square is also right in the centre

This is the 62” x 75” version- as you can see in the corners there are two pink squares and two white squares - there’s also no centre square. It still looks completely fine and you get a slightly larger quilt but wanted to call this out :-)
Ok let’s get started!
Fabric Requirements:
Quilt top:
- 2 yards Colour 1
- 2 yards Colour 2
Binding: 0.5 yards (7 strips)
Backing: 4 yards
Cutting Instructions
Cut Colour 1 into the following:
- (8) 5.5” x WOF,
- (3) 8” x WOF
Cut Colour 2 into the following:
- (8) 5.5” x WOF,
- (3) 8” x WOF
Piecing Instructions
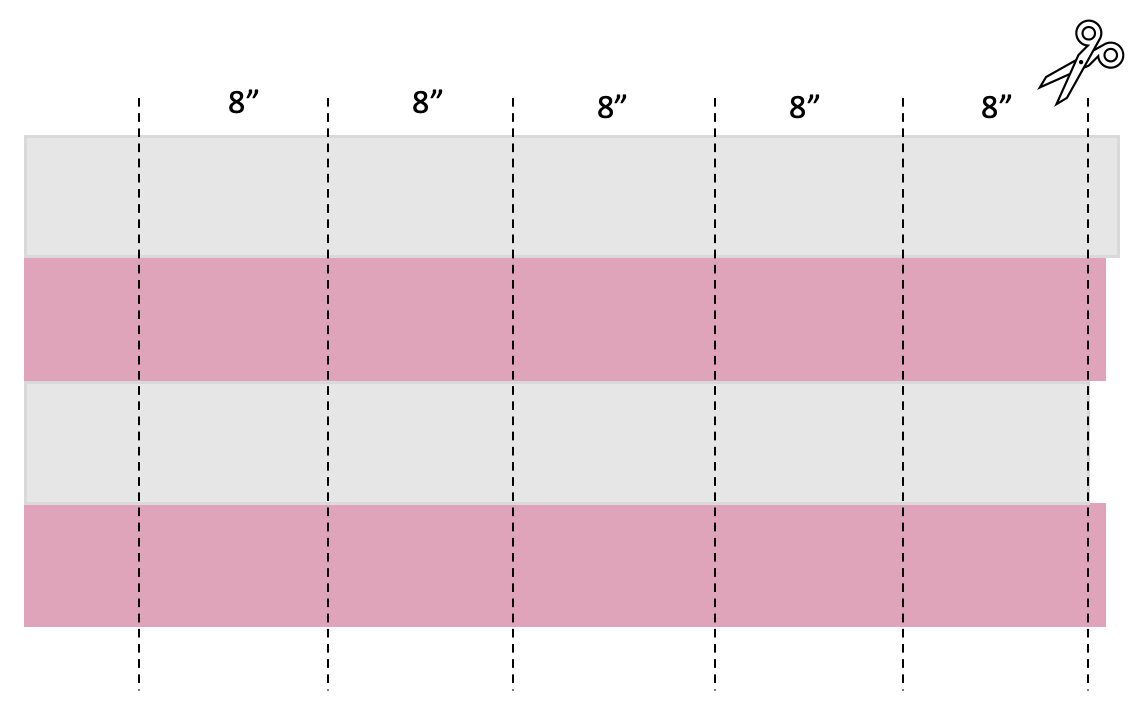
Take (2) of your 5.5”x WOF Colour A strips and (2) of your 5.5” x WOF Colour B strips and sew them together, lengthwise, right sides together using a 1/4’ seam as follows:

Press your seams towards the dark colour. Repeat for the rest of your 5.5” strips- in total you will have 4 (5.5”) strip pieces that look like this.

Trim off the selvage/ uneven ends and cut (5) pieces that are 8” each as follows.
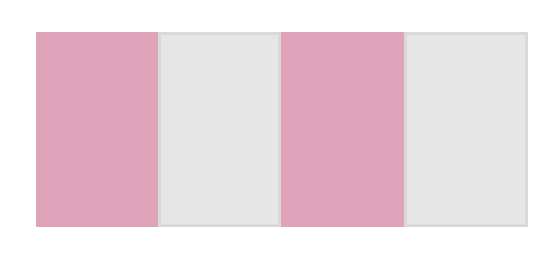
Repeat for each of your 5.5” strip pieces. In total, you will have 20 pieces that look like this. Set aside for now.
Take (2) of your 8” x WOF Colour A strips and (1) of your 8” x WOF Colour B strips and sew them together, lengthwise, right sides together using a 1/4’ seam as follows:

Press your seams towards the dark colour. Trim off the selvage/ uneven pieces and cut (5) pieces that are 8” each as follows.

In total, you will have 5 pieces that look like this:

Take (2) of your 8” x WOF Colour B strips and (1) of your 8” x WOF Colour A strips and sew them together, lengthwise, right sides together using a 1/4’ seam as follows:

Press your seams towards the dark colour. Trim off the selvage/ uneven pieces and cut (5) pieces that are 8” each as follows.

In total, you will have 5 pieces that look like this:

Next we are going to sew our rows together- we have two types of rows:
Row A- sew your three pieces together as follows (Colour A will be on either end)

Row B- sew your three pieces together as follows (Colour B will be on either end)

Press your seams towards the dark colour (for those new seams that aren’t already pressed). Repeat to have a total of:
If you are doing the symmetrical (slightly smaller version):
(5) Row A
(4) Row B
(9 rows in total)
If you are doing the unsymmetrical (slightly larger version):
(5) Row A
(5) Row B
(10 rows in total)
Finally we will sew our rows together, using 1/4” seam, alternating between Row A and B. As mentioned above, we have enough fabric to make 10 rows but this means it’s not symmetrical. So it’s up to you whether you want to do 9 rows (in which case it will be symmetrical) or 10 rows (where you use all your fabric but it’s not totally symmetrical). Because we have pressed all of our seams to the dark side, you will find they nest together perfectly. And your quilt top is done!

Baste, bind and quilt as desired :-)
I used a big wavy stitch on a diagonal to create this grid pattern. I used a beautiful mustard gingham- if I had enough fabric, I would have made a bias binding but in this case, non-bias had to do.
I also rounded my corners (you can find a quick video on how to do that here).

Happy sewing!
