
How to make: A big flower quilt (super simple and speedy!)
When I decided to make this quilt, I didn’t realise it would come together so quickly. Given there are only 13 blocks, I decided against strip piecing so I was shocked when I had the whole thing cut and pieced in less than two hours!
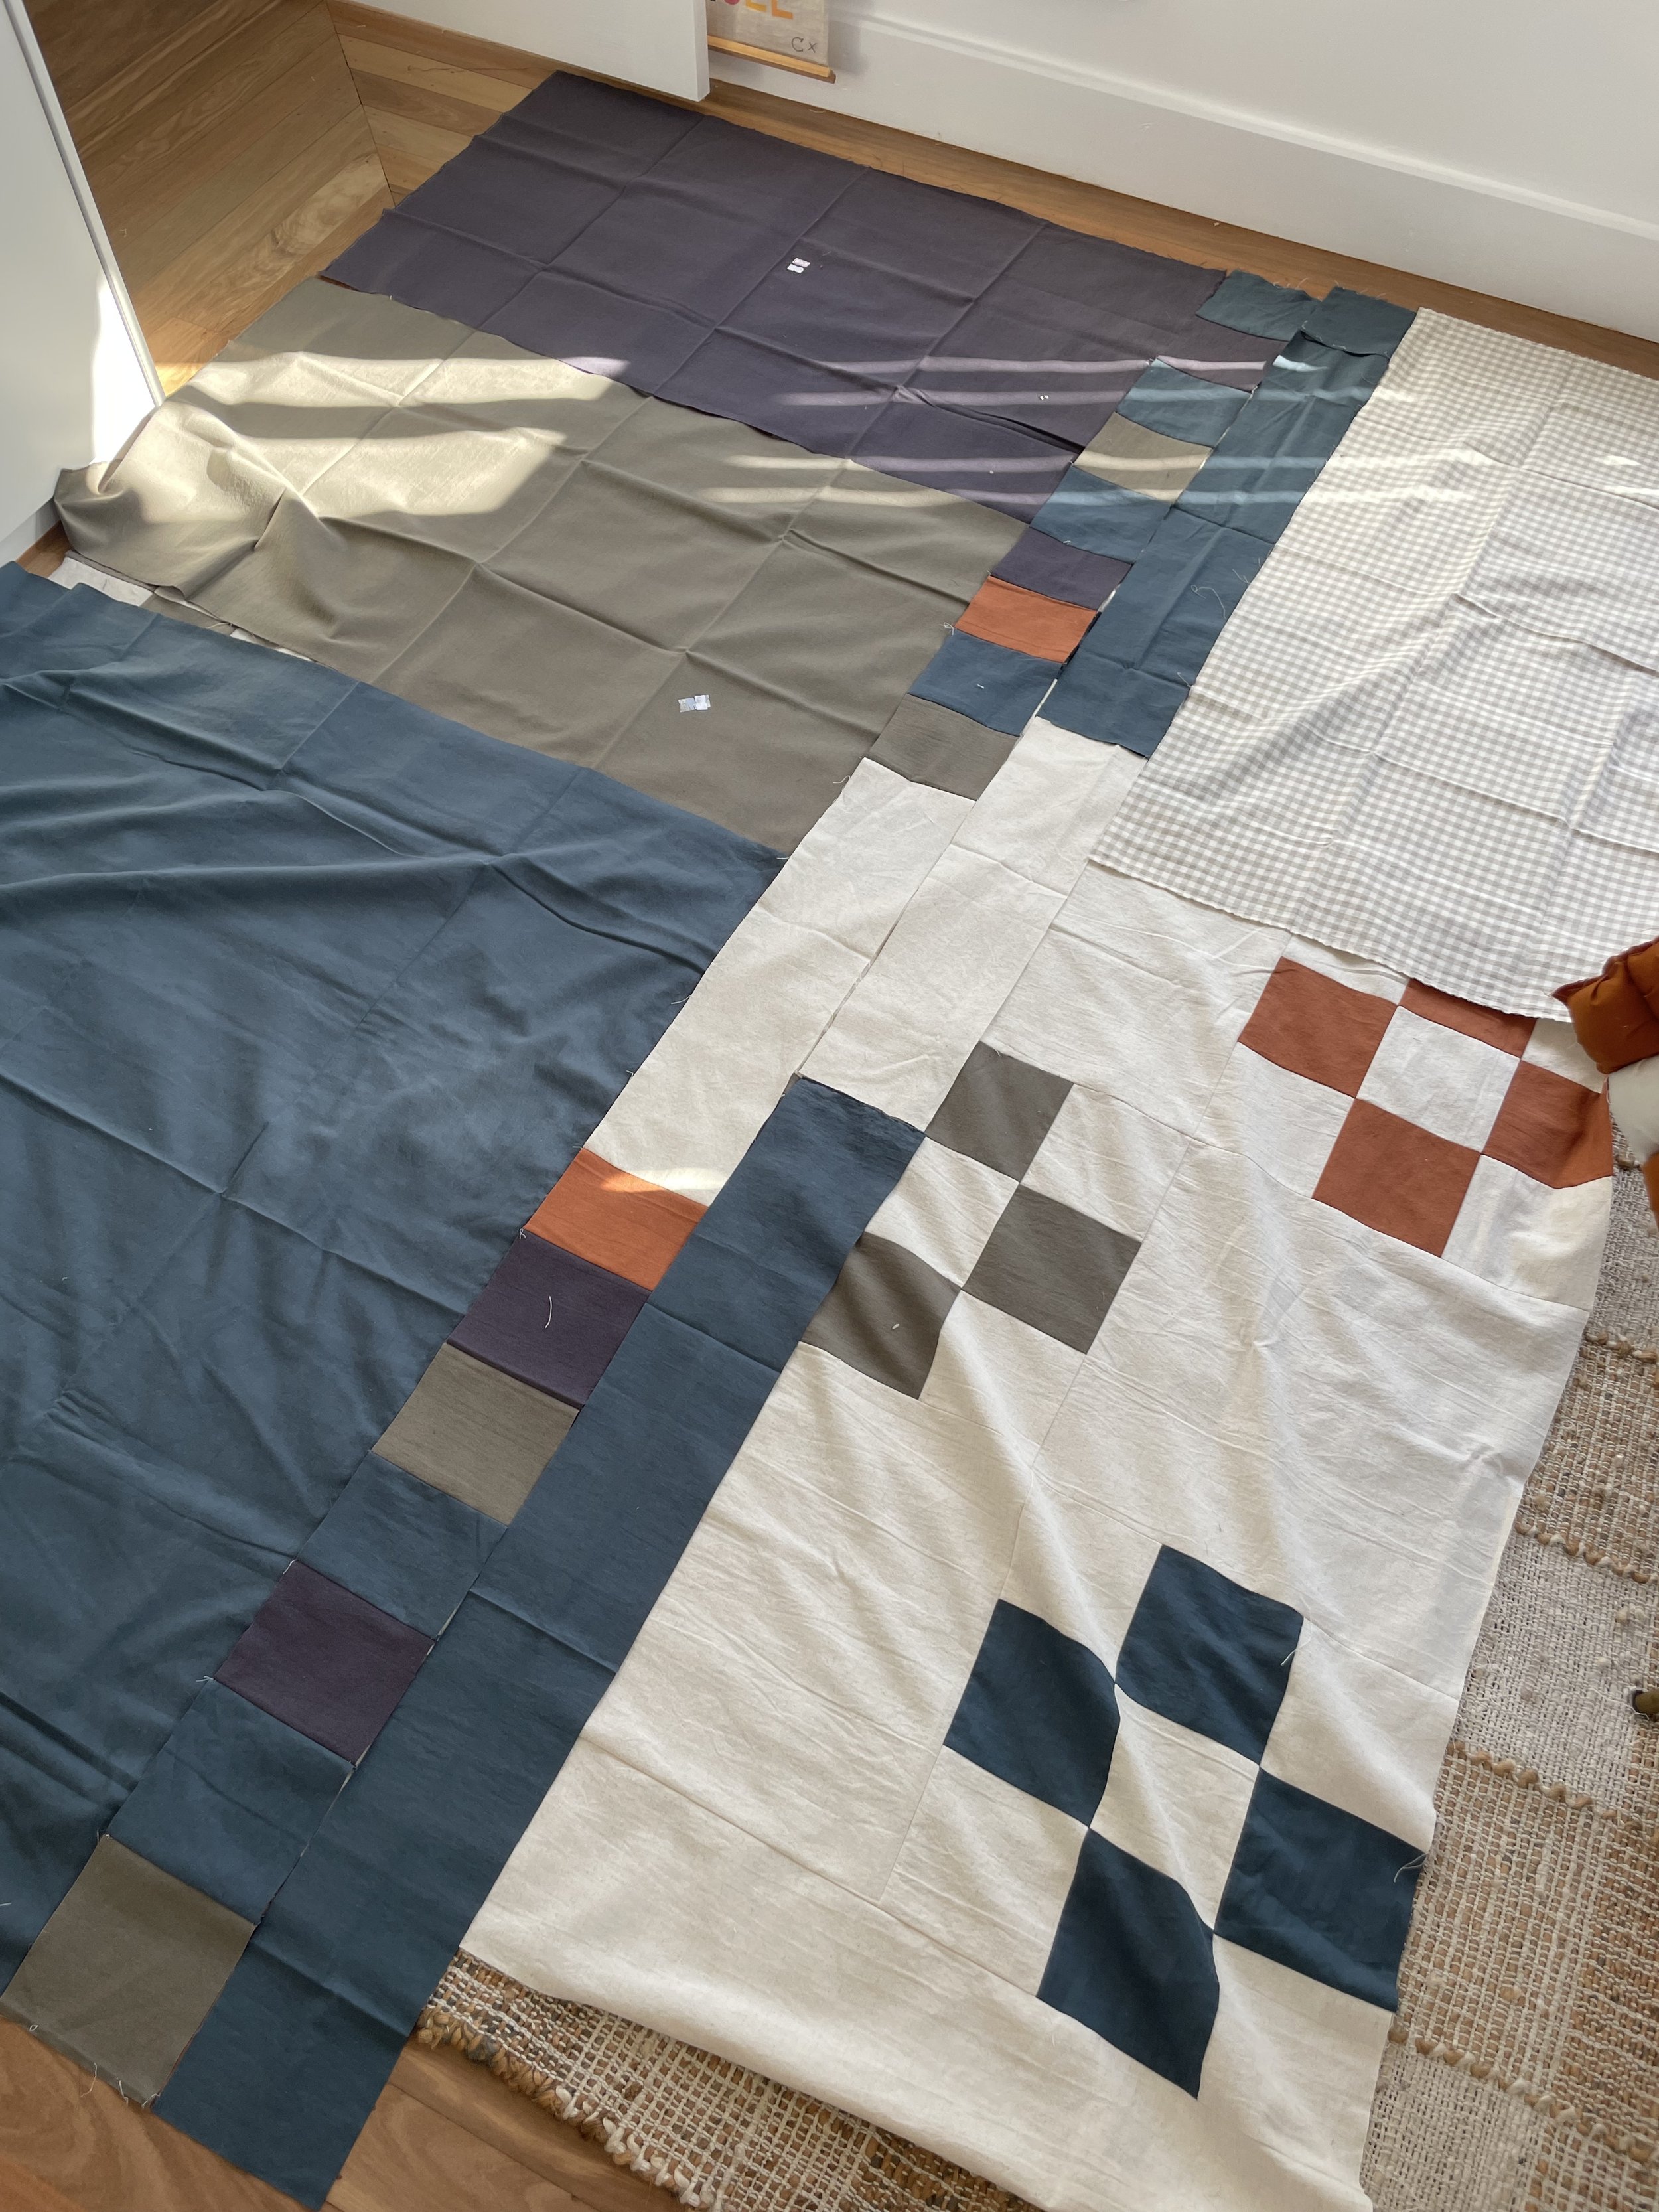
This is the perfect quilt pattern to use to show off some of those gorgeous textural fabrics you might have hidden away- I used some heritage Japanese linen cotton blends. It makes a quilt that is approximately 85” x 85” (but stay tuned- i’ll eventually add instructions to make different sizes)
Fabric requirements
Contrasting Fabric:
7 Fat Quarters OR
(3) fabrics - 1/3 yard (30cm) each (Fabric A-C) PLUS
(1) fabric 1/2 yard (45cm) (Fabric D)
5 yards (4.5 metres) background fabric
2/3 yard (65cm) binding fabric
7.5 yards (6.5 metres) backing fabric

Cutting requirements:
Contrasting Fabric:
If you are using fat quarters:
From six fat quarters, cut (8) 5.5” squares
From one fat quarter, cut (4) 5.5” squares .

If you are using fabric lengths:
From Fabric A-C cut (2) strips that are 5.5” x WOF. Subcut each strip into (7) squares that are 5.5” x 5.5” for a total of 14 squares from each of the three fabrics
From Fabric D cut (3) strips that are 5.5” x WOF. Subcut (2) strips into (7) squares that are 5.5” x 5.5”. Subcut (1) strip into (2) squares that are 5.5” x 5.5”. You will have a total of 16 squares in Fabric D
Background fabric:
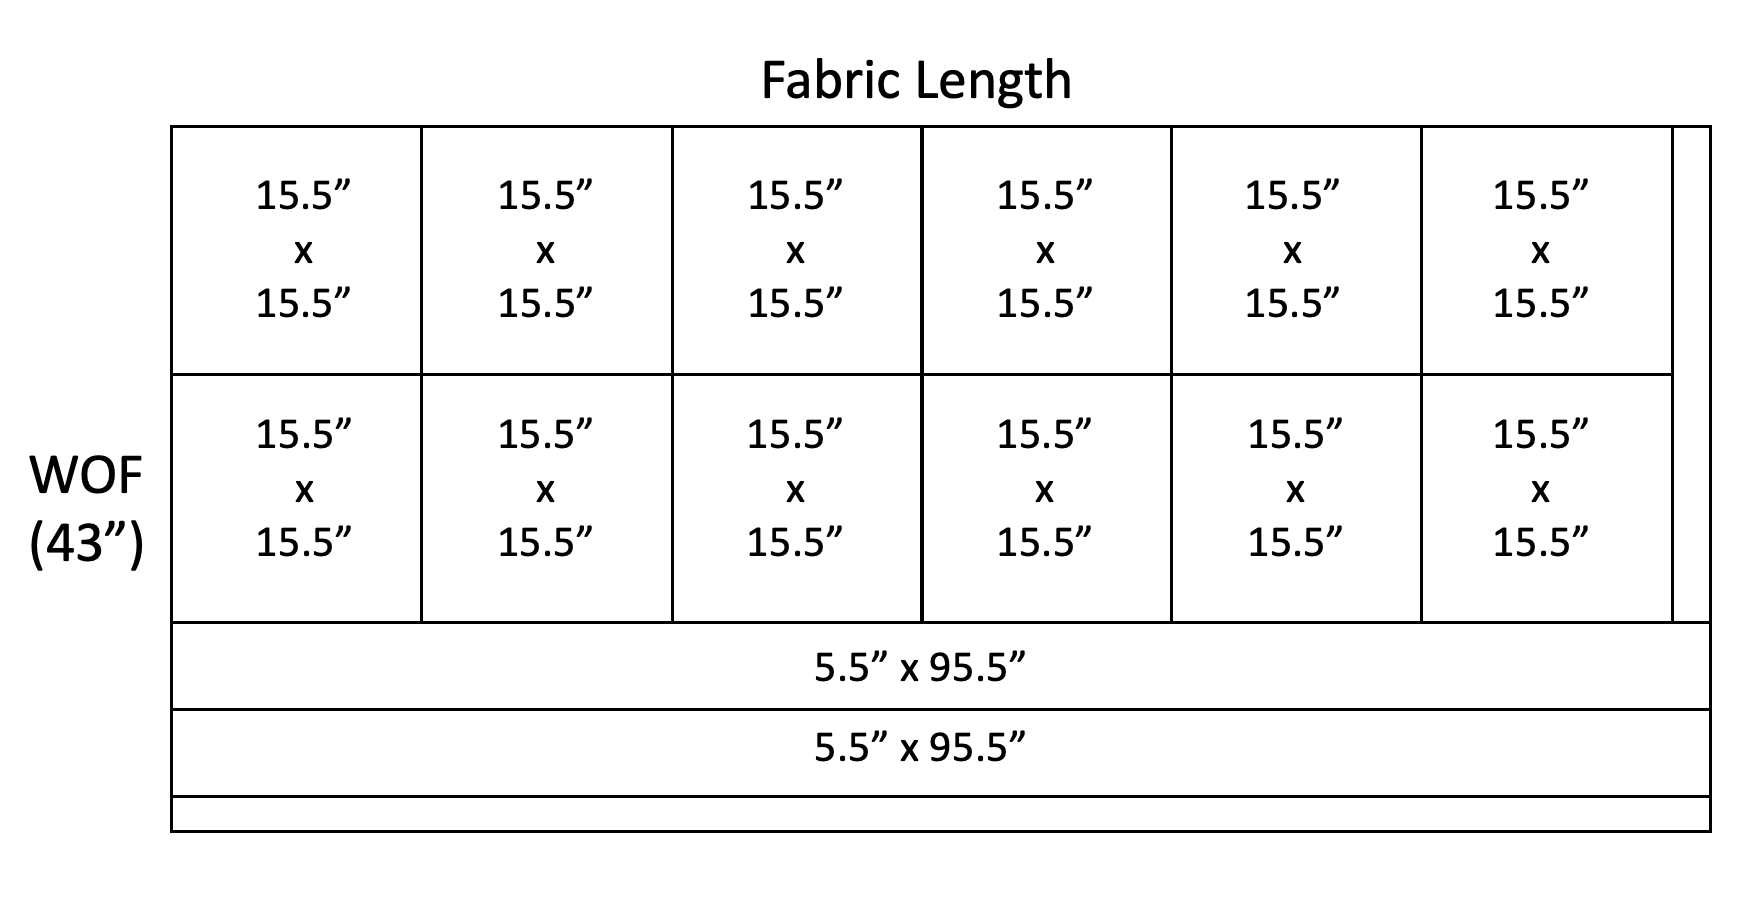
Cut (10) strips that are 5.5” x WOF. Subcut each strip into (7) 5.5” x 5.5” squares for a total of 70 (You only need 65 so will have a few extras)
Cut (4) strips that are 5.5” x WOF. This is for our sashing- set aside.
From your remaining fabric (see diagram below)
Cut (2) strips that are 5.5” x 95.5”. This is for our sashing- set aside.
Cut (12) squares that are 15.5” x 15.5” each
I recommend folding your fabric several times so you can make 1-2 cuts for your long pieces.

Piecing instructions.
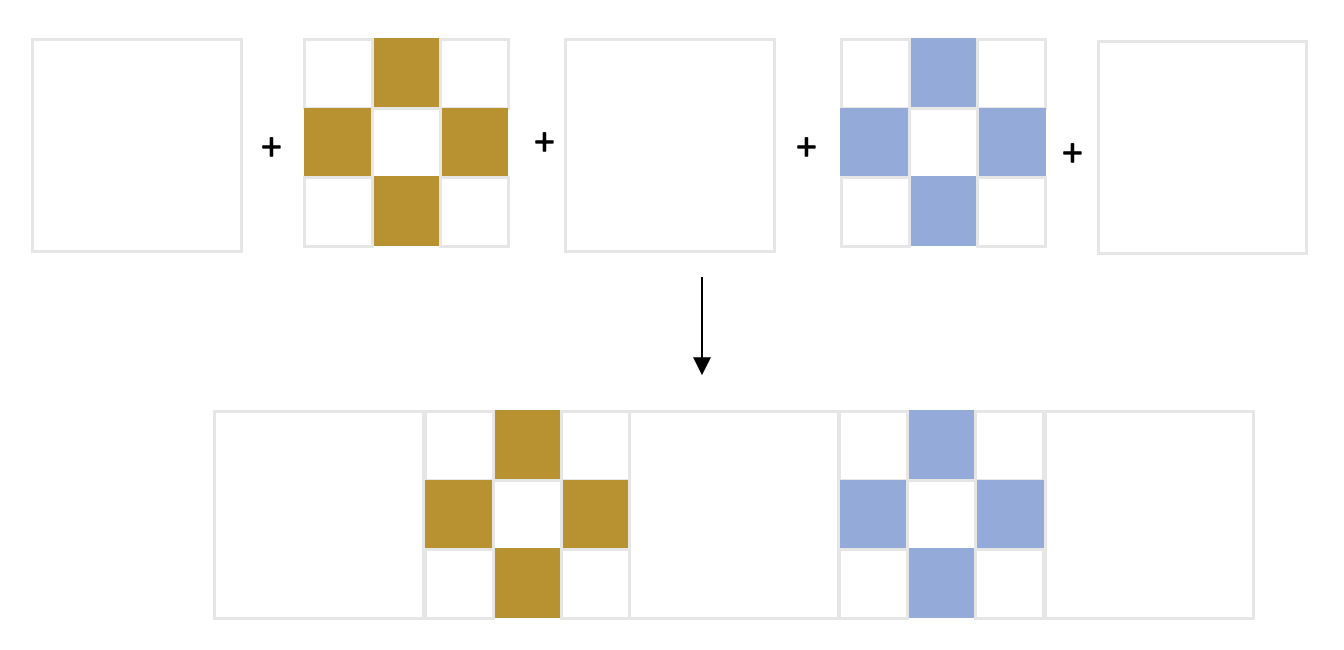
Take (4) squares of Fabric A (or 4 squares from one FQ) that are 5.5” x 5.5” and (5) squares of background fabric that are 5.5”
With right sides together and using 1/4” seam, sew together your rows first as follows:

3. Press your seams towards Fabric A
4. Now sew your rows together- because your have pressed your seams towards Fabric A, you will find they nest together perfectly :-)

5. Repeat with your other fabrics for a total of 13 blocks in total.
Sewing your quilt top together.
First we are going to start by sewing our rows together using a 1/4” seam, right sides together. We will have 5 rows in total:
3 rows will have 3 flowers and (2) squares that are 15.5” x 15.5”

2 rows will have 2 flowers and (3) squares that are 15.5" x 15.5”
Next we will sew our rows together:


Finally, we will add our sashing. Take your (4) strips that are 5.5” x WOF and cut off the selvage. Take (2) of the strips and sew together at the short ends, right sides together using a 1/4” seam

Repeat with the other (2) strips. Next we are going to attach these to the two sides of your quilt (opposite sides to each other), using 1/4” seams You may have a little excess that you can trim off:

Now take your (2) pieces of 5.5”x 95.5” and attach them to the top and bottom:

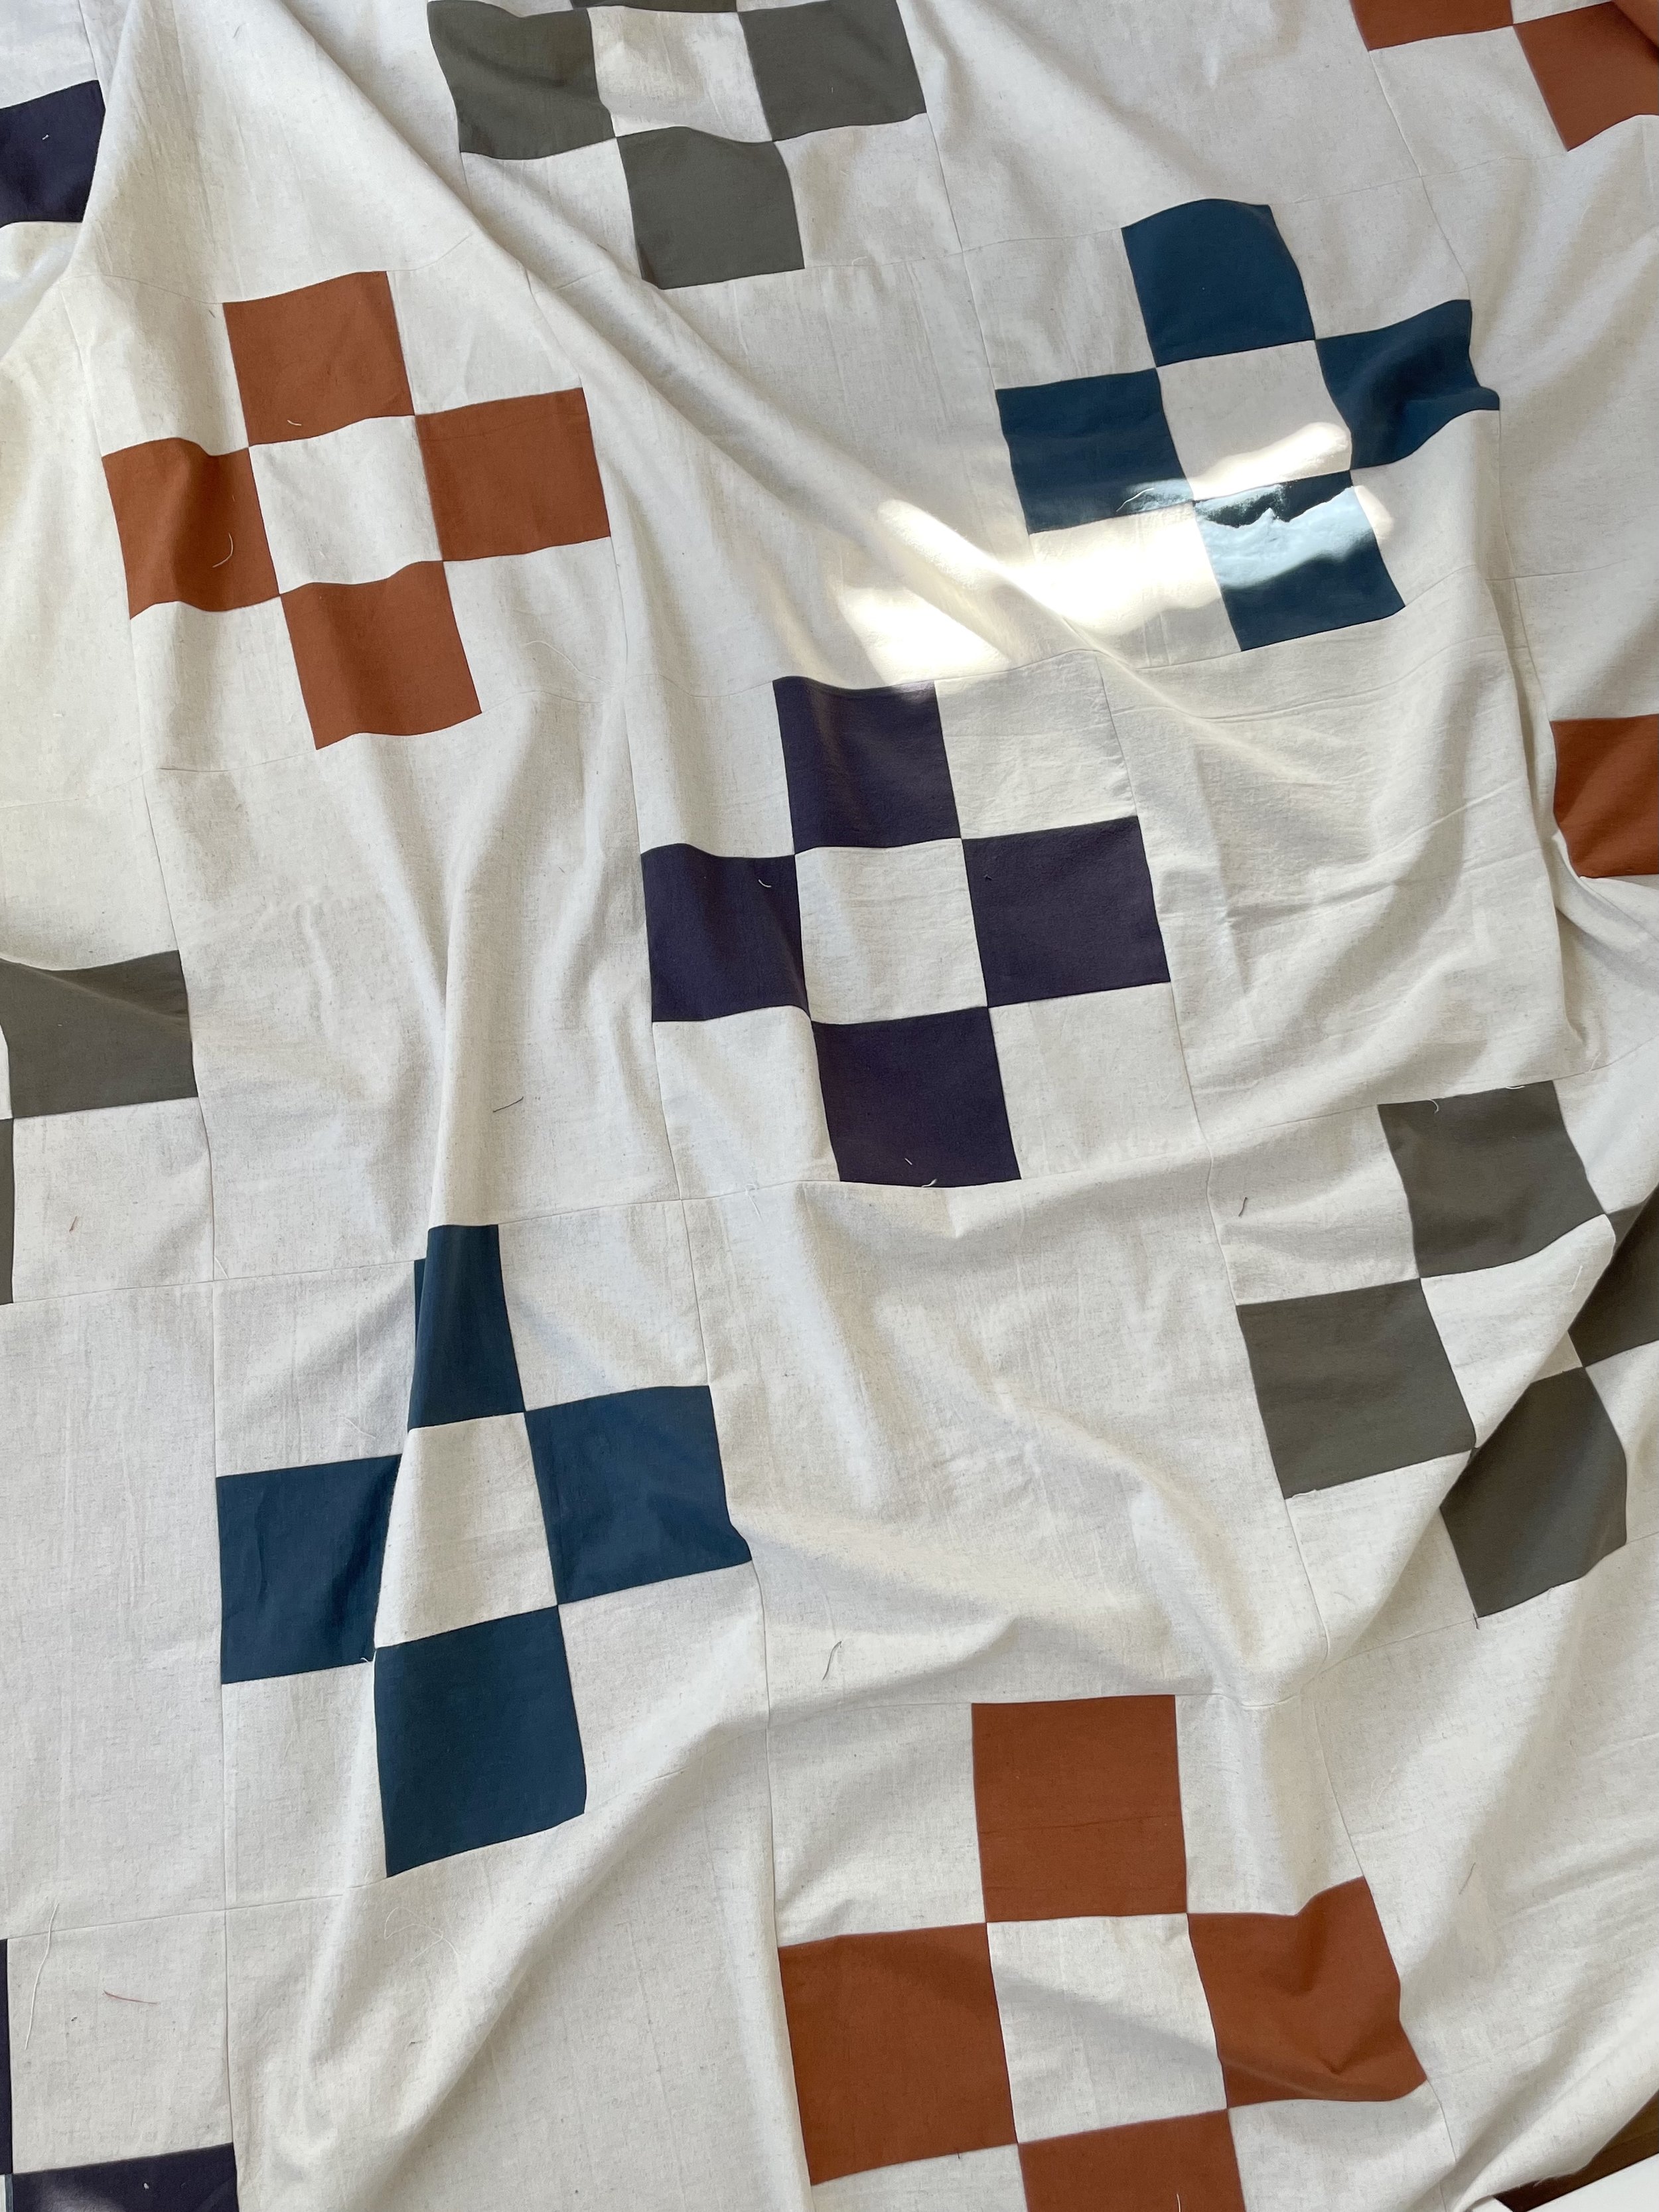
And your quilt top is done! Baste, quilt and bind as desired.
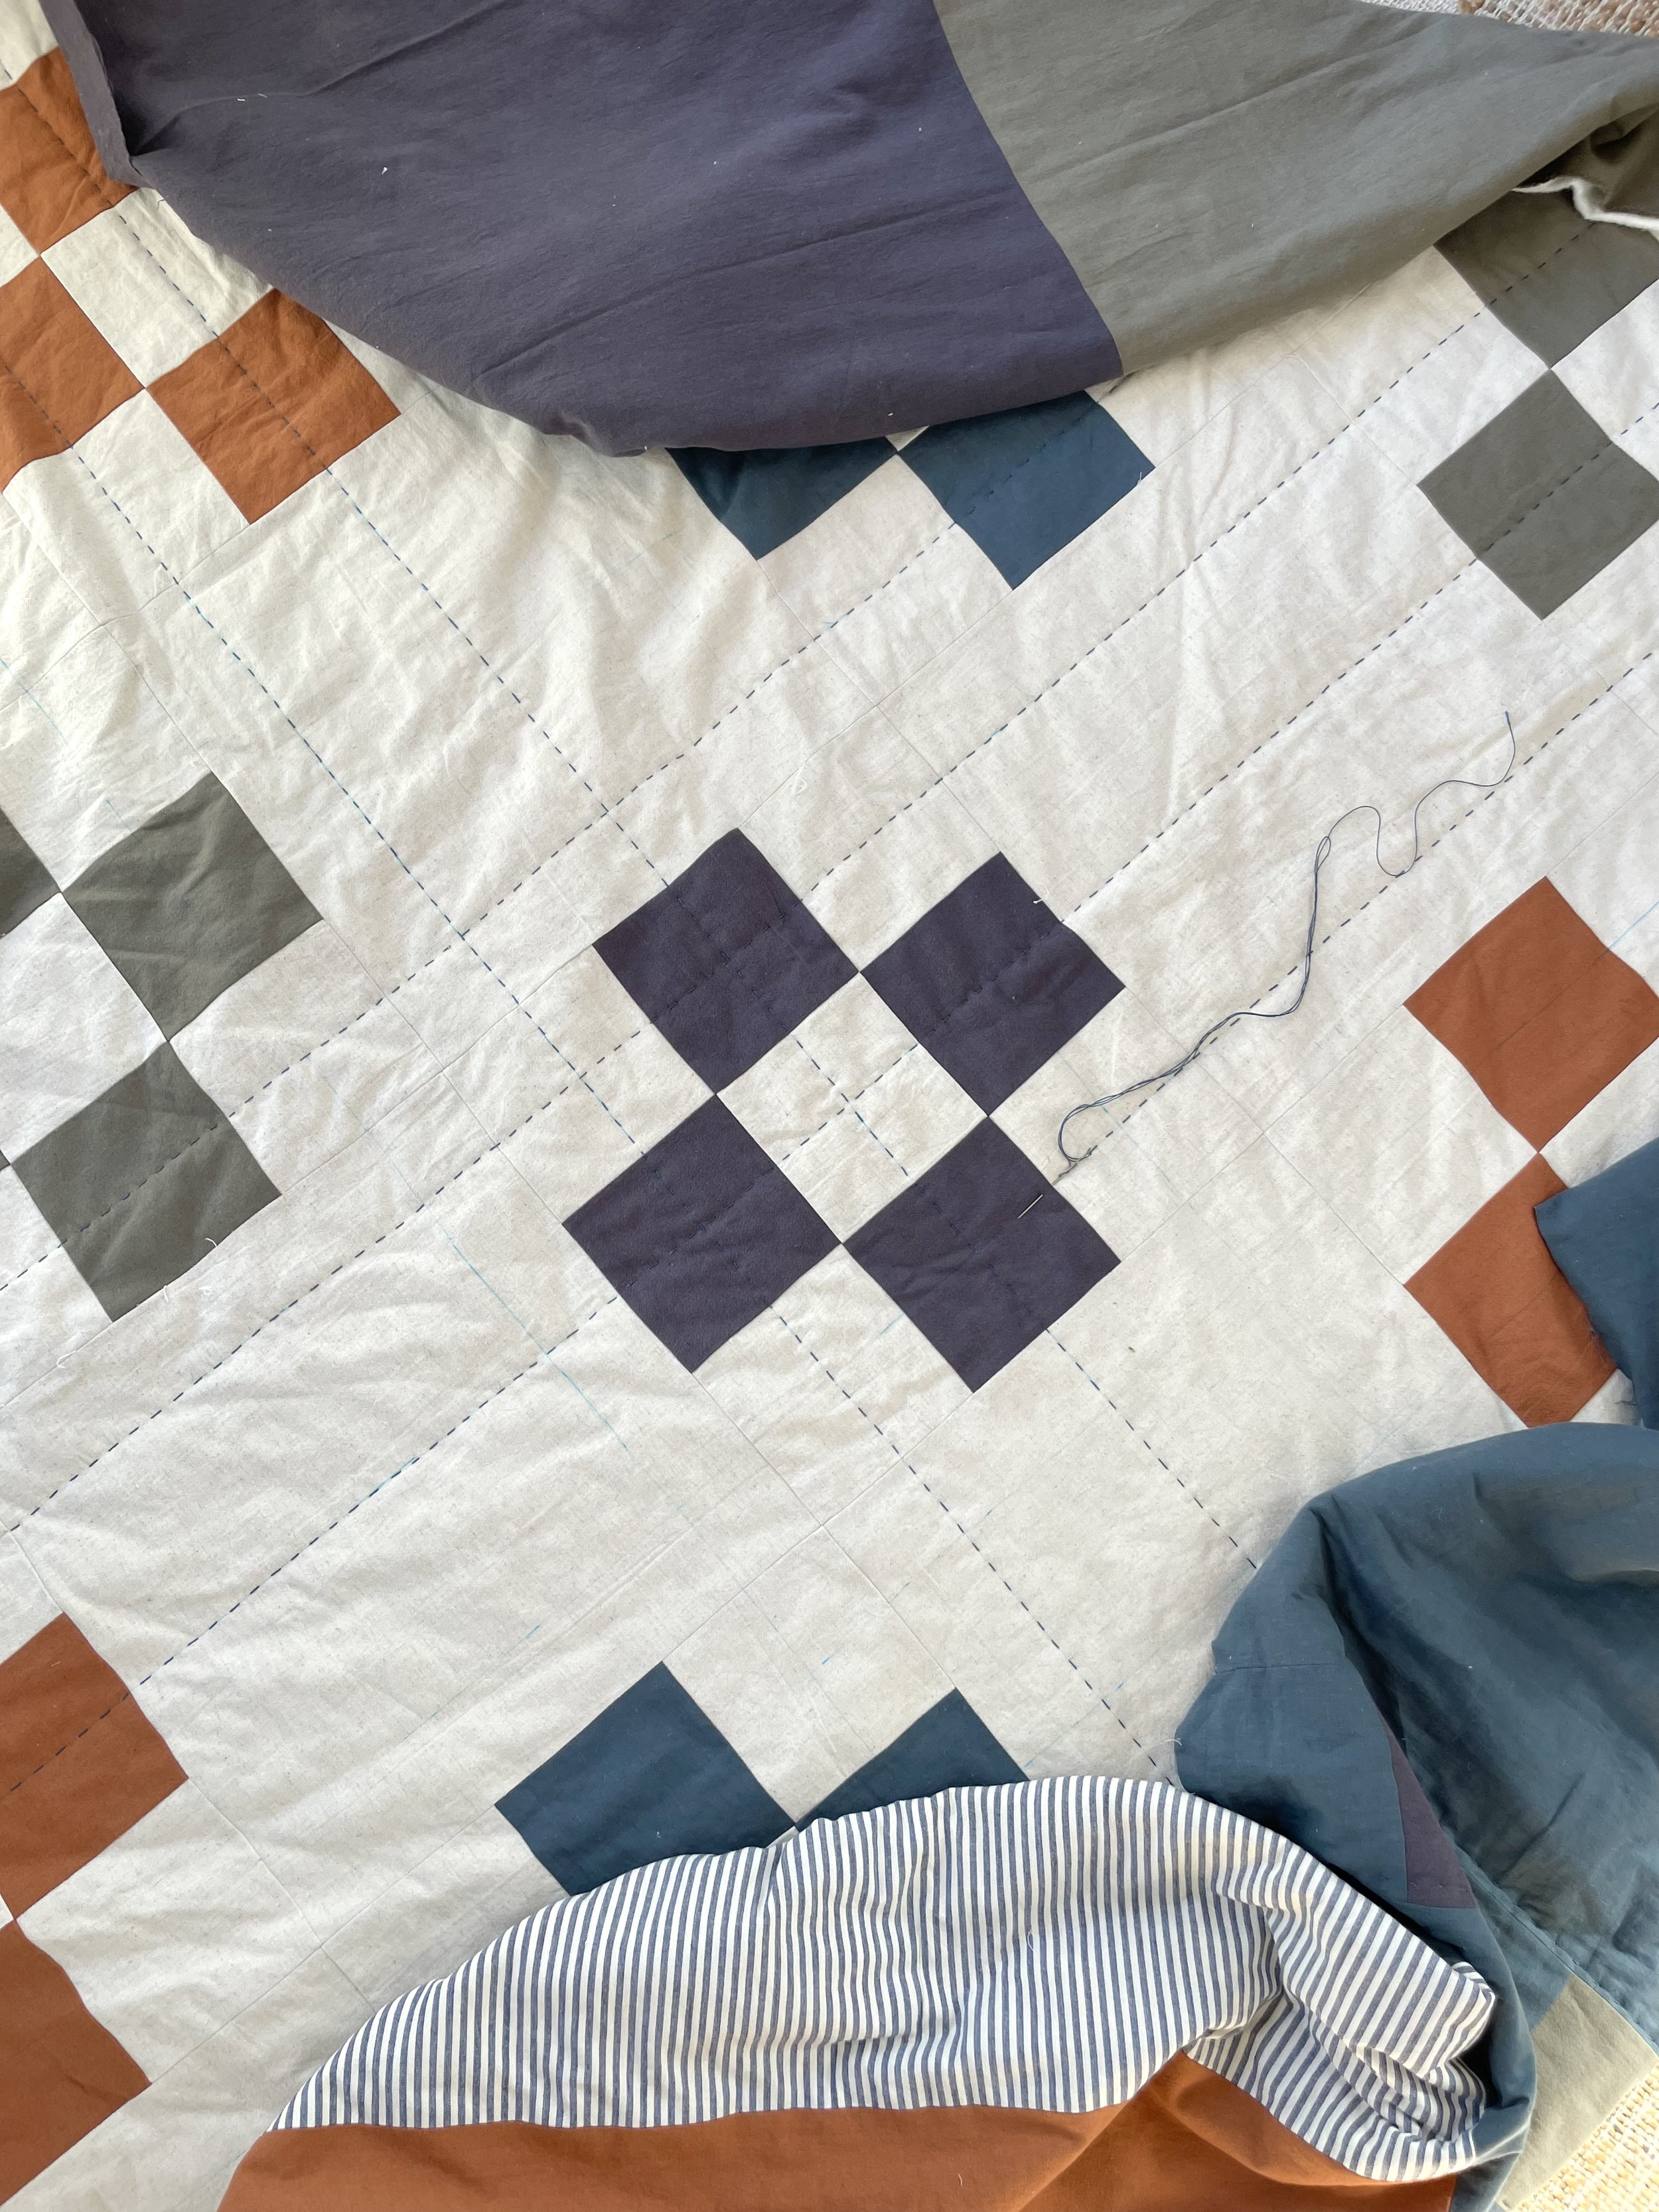
For my quilt, I used a double layer of batting to make it extra warm as we head into winter in Australia. I used some lovely linen cotton blends that I got from a recent trip overseas and I made a scrappy back using some leftover fabrics.
I’m currently hand quilting it :-)

I hope you enjoy making this quilt and as always, please let me know if you have any questions! :-)