
How to make: A big square quilt
As I'm writing this blog post, Wix asked me to "Add a Catchy Title" which I'm not sure I've done but what else could I name this quilt ? :-)

I love taking quilts on trips- this is this quilt in action in an Airbnb we stayed in when we visited Sydney a few months ago.
I know this pattern is super simple and we probably don’t need another tutorial on the internet around how to stitch squares together. But there’s also not a lot of fat quarter friendly square patterns out there- so here is my take on making a lots of squares quilt pattern- which is also great from a fat quarter efficiency perspective. Sometimes it’s nice to sew fabric together and see how it ends up, but sometimes it’s nice to know if you use a certain number of fat quarters, you will end up with a quilt of a certain size :-)
Fabric requirements
Baby Cot Size (44x 49.5")
8 fat quarters
Final quilt is 8 squares by 9 squares
Throw Size (71" x 71")
19 fat quarters OR 1 yard each of 5 fabrics
Final quilt is 13 squares by 13 squares (you will have a couple of squares leftover)
Bed Size (80" x 99")
30 fat quarters
Final quilt is 15 squares by 18 squares
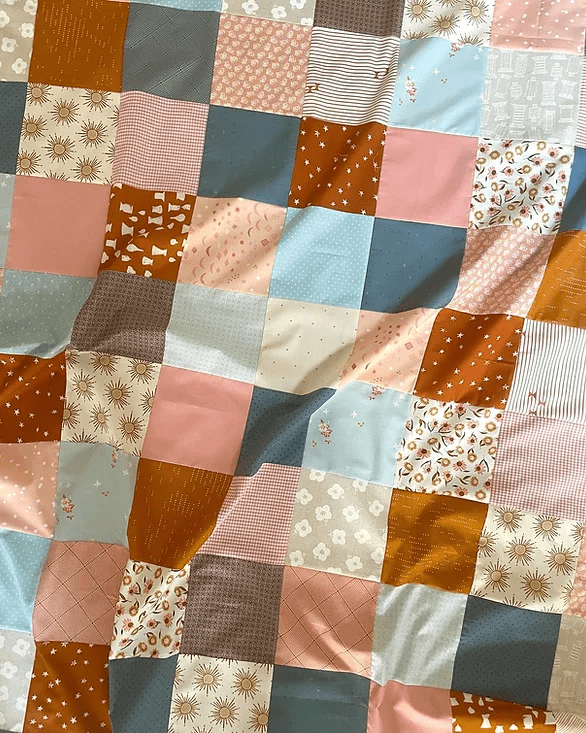
Here is my fabric pull- I used a mixture of textures including some Essex Linen, cottons and even hemp!:

Instructions
Start by taking each fat quarter and cutting it into (9) squares, each 6” x 6”.
If you are making your quilt from the 5 yards fabric, cut each fabric into (5) 6”x WOF. Sub cut each strip into (7) 6”x6” squares. You will have 35 squares from each colour for a total of 175 squares. Be careful with your cutting as you are using the whole WOF
If you carefully line up your fat quarters, you can bulk cut (eg cut more than one at a time)- given we are using 18” and fat quarters are 18” (or usually slightly more), be careful when cutting to make sure you have enough :-)

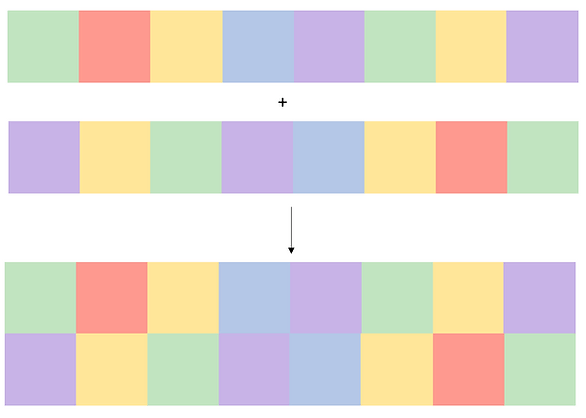
And that’s cutting done! Now it’s time to sew the squares together. There are two main options:
1Layout all your squares together ahead of time - you can then make sure they are perfectly laid out with no duplicates or similar colours next to each other. This could take some time though (especially if you are a perfectionist)
OR (if you're impatient like me), you can fly by the seat of your pants and go rogue and just sew together rows one by one and hope for the best, without doing the layout first.
Regardless of which way you choose, you can follow the following method for sewing your squares together: Sew the squares together to form rows.

then sew the rows together:
As a reminder:
For the baby/ cot size, we are sewing 9 rows of 8 squares in each row
For the throw size, we are sewing 13 rows of 13 squares in each row
For the bed size, we are sewing 18 rows of 15 squares in each size.
And that's the quilt top done!
I quilted it on my sewing machine using my favourite zig zag stitch.
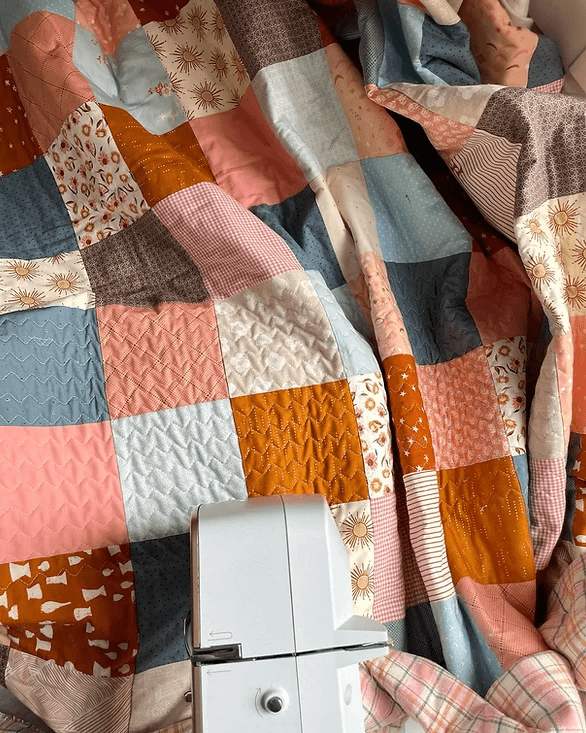
And another photo just to show off that lovely quilty texture

I finished mine off my rounding out the corners (I just used a plate to trace around in each corner to keep it consistent) and used a lovely bias stripe in Essex Linen in Chambray. I used Mammoth Flannel as the packing which is lovely and soft

And that's it! Such a fun, quick and simple quilt which is one of my favourites :-)
